Rhino8のGrasshopperで新規追加されたコンポーネントの機能を日本語で記載しています。
左にあるA~Cは重要度で、Aが一番重要度の高いコンポーネントになります。
パネル名のついたグレーのボタンから各パネルのコンポーネントをご覧いただけます。
Params
Geometry
Circlar Arc
Extrusion
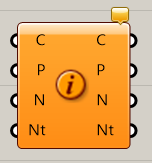
C

Params>Geometry
押し出し(Extrusion)オブジェクトを格納する。Rhinoで[UseExtrusions]コマンドを使うことで、押し出しとポリサーフェスのどちらを作成するかを事前に設定できる。
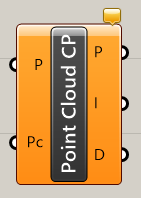
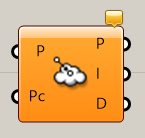
Point Cloud
C
Params>Geometry
点群(Point Cloud)オブジェクトを格納する。点群は複数の点ではなく、点群という異なるオブジェクト。
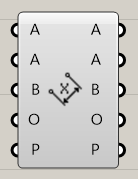
Angular Dimension
C
Params>Geometry
角度寸法(Angular Dimension)オブジェクトを格納する。
Annotation Dot
C
Params>Geometry
テキストドット(Annotation Dot)オブジェクトを格納する。
Centermark
C
Params>Geometry
中心マーク寸法(Centermark)オブジェクトを格納する。
Hatch
C
Params>Geometry
ハッチング(Hatch)オブジェクトを格納する。
Leader
C
Params>Geometry
引出線(Leader)オブジェクトを格納する。
Linear Dimension
C
Params>Geometry
長さ寸法(Linear Dimension)オブジェクトを格納する。
Ordinate Dimension
C
Params>Geometry
座標寸法(Ordinate Dimension)オブジェクトを格納する。
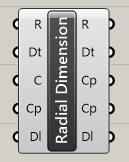
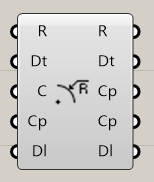
Radial Dimension
C
Params>Geometry
半径寸法・直径寸法(Radial Dimension)オブジェクトを格納する。
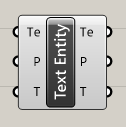
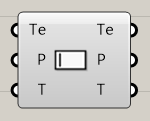
Text Entity
B

Params>Geometry
テキスト(Text Entity)オブジェクトを格納する。ここで言うテキストはRhinoで[Text]コマンドで作成できるもの。
Block Instance
B

Params>Geometry
ブロック(Block Instance)オブジェクトを格納する。
Light
C

Params>Geometry
ライト(Light)オブジェクトを格納する。
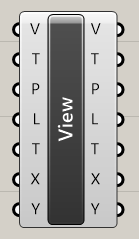
View
C
Params>Geometry
ビュー(View)情報を格納する。右クリックから、Front・Top・Rightの様な3dmファイルで設定したビューや、名前の付いたビュー、レイアウトビューから使用するビューを選択できる。
Primitive
Earth Anchor Point
C

Params>Primitive
各種属性情報(Model Attribute Key)を格納する。また、右クリックメニューからの各種属性情報を指定できる。
Uint System
C
Params>Primitive
単位系の設定を格納する。右クリック>Set Unit Systemからモデルの単位系や任意の単位系を設定可能。
Rhino
Model Attribute Key
C
Params>Rhino
各種属性情報(Model Attribute Key)を格納する。また、右クリックメニューからの各種属性情報を指定できる。
Model Block Definition
C

Params>Rhino
ブロック定義(Model Block Definition)を格納する。また、右クリックメニューのSet Instance Definitionsからのブロック定義を指定できる。
Model Layer
C
Params>Rhino
レイヤ(Model Layer)を格納する。また、右クリックメニューのSet Layerからのレイヤを指定できる。
Model Object
C

Params>Rhino
オブジェクト(Model Object)を格納する。また、右クリックメニューのSet One Model ObjectやSet Multiple Model Objectsから1つまたは複数のオブジェクトをRhinoから読み込める。ここでのオブジェクトは、点、曲線、サーフェス、ポリサーフェス、メッシュだけでなく、押し出しやブロックも対象に含まれる。
Model Annotation Style
C
Params>Rhino
注釈スタイル(Model Annotation Style)を格納する。また、右クリックメニューのSet Annotation Stylesからの注釈スタイルを指定できる。
Model Hatch Pattern
C
Params>Rhino
ハッチ(Model Hatch)を格納する。また、右クリックメニューのSet Hatch Patternsからのハッチを指定できる。
Model Linetype
C
Params>Rhino
線種(Model Linetype)を格納する。また、右クリックメニューのSet Linetypesから線種を指定できる。
Model Print Width
C

Params>Rhino
印刷幅(Model Print Width)を格納する。また、右クリックメニューのSet Print Widthsから印刷幅を指定できる。
Model Environment
C

Params>Rhino
環境(Model Enviroment)を格納する。また、右クリックメニューのSet Enviromentsから環境を指定できる。
Model Material
C
Params>Rhino
マテリアル(Model Material)を格納する。また、右クリックメニューのSet Materialsからマテリアルの設定方法を指定できる。
Model Display Mode
C

Params>Rhino
表示モード(Model Display Mode)を格納する。また、右クリックメニューのSet Display Modesから表示モードを指定できる。
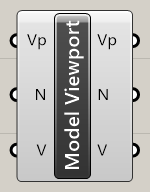
Model Viewport
C
Params>Rhino
TopやFront、Perspectiveと言ったビューポート(Model Viewport)を格納する。また、右クリックメニューのSet Viewportsからピューポートを指定できる。
Page Layout
C

Params>Rhino
レイアウトのページ(Page Layout)を格納する。また、右クリックメニューのSet Page Layoutからのレイアウト内のページを指定できる。
Util
Trigger
C
Params>Util
コンポーネントに繋ぎ、指定の間隔で結果を更新する。KangarooのSolverなどのシミュレーションする際に使用する。Rhino7まであったTimerコンポーネントの置き換え。
Get Boolean
B
Params>Util
Get File Path
B
Params>Util
Get Plane
C
Params>Util
Maths
Matrix
Swap Columns
C
Maths>Matrix
行列(Matrix)を入力し、1つ目の行(Column A)と2つ目の行(Column B)を入れ替えた行列を出力する。行の指定はそれぞれ整数(インデックス値)で行う。
Swap Rows
C

Maths>Matrix
行列(Matrix)を入力し、1つ目の列(Row A)と2つ目の列(Row B)を入れ替えた行列を出力する。列の指定はそれぞれ整数(インデックス値)で行う。
Script
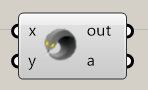
Script
B
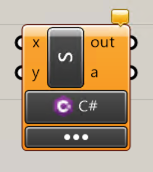
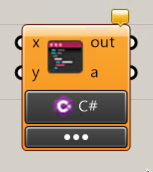
Maths>Script
C#,IronPython2系、Cpython3系の3つから任意に使用言語を指定し記述できるコンポーネント。プラスマークから任意に入出力を増やして記述可能。端子ごとにデータの型やItem,List,Treeを設定し入力方法も変更できる。また共通の仕様としてShift + 右クリックで外部で書いた記述を入力できるScript Inputなどの端子を増やすこともできる。
CSharp Script
B
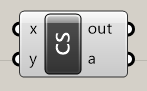
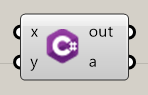
Maths>Script
C#で記述できるコンポーネント。プラスマークから任意に入出力を増やして記述可能。端子ごとにデータの型やItem,List,Treeを設定し入力方法も変更できる。Rhino7までのコンポーネントではなくScriptコンポーネントのC#だけ使用できるコンポーネント。
IronPython 2 Script
C
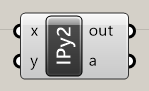
Maths>Script
IronPythonの2系で記述できるコンポーネント。プラスマークから任意に入出力を増やして記述可能。端子ごとにデータの型やItem,List,Treeを設定し入力方法も変更できる。Rhino7までのコンポーネントではなくScriptコンポーネントのIronPythonの2系だけ使用できるコンポーネント。
Python 3 Script
B
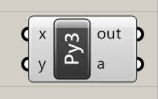
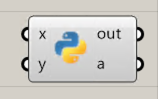
Maths>Script
CPythonの3系で記述できるコンポーネント。プラスマークから任意に入出力を増やして記述可能。端子ごとにデータの型やItem,List,Treeを設定し入力方法も変更できる。Rhino7までのコンポーネントではなくScriptコンポーネントのCPythonの3系だけ使用できるコンポーネント。
Util
Clamp
C
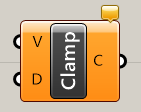
Maths>Script
値(Value)とドメイン(Domain)を入力し、ドメインの最大値より大きい値は最大値に、ドメインの最小値より小さい値は最小値に置き換える。
Sets
Text
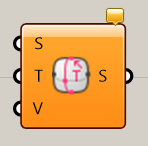
Text On Surface
B
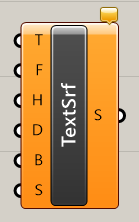
Sets>Text
作成したい文字列(Text)、フォント(Font)、大きさ(Height)、深さ(Depth)、文字を配置する曲線(Base Line)を入力し文字をBrepで作成する。文字を配置するサーフェス(Base Surface)の指定も可能(Rhino7 SR13から追加)。
詳細1:文字を配置する曲線(Base Line)上にテキストオブジェクトを作成・配置できる。高さ(Height)と厚み(Depth/0でも可)の指定、及び[Model Font]コンポーネントを接続してフォントの種類をプルダウンで選択可。スタイルやウェイトも選択可能だが、基本的には選択したフォントに依存する。
曲線のみでは向きの調整ができないため、方向を指定するためにS入力(サーフェス)を指定する。サーフェスを回転させる事で文字の向きや配置平面を変更できる。
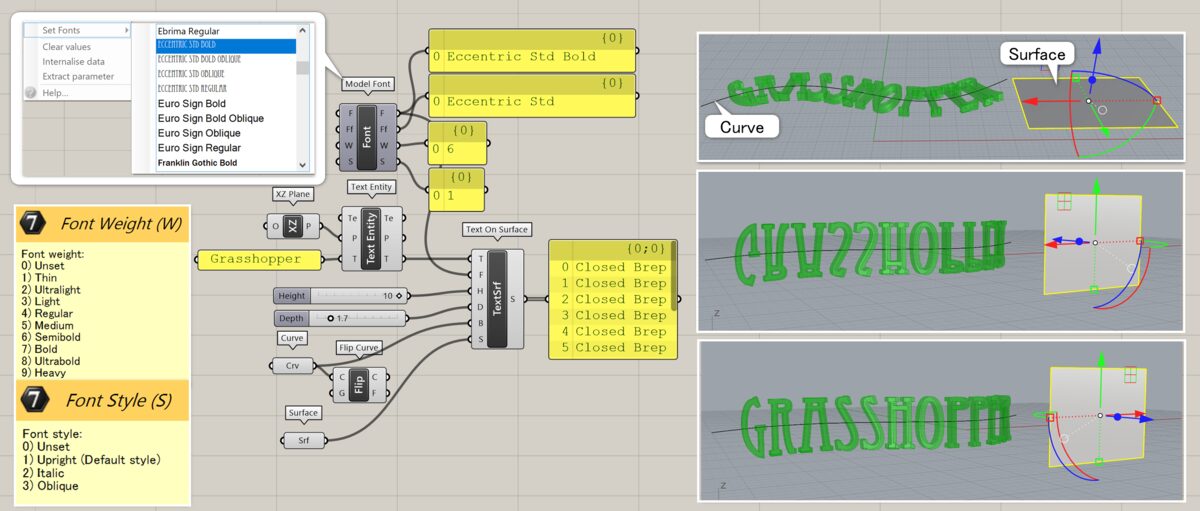
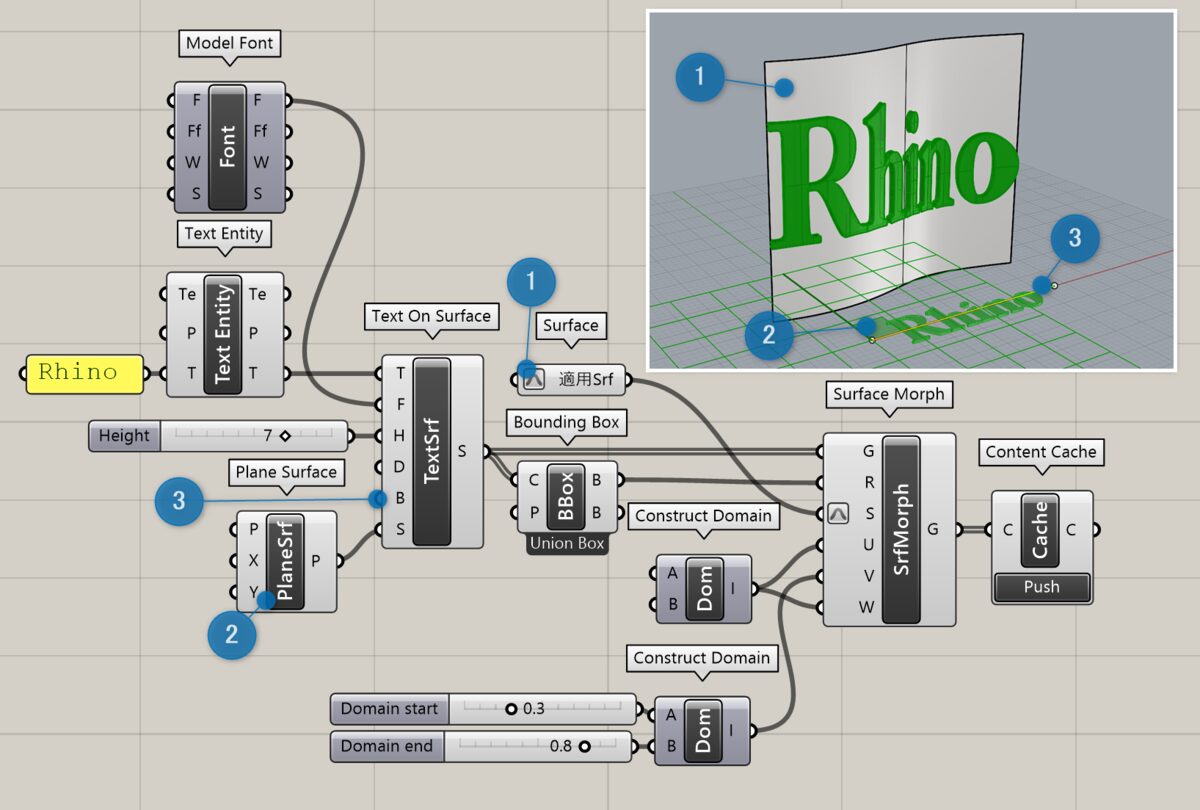
詳細2:[Text On Surface]を使用して作成したテキストオブジェクトを、[SurfaceMorph]にてサーフェスに貼り付けた例。
Vector
Point
Point Cloud Attributes
C
Vector>Point
点群(Cloud)を入力し、各種値を設定、または確認できる。項目は、点の座標値(Locations)、ベクトル(Normals)、色(Coulours)、点ごとの設定値(Extra)、隠れているかどうか(Hidden)である。
Point Cloud Closest Point
C
Vector>Point
点(Point)と点群(Cloud)を入力し、点群内の最も近い点(Point)を出力する。点群内の点のインデックス値(Index)や離れている距離(Distance)も出力する。
Reduce Point Cloud
C
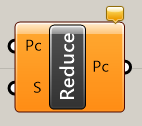
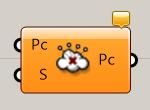
Vector>Point
点群(Cloud)と残したい点数(Sample)を入力し、点を削減した点群を出力する。元々の点群数よりも大きい点数を入力した場合は無効となる。
Curve
Analysis
Length Paramater
C
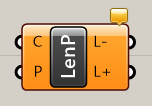
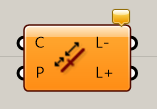
Curve>Analysis
曲線(Curve)とパラメータ値(Parameter)を入力し、始点から指定したパラメータ値までの長さをL-から、指定したパラメータ値から終点までの長さをL+から出力する。
Primitive
Polygon Edge
C
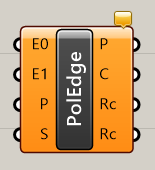
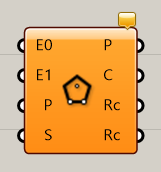
Curve>Primitive
1つ目のエッジの始点(Edge Start)とエッジの終点(Edge End)、平面を指定する点(Plane Point)、多角形の数(Segments)を入力し多角形を出力する。
Surface
SubD
SubD Virtices
C
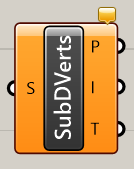
Surface>SubD
SubD(SubD)を入力し、制御点(Point)、点のインデックス(Index)、クリースの状態(Tag)を出力する。TagはSmooth,Crease,corner,dartと言った表記。
SubD Edge Tags
C
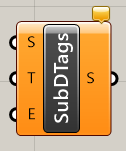

Surface>SubD
SubD(SubD)とエッジのタグの状態(Edge Tag)、エッジの番号(Edge IDs as list)を入力し、指定したエッジ部分の折れ方・クリースの状態を変更する。
SubD Vertex Tags
C
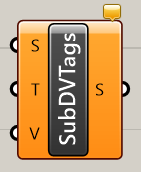
Surface>SubD
SubD(SubD)と頂点のタグの状態(Vertex Tag)、頂点の番号(Vertex IDs)を入力し、指定した個所の折れ方・クリースの状態を変更する。
Util
Reverse Surface
B
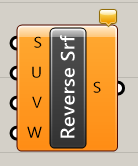

Surface>Util
サーフェス(Surface)とU方向(U)、V方向(V)、法線方向(W)をそれぞれ反転するかどうかを入力し、サーフェスの方向を変える。
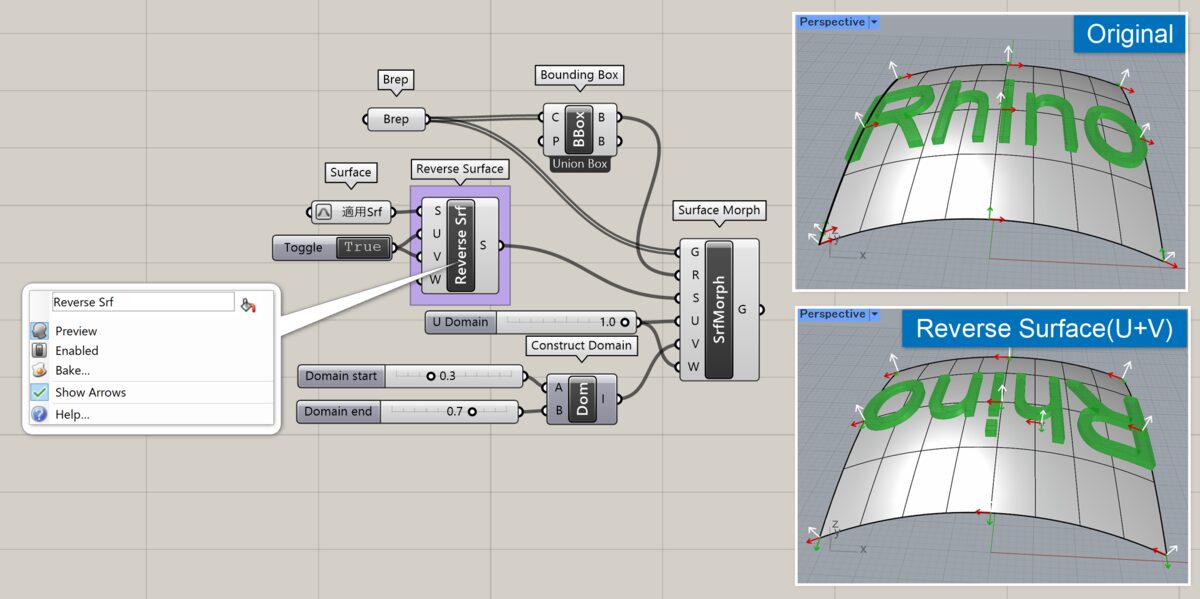
詳細1:入力したサーフェス(Surface)のU方向(U)、V方向(V)、法線方向(W)をそれぞれ反転するかを、False/Trueで入力して決定する。コンポーネントを右クリックして表示される「Show Arrows」オプションにて、反転後の矢印の向きを表示・確認できる。
図は、[Surface Morph]を使用してロゴをサーフェスに貼り付け、[Reverse Surface]にてUとVの向きを反転させた例。
Transpose Surface
B
Surface>Util
サーフェス(Surface)を入力し、UとVの向きを交換したサーフェス(Surface)を出力する。またU方向のドメイン値(U Component)、V方向のドメイン値(V Component)も出力する。法線の方向も変更されることがあるため、注意が必要。
詳細1:サーフェス(Surface)を入力し、UとVの向きを交換したサーフェス(Surface)を出力する。法線方向(W)は調整できないため、[Reverse Surface]との組み合わせで希望する向きに調整できる。
図は、[Surface Morph]を使用してロゴをサーフェスに貼り付け、[Transpose Surface]にてUVを反転し、裏返ったロゴを[Reverse Surface]にてUとWを反転させて調整した例。
詳細2:サーフェスを分割し、[Surface Morph]で貼り付けたオブジェクトの向きを[Transpose Surface]でUV変更して回転させ、[Cull Pattern]で選択した1つおきのサーフェスに対してのみ[Reverse Surface]を適用、Uのみ反転させてファサードパターンを作成した例。
クリックで画像を拡大表示できます。
Mesh
Trianglation
ShrinkWrap
A
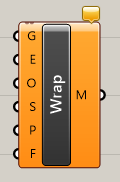
Mesh>Trianglation
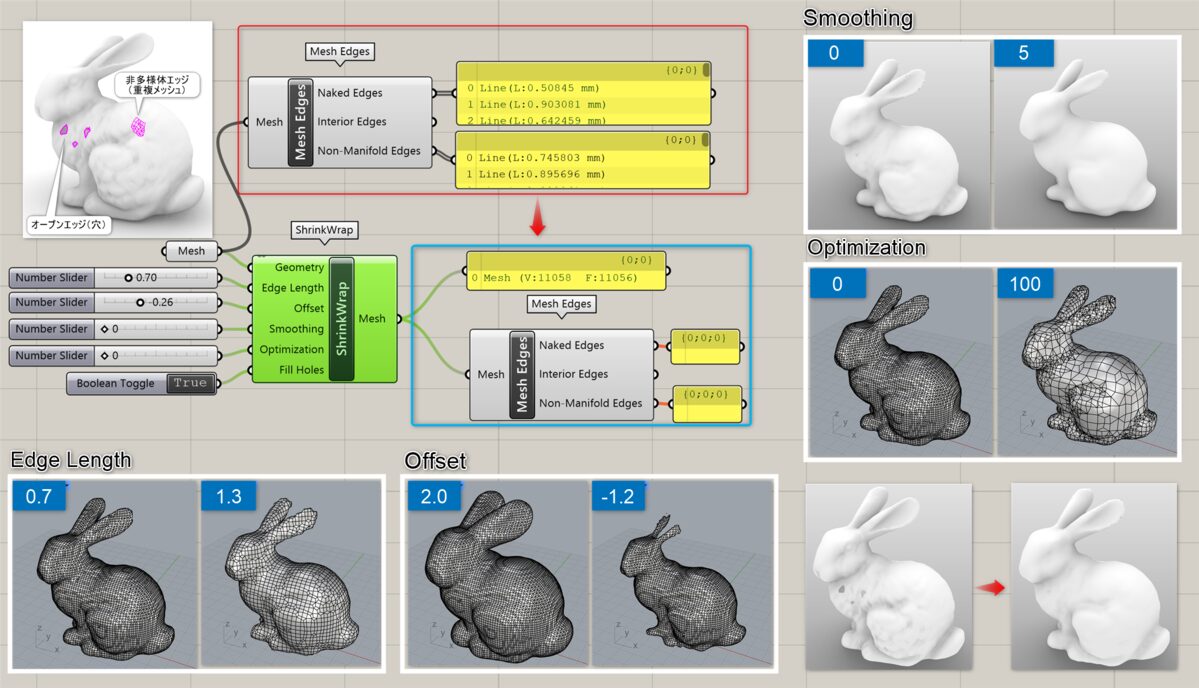
メッシュか点群(Geometry)、目標となるエッジの長さ(Edge Length)を入力し、形状を覆うようなメッシュを作成する。オプションとして、法線方向のオフセット値(Offset)、滑らかにする処理の実行回数(Smoothing)、最適化のパーセンテージ(Optimization)、穴を埋めるかどうか(Fill Holes)も設定可能。
詳細1:メッシュか点群(Geometry)、目標となるエッジの長さ(Edge Length)を入力し、形状を覆うようなメッシュを作成する。図は、[Shrink Wrap]を適用後、元のメッシュに存在したオープンエッジや重複メッシュが解消された事を[Mesh Edges]で確認した例。各オプションの比較画像も紹介。
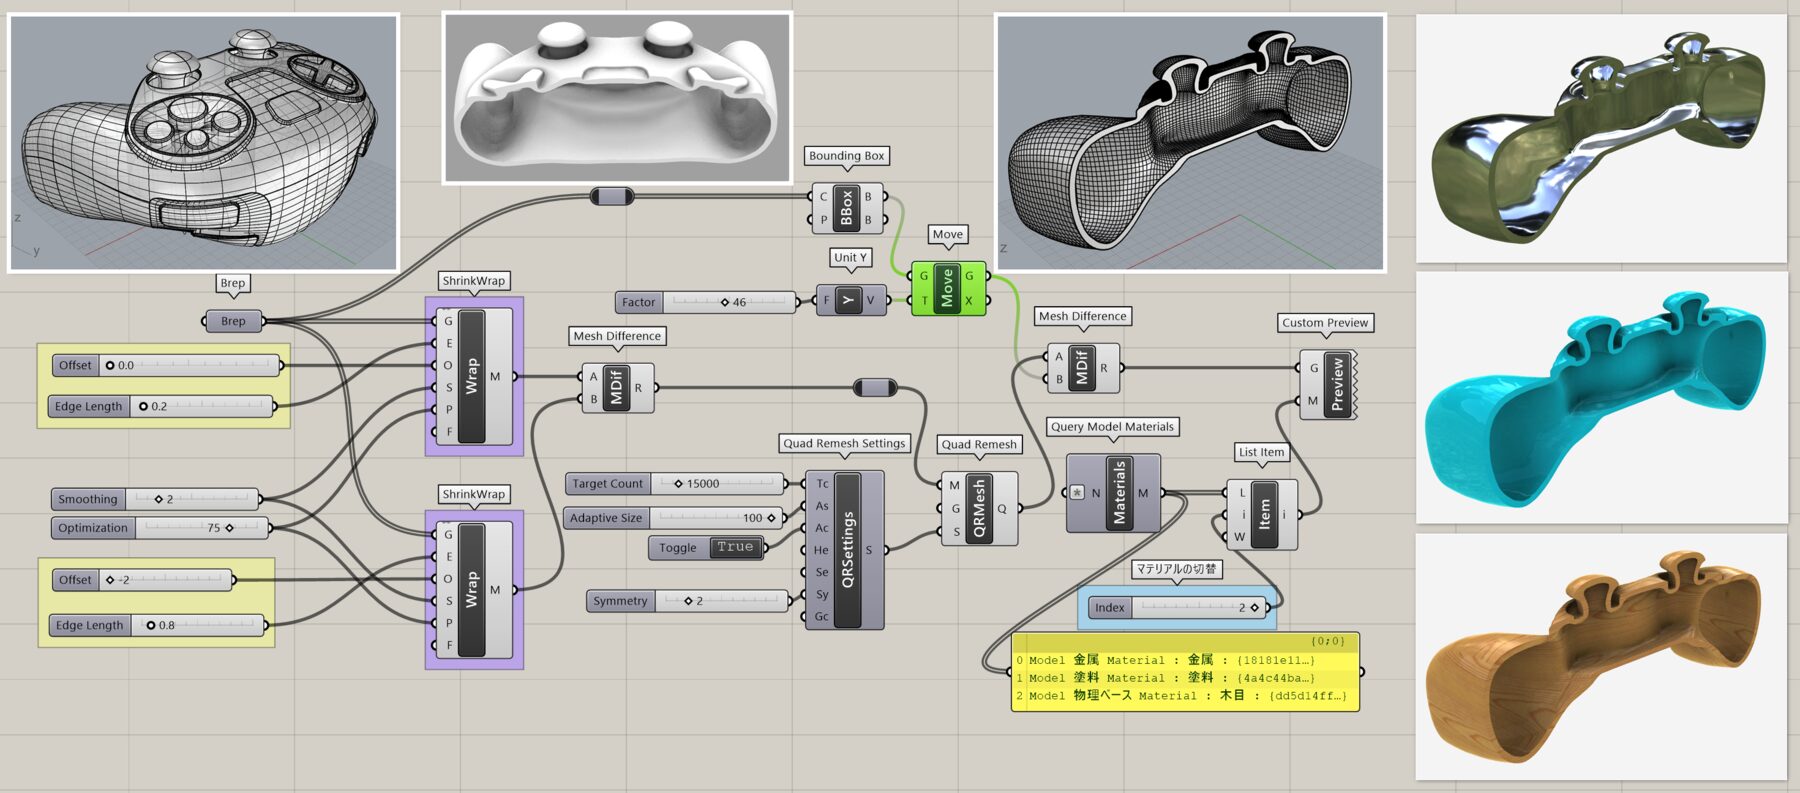
詳細2:Brepに[Shrink Wrap]を2つ適用後、1つはオフセットで小さくしたものを[Mesh Diffrence]で引き算をし、中をくりぬいた例。ここでは更に、[Quad Remesh]で四角ポリゴンに変換し、再度[Mesh Difference]で半分にカット後[Custom Preview]を使用してRhinoファイル上のマテリアルを[Query Model Materials]で読込み、[List Item]で切り替え表示を行っている。(ビューポート表示は”レンダリング”)
クリックで拡大表示できます。
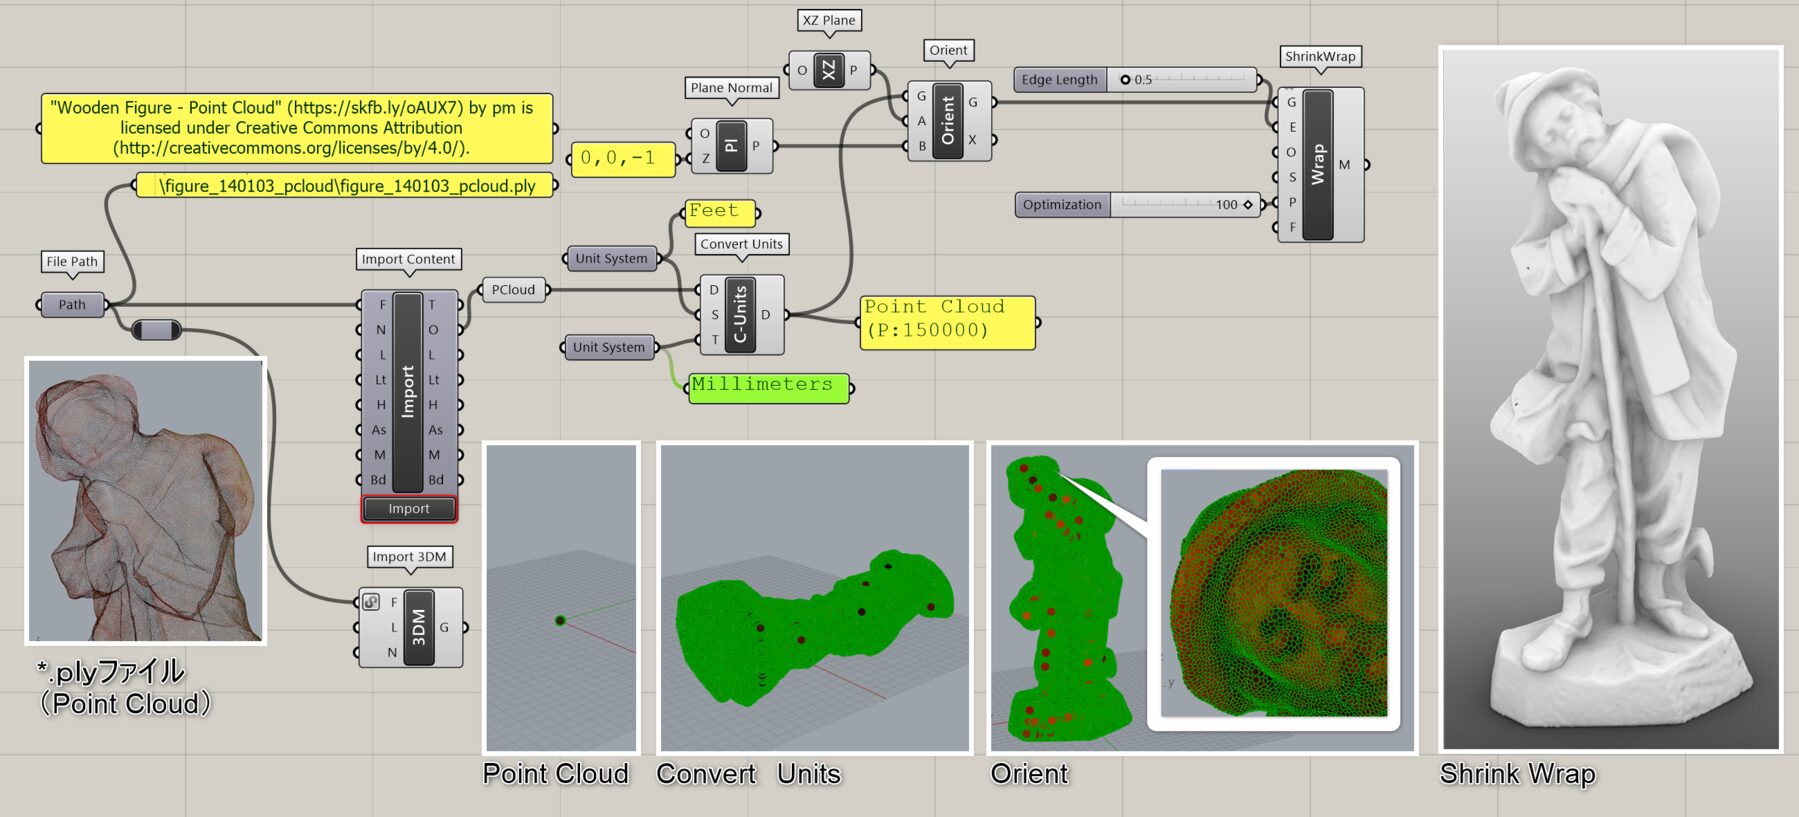
詳細3:点群データ(*.ply)ファイルを[Import Content]で読み込み、(Import 3DMでも可)[Convert Units]で単位を変換後、[Orient]や[Plane Normal]で向きを調整し、[ShrinkWrap]でメッシュ化した例。
クリックで拡大表示できます。
Intersect
Mathmatical
Point Cloud Contour
C
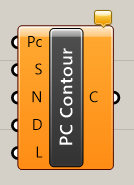
Intersect>Mathmatical
点群(Cloud)と始点(Start)、方向(Direction)、間隔(Distance)を入力し、点群と交差する一定間隔の断面を作成する。法線方向を限定するかどうか(Limit)も設定可能。
Point Cloud Section
C
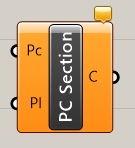
Intersect>Mathmatical
点群(Cloud)と交差する平面(Plane)を入力し、点群を交わる断面を作成する。点群数が少なすぎるとエラーとなる。
Transform
Morph
MorphToMesh
B
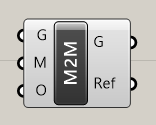
Transform>Morph
張り付ける形状(Geometry)、メッシュ(Mesh)、オフセット値(Offset)を入力して、メッシュの面一枚一枚に形状をモーフィングする。張り付ける形状は、Ref(Refernce Polygons)で確認できる多角形曲線内に配置する必要がある。
詳細1:サーフェスに[TriRemesh]を適用して三角メッシュを作成し、[MorphToMesh]を適用してその三角メッシュ一枚ずつそれぞれにオブジェクト(Brep/Mesh可)を貼り付けた例。貼り付けるオブジェクトはR(Reference)出力で確認できる多角形曲線内に配置する必要があり、ここでは三角メッシュなので三角形の位置にオブジェクトを作成。オフセット値(Offset)を入力して、法線方向に押し出す事も可能。

詳細2:OBJファイルをインポートして[QuadRemesh]を適用し、R出力の四角形にBrepを配置して[MorphToMesh]を適用した例。配置する四角形エリアに空間があると隙間があくため、ここでは配置パーツを回転・スケールを行って意図的に穴を開けている。
クリックで拡大表示できます。

詳細3:Sphereに[TriRemesh]を適用後、D(Dual)出力を利用して生成された5.6.7角形に対して、[MorphToMesh]を適用した例。
クリックで拡大表示できます。

Bend Deform
Util
Named Group
C
Transform>Util
グループ(Group)とオブジェクト(Objects)、グループ名(Name)を入力して、名前の付いたグループを作成する。設定後、GroupをBakeすることで既存のGroupに追加可能。
Display
Preview
Custom Curve Preview
C
Display>Preview
曲線(Curve)、線種情報(Line Type)、色(Colour)を入力し、ビュー上に表示する。
Deconstruct Material
C
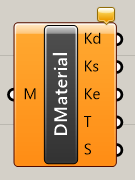
Display>Preview
マテリアル(Material)を入力し、色(Diffuse)、光沢色(Specular)、エミッション色(Emission)、透明度(Transparency)、光沢仕上げ(Shine)の値を取得する。
Rhino
Content
Content Cache
A
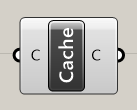

Rhino>Content
Rhinoのキャッシュを介してRhinoとGHのデータを相互連携するコンポーネント。コンポーネントをズームすることで端子の増減が可能。入力端子には、連携するデータ(Content)、任意のキャッシュ名(Name)、反映を端子入力で行うかボタンで行うか(Pattern)がある。出力端子には、連携データ(Content)、キャッシュ名(Name)、キャッシュから取り出したデータ(Cache)がある。Contentは、レイヤやユーザーテキストなどの各種属性が付与可能なオブジェクト。
入力にContentがあるとデータのPush(GHのデータを3dmに反映)、出力にCacheがあるとデータのPull(3dmのデータをGHに抽出)が可能。両方あるとPushとPullを同時に行う。
詳細説明はこちら
Rhino 8 Grasshopper – Content Cache Part1 基礎
Rhino 8 Grasshopper – Content Cache Part2 応用
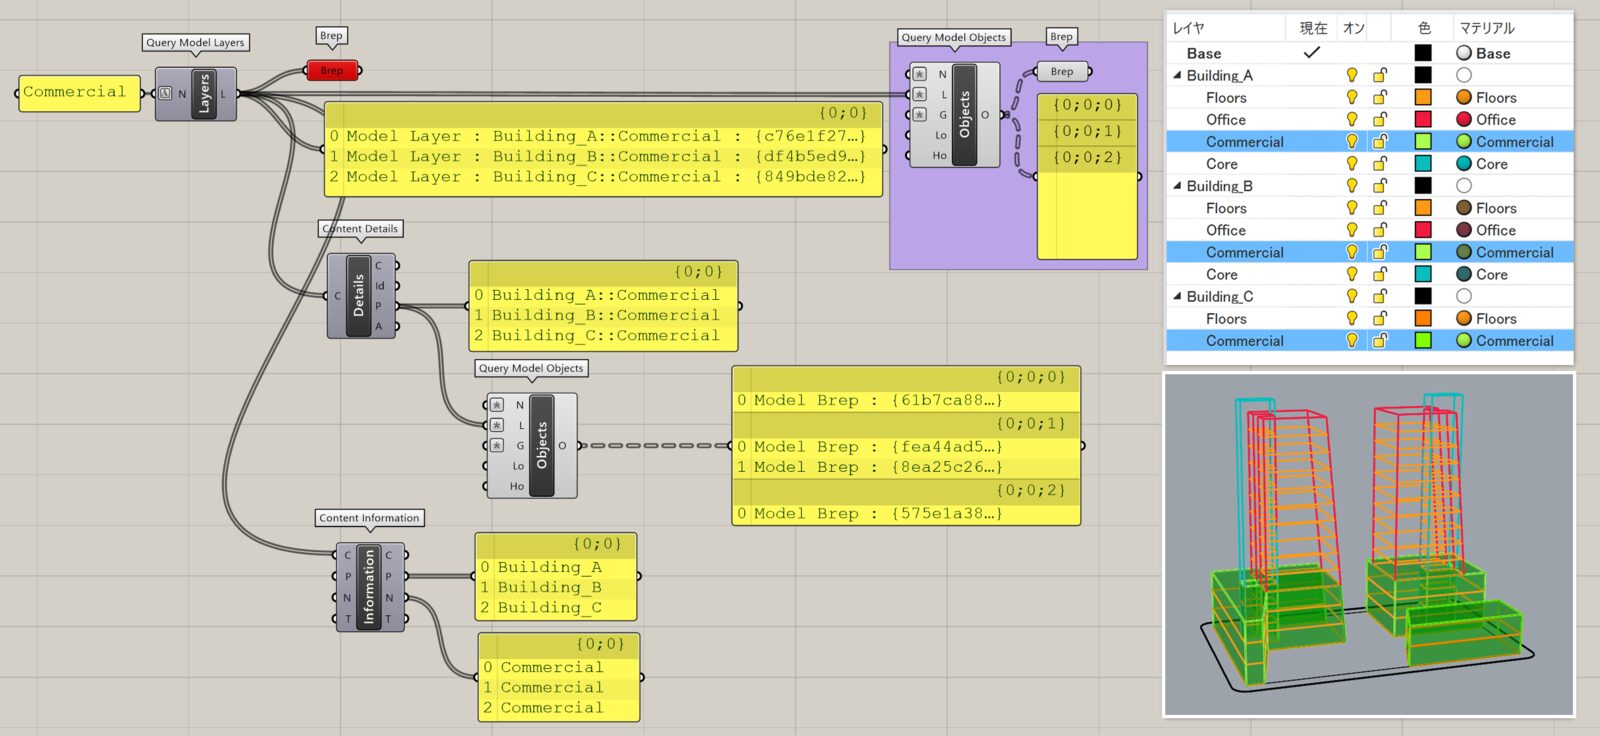
Content Details
B
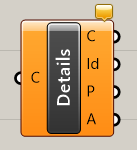
Rhino>Content
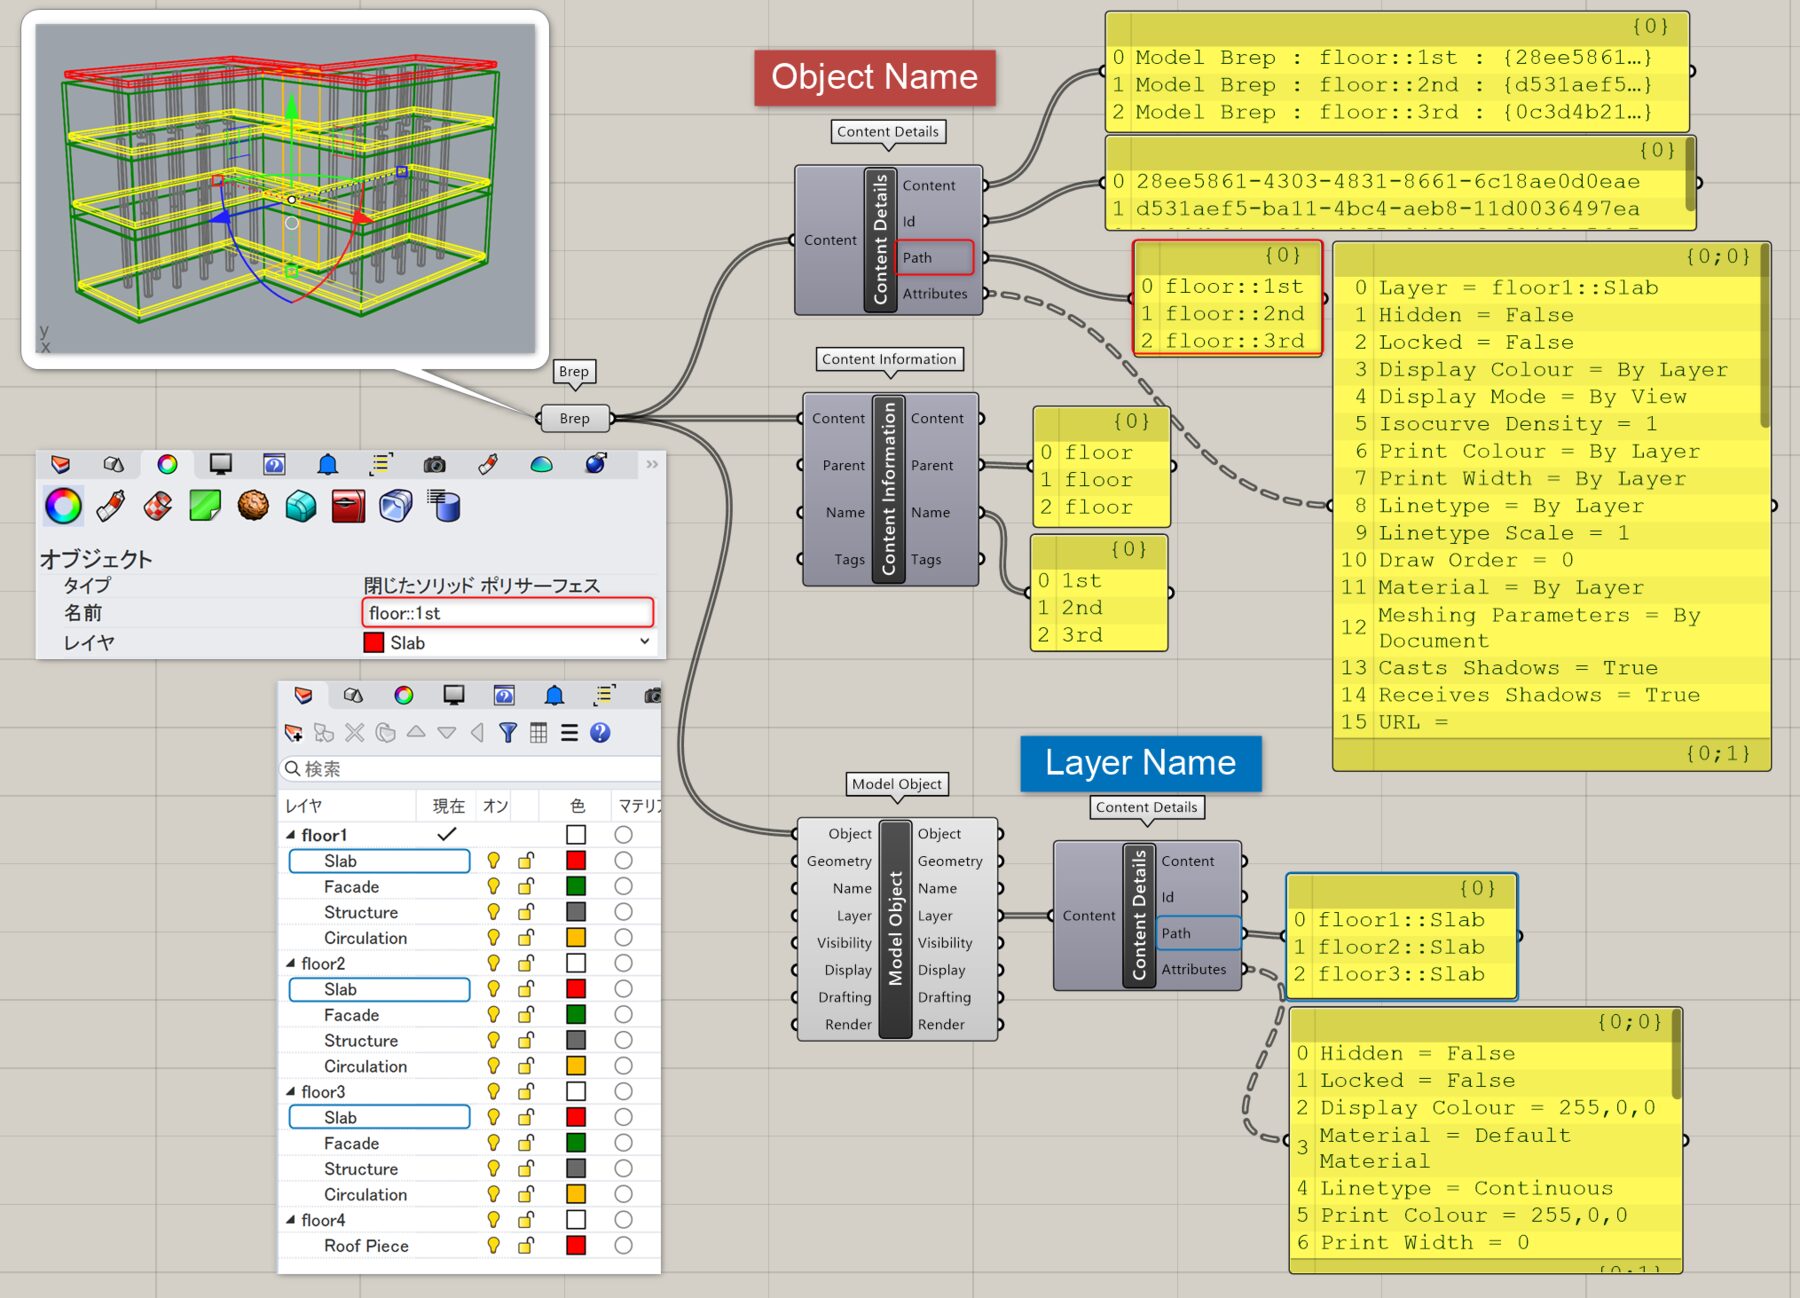
Rhinoの要素(Content)を入力し、オブジェクトのID(Id)、パス(Path)、属性情報(Attributes)を取得する。Rhino7までの[Object Details]が新しくなったもの(旧コンポーネントは検索窓で「#」を付けて検索すれば使用可能)。
Pathは、基本的にはオブジェクトの名前(Name)のことだが、レイヤ同様「親::子::孫」のように「::(コロン2つ)」をセパレータとして記入すると次の[Contant Information]コンポーネントにより親(Parent)の情報を抽出可能。
属性情報は、レイヤや表示・非表示、ロックされているか、色やマテリアル関係、線種などのオブジェクトに紐づいた各種情報。
詳細1:Rhinoの要素(ここではBrep)を入力し、[Content Details]からオブジェクトID、パス、属性情報を取得した例。パスからは、指定されていればオブジェクト名が出力される。図では、パス出力から「オブジェクト名」を出力した場合と、[Model Object]を経由して「階層のあるレイヤ名」を出力している。階層のある名前やレイヤは、オブジェクト名でもレイヤ名でも同様に[Content Information]よりParent(親階層)とName(子階層)を分けて出力する事も可。
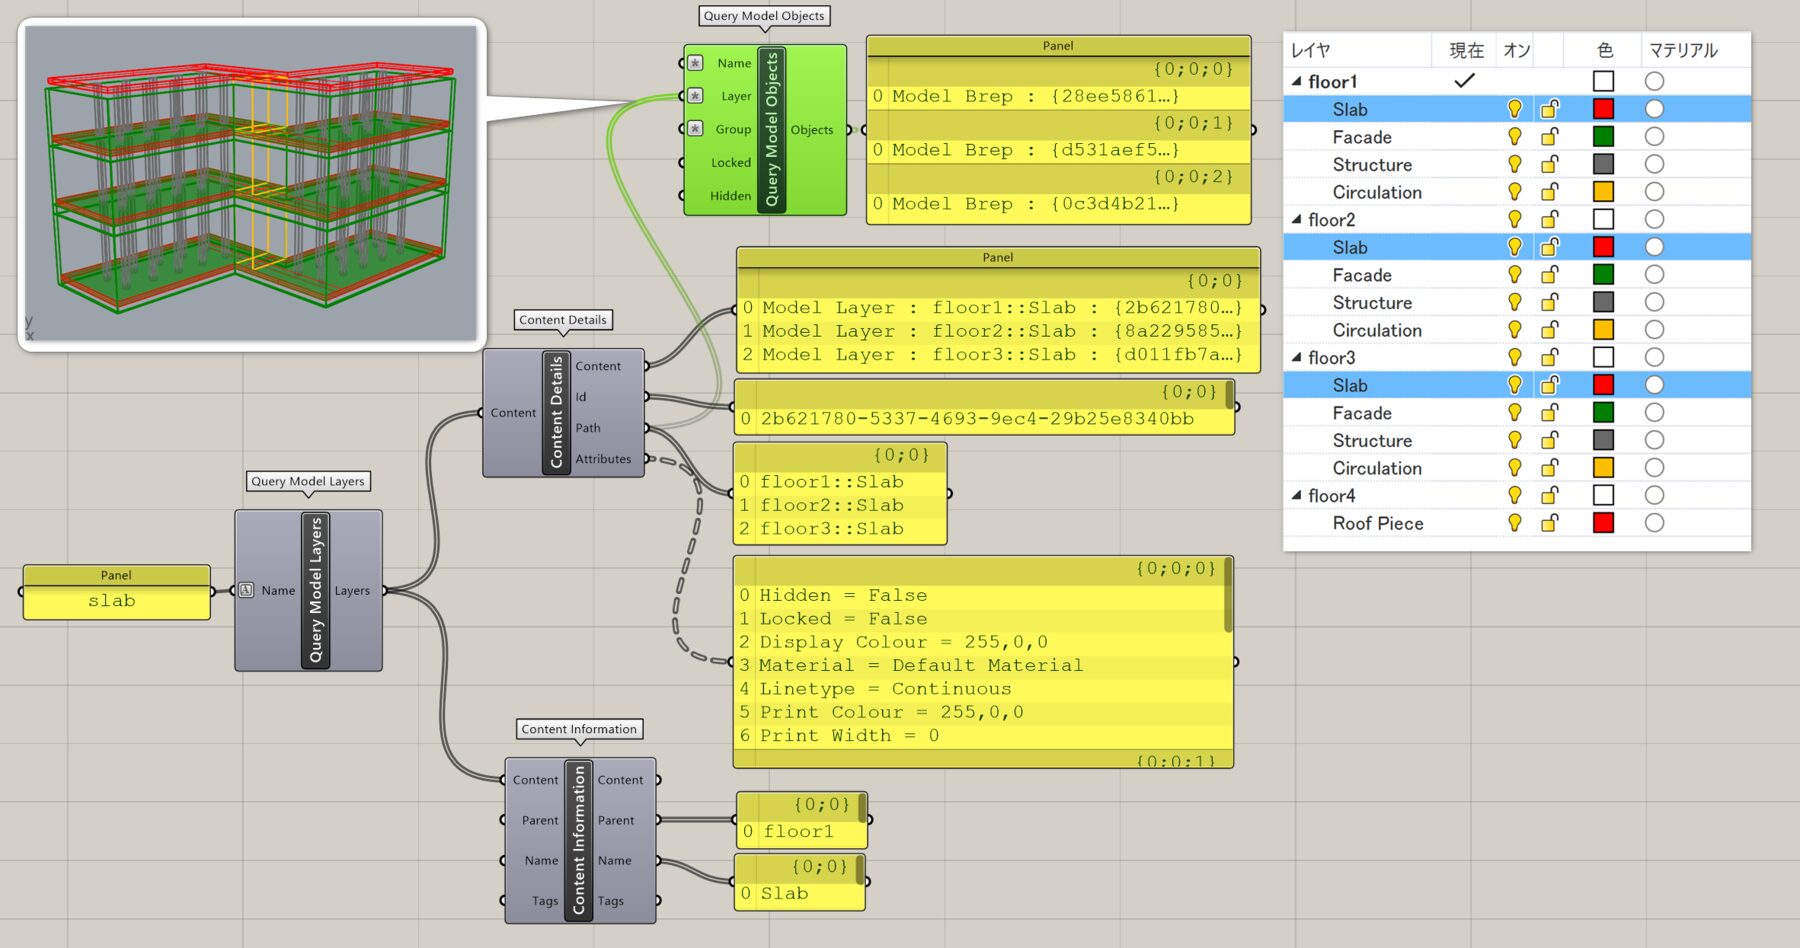
詳細2:[Query Model Layers]の「Match Method>Contains」フィルタ設定にて「slab」レイヤを抽出し、[Content Details]と[Content Information]でレイヤ情報を取得した例。[Content Details]のPath出力を[Query Model Object]のレイヤ入力に接続すれば、抽出したレイヤ内のオブジェクト(ここではslab)を抽出できる。
Content Infomation
C
Rhino>Content
属性付与可能なオブジェクト(Content)を入力し、親のパス(Parent)、子の名前(Name)、タグ(Tag as list)などを取得可能。もしくは個々に値を入力し、オブジェクトの情報を作成・修正することも可能。
Convert Units
C
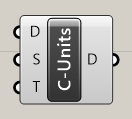
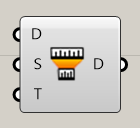
Rhino>Content
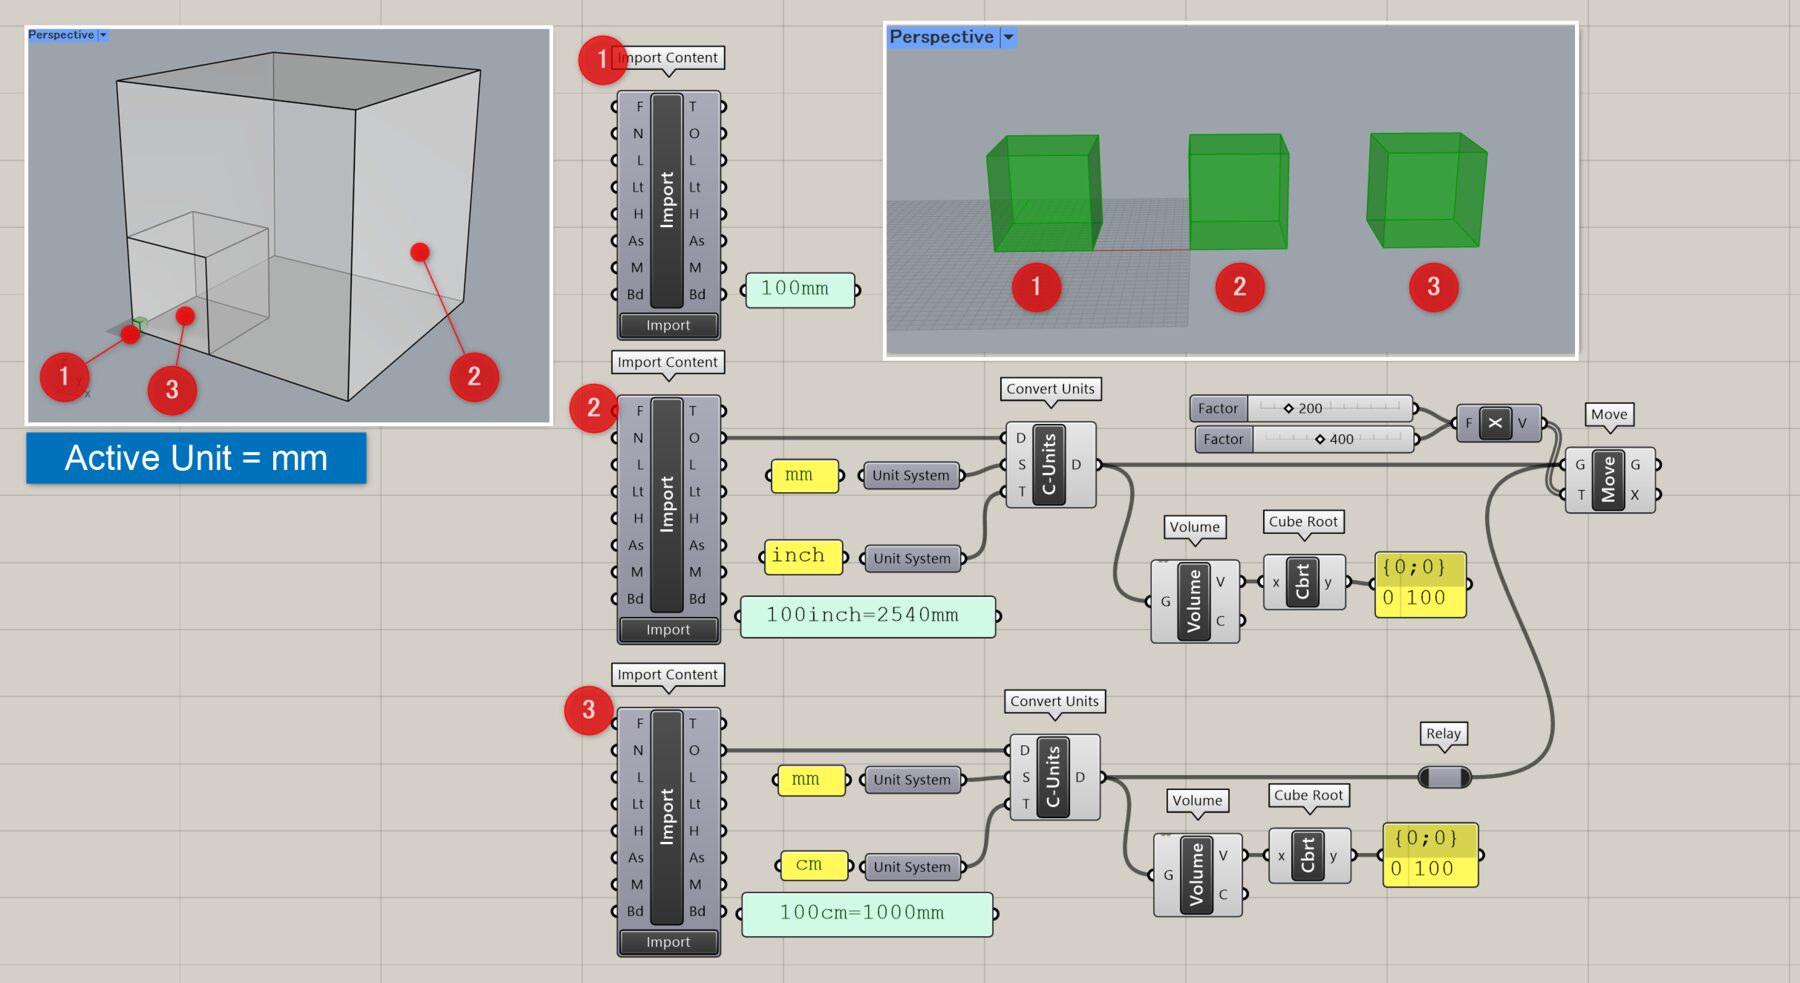
単位系を変更したいオブジェクトや数値(Data)、元となる単位系(Source)、変更後の単位系(Target)を入力し、データを変換する。
詳細1:[Convert Units]に数値を入力し、mからFeet、Model Unit(開いているファイルの単位:mm)からcmへデータ変換した例。各種単位は[Unit System]を右クリックして選択できる。
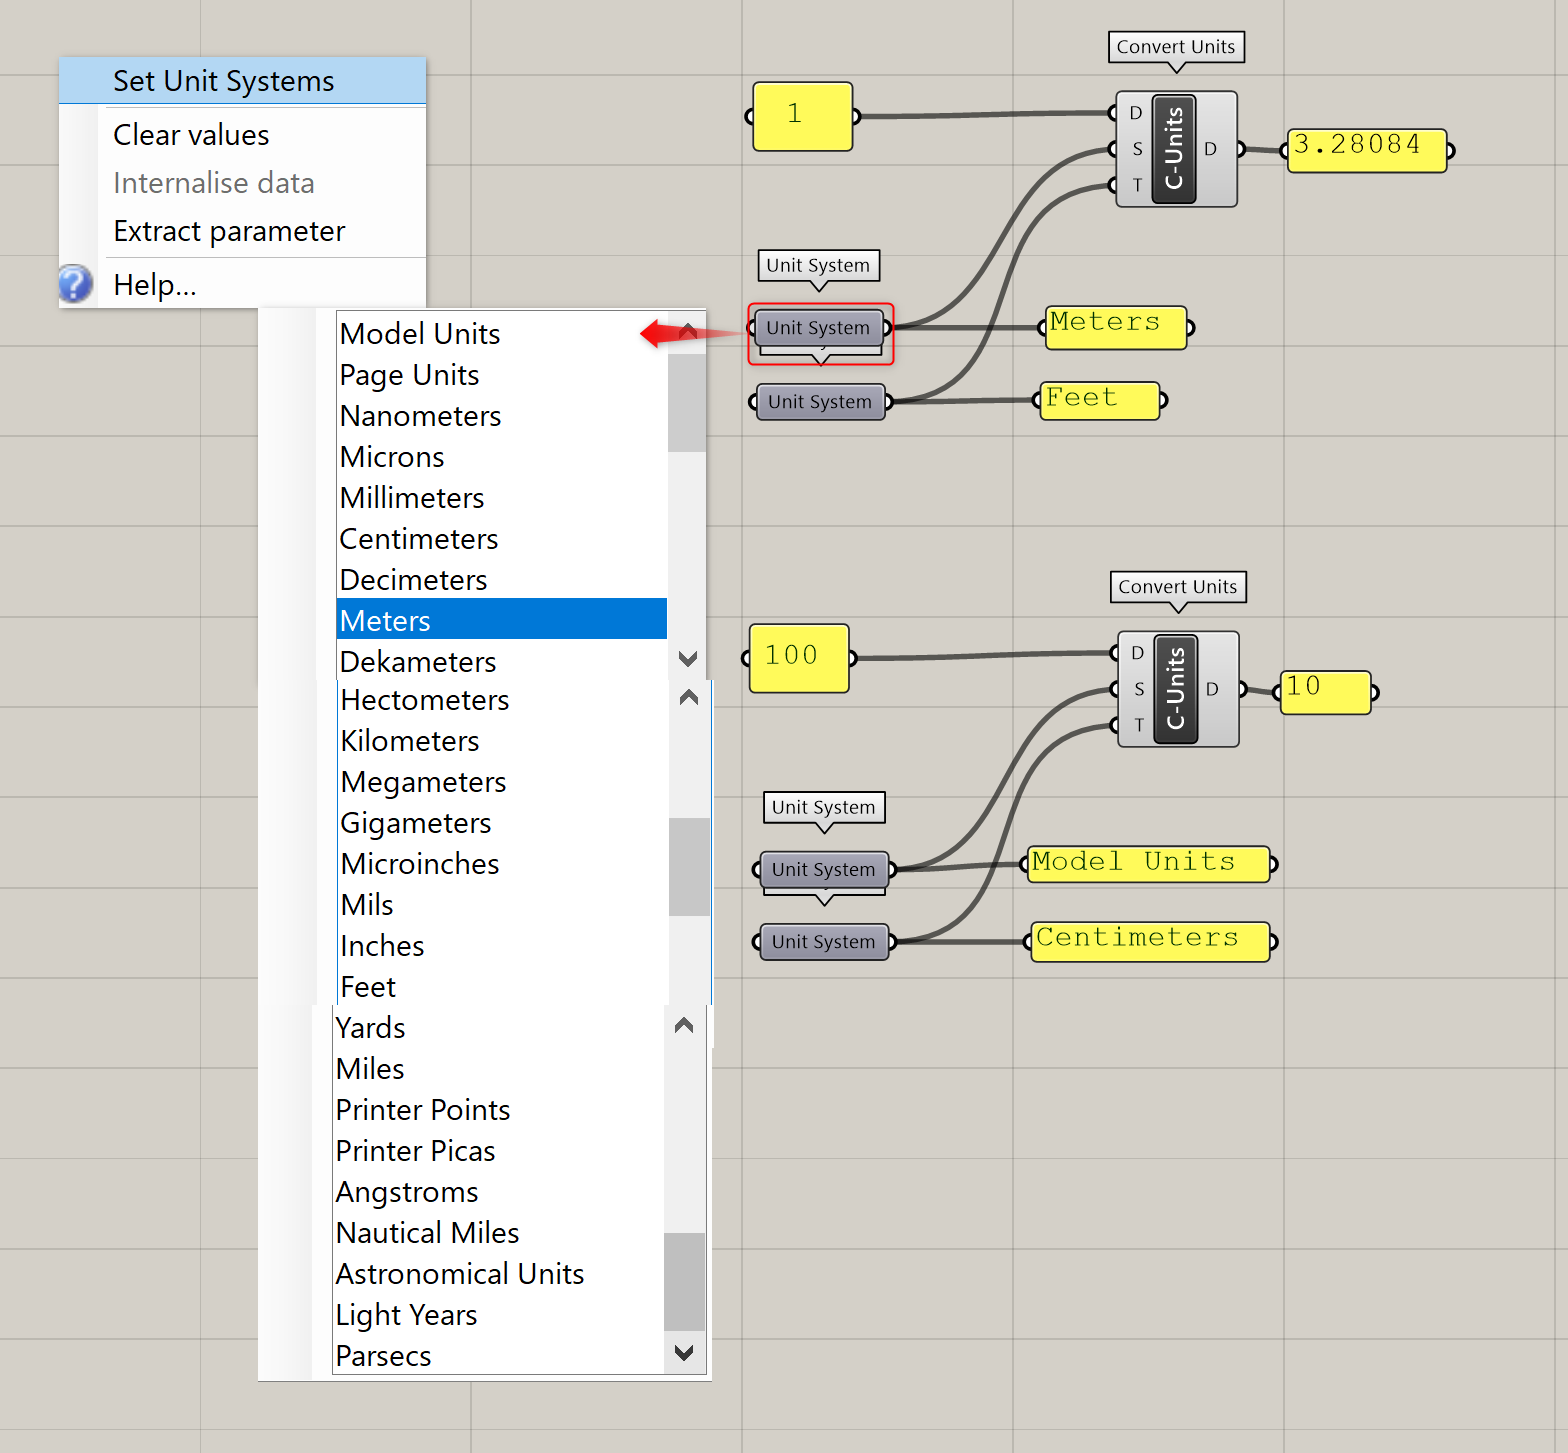
詳細2:オブジェクトの入力も可。図は、[Import Contents]で①Model Unit=mm②Model Unit=inch③Model Unit=cmにて 100100100のBoxを作成したものを Model Unit=mmのファイルへ全て読み込んだ後、[Convert Units]にてそれぞれ単位をmmに変換し、オブジェクトのサイズを揃えた例。
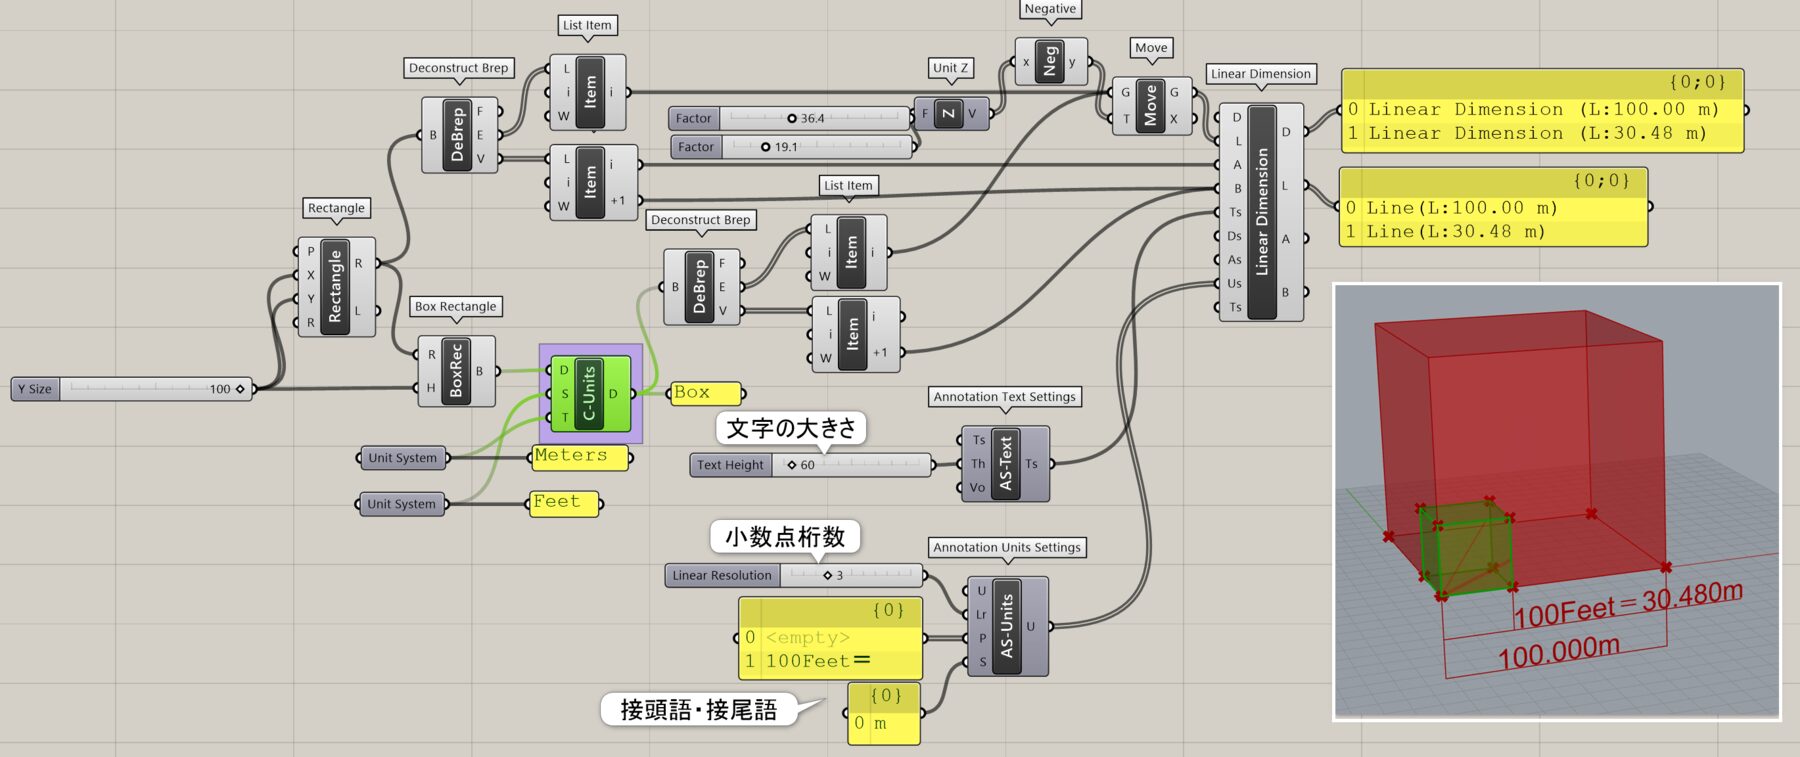
詳細3:[Convert Units]を使用して、100mを100Feetに変換した例。[Linear Dimension]にて数値を表示し、[Annotation Text Settings]で文字の大きさを、[Annotation Units Settings]で小数点の桁数や、接尾語、接頭語の指定を行っている。
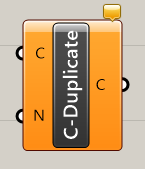
Duplicate Content
B
Rhino>Content
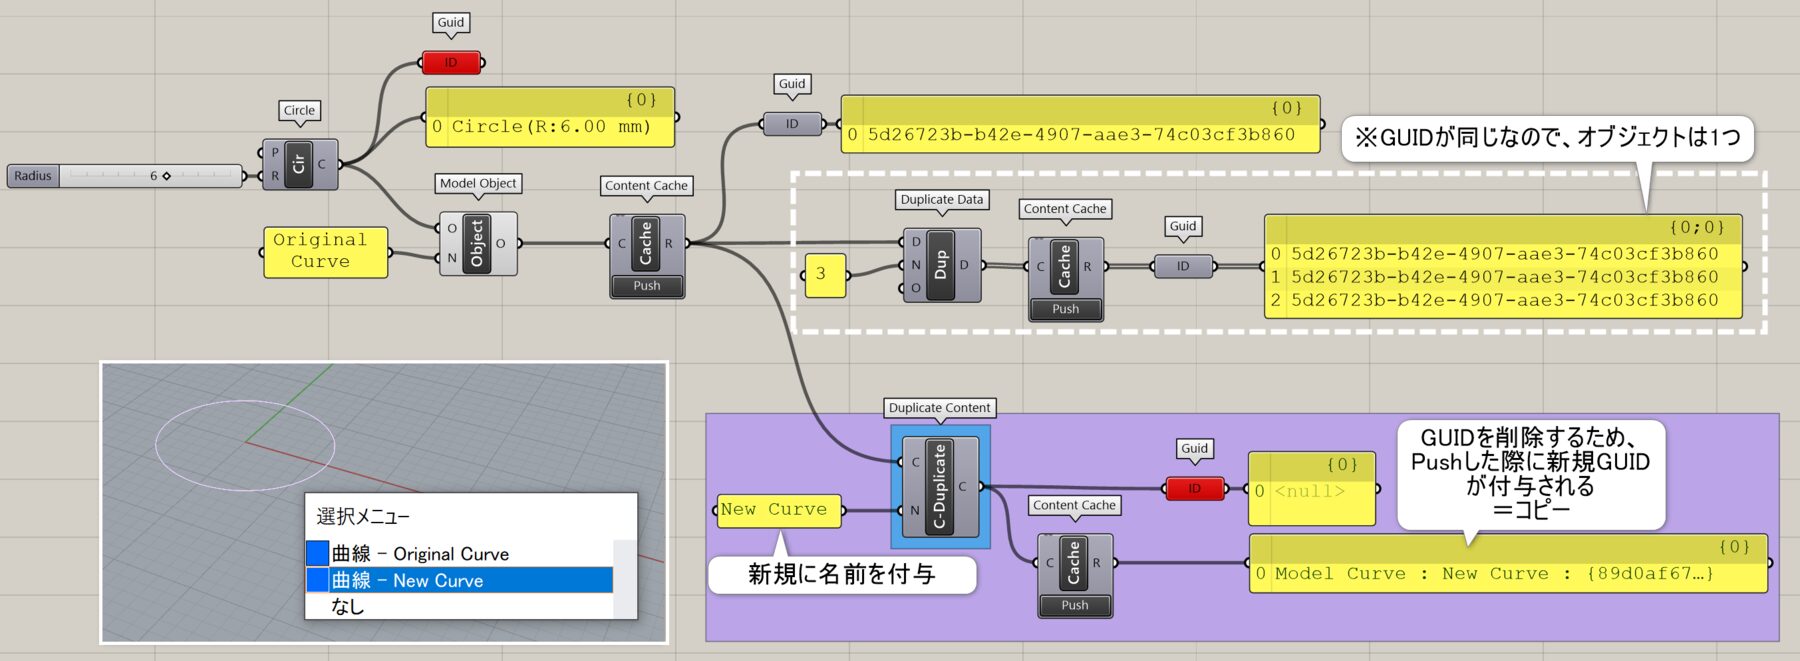
複製したいオブジェクト(Content)と新しい名前(Name)を入力し、新しい名前をつけたオブジェクトを出力する。
詳細1:類似した名前のコンポーネント[Duplicate Data]は、[Content Cache/Push]でベイクすると、同じGUIDのコンテンツを複製する。(オブジェクトは複製されるが、ベイク時すると同じIDは上書きとなるので結果は1つとなる)[Duplicate Content]はGUIDを削除し、新規にオブジェクト名を付与したものを出力できる。[Content Cache]に接続した場合、GUIDのないものは新規GUIDを付与するため、ベイクした結果は上書きではなくコピーとなる。
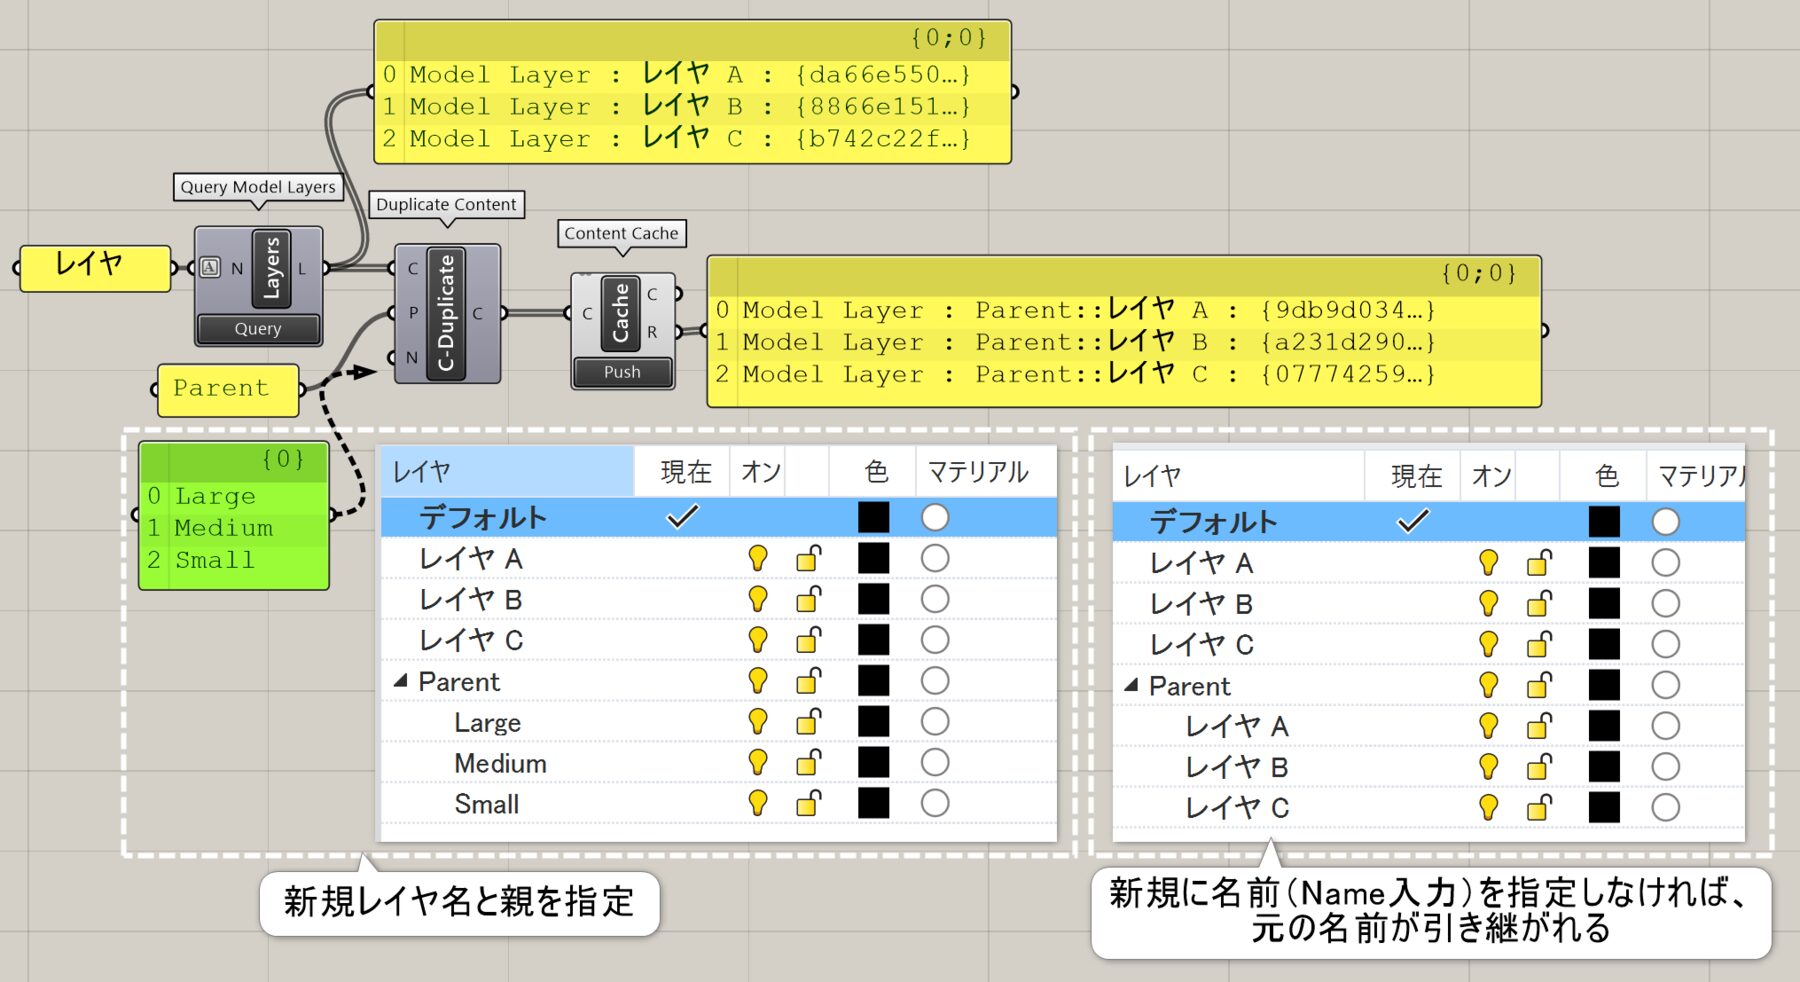
詳細2:[Duplicate Content]をレイヤ名に使用した場合の例。元のレイヤ名を[Model Layer]で取得し、[Format]で、コピー後のレイヤ名を作成してベイクして空レイヤを作成している。

詳細3:[Duplicate Content]をズームインしてParent Optionを追加すると、新規に親を指定して複製できる。新しい名前は、入力しなければ元の名前が引き継がれる。
Evaluate Text Fields
C
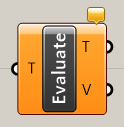
Rhino>Content
入力した文字列(Text)にテキストフィールド(https://docs.mcneel.com/rhino/8/help/ja-jp/information/text_fields.htm)を含む場合に、テキスト(Text)と値(Values)をそれぞれ抽出する。
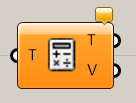
Text Field Expression
C
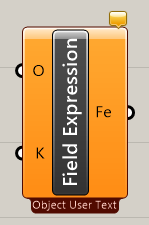
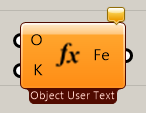
Rhino>Content
入力したオブジェクト(Object)に関するテキストフィールド(Field Expression)(https://docs.mcneel.com/rhino/8/help/ja-jp/information/text_fields.htm)を作成する。どのテキストフィールドを作成するかは右クリックから選択できる。標準のUser Text以外にレイヤ、ブロック、ドキュメント、レイアウトなどに関するものも作成可能。入力端子はどのテキストフィールドを選択するかによって変化する。Rhinoで寸法などを修正時に[fx]ボタンから実行できるテキストフィールドと近しい機能。
Unit System
C
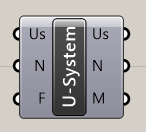
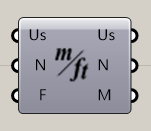
Rhino>Content
単位系(Unit System)を入力し、名前(Name)やメーターとの倍率(Meters)を取得する。もしくは単位系を入力せずに単位系名(Name)と現在の単位系との倍率(Factor)を設定し、独自の単位系を作成することも可能。
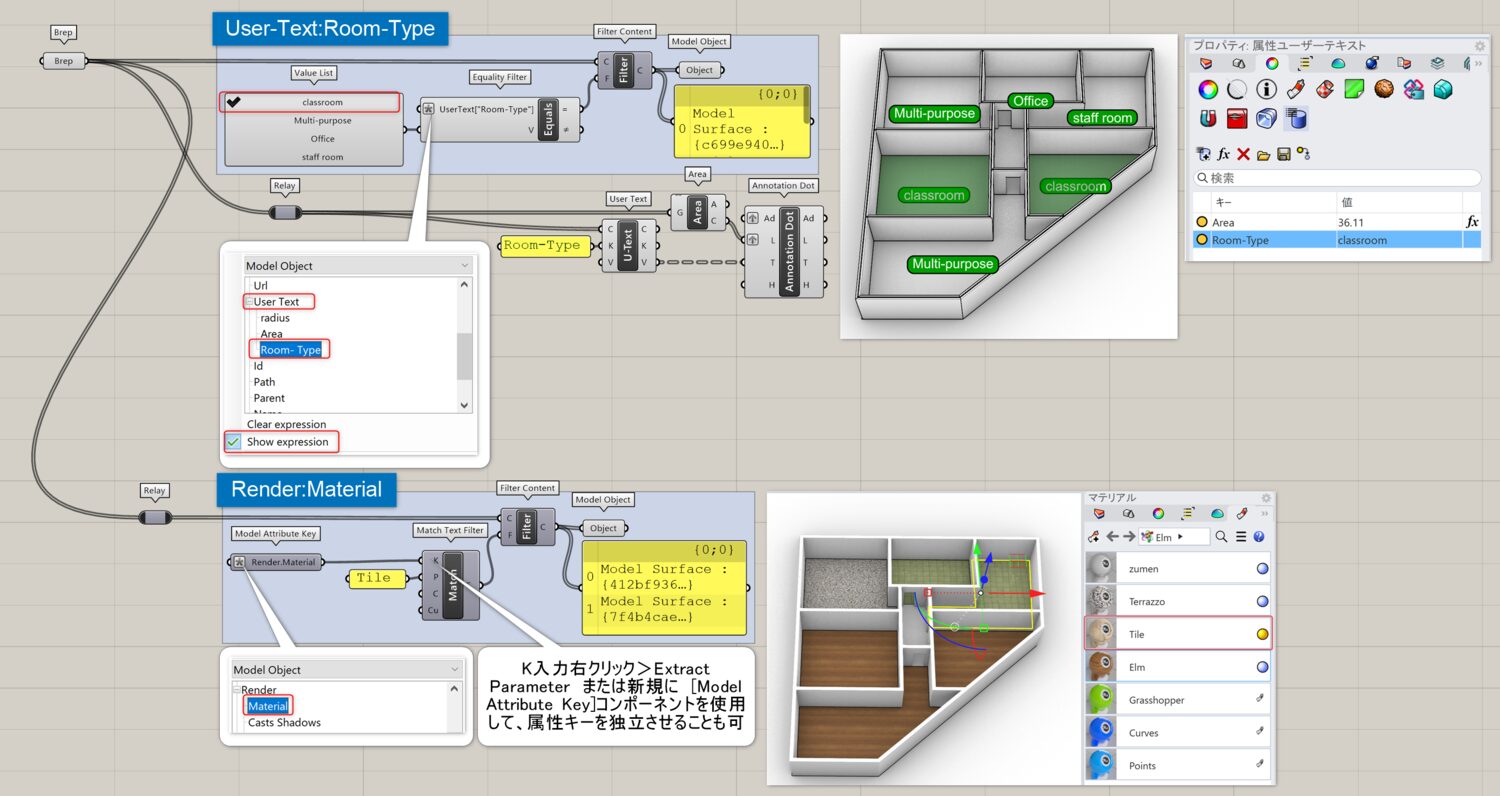
User Text
A
Rhino>Content
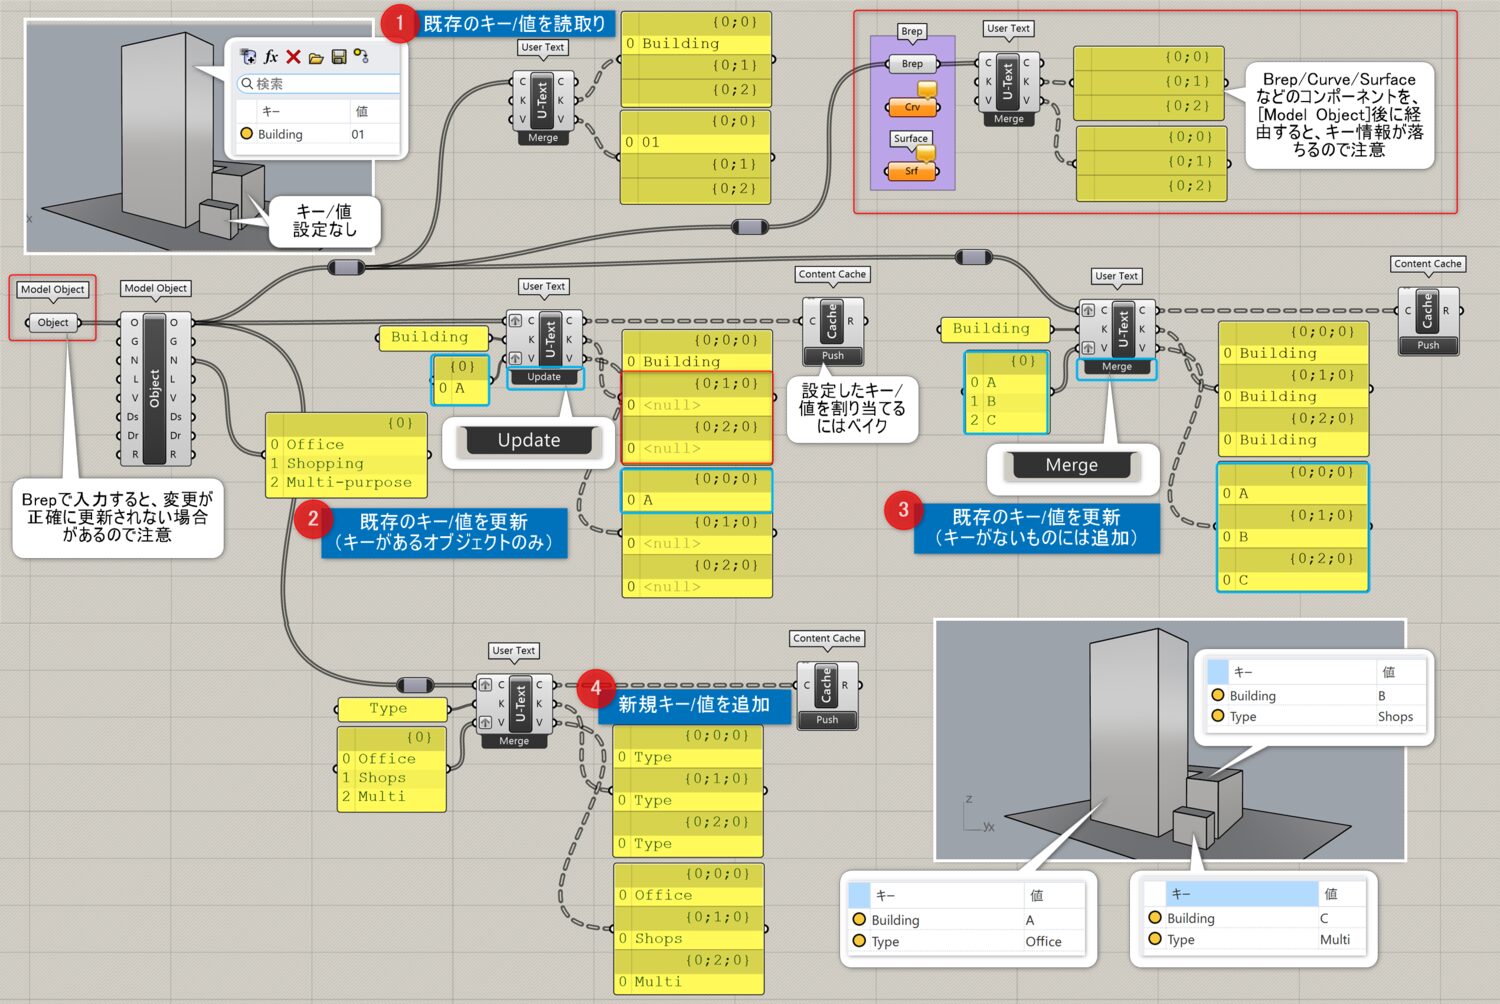
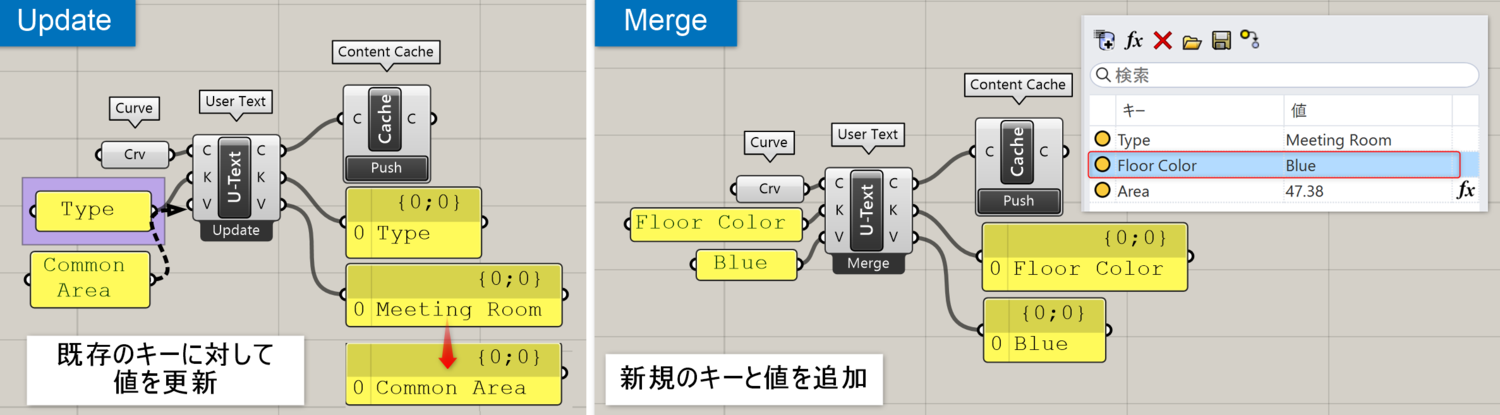
オブジェクト(Content)を入力し、キー(Keys as list)や値(Values as list)を取得する。もしくは個々に値を入力し、オブジェクトに属性ユーザーテキストを追加・修正することも可能。また右クリックから、既存のキーと併せるMerge、キーが存在する場合は値を変更するUpdate、キーを削除するRemoveなどからオプションを変更可能。
詳細1:入力したオブジェクトにキーや値が存在すればそれを読み取る事ができ、存在しない場合は値を追加したり編集したりする事が可能。設定したキーや値をオブジェクトに割り当てる場合は[Content Cache]等でベイクする。オブジェクトの格納に[Model Object]ではなく[Brep]等を使用したり、途中で経由したりすると、[User Text]の変更/更新が正常に行われない場合があるので注意。
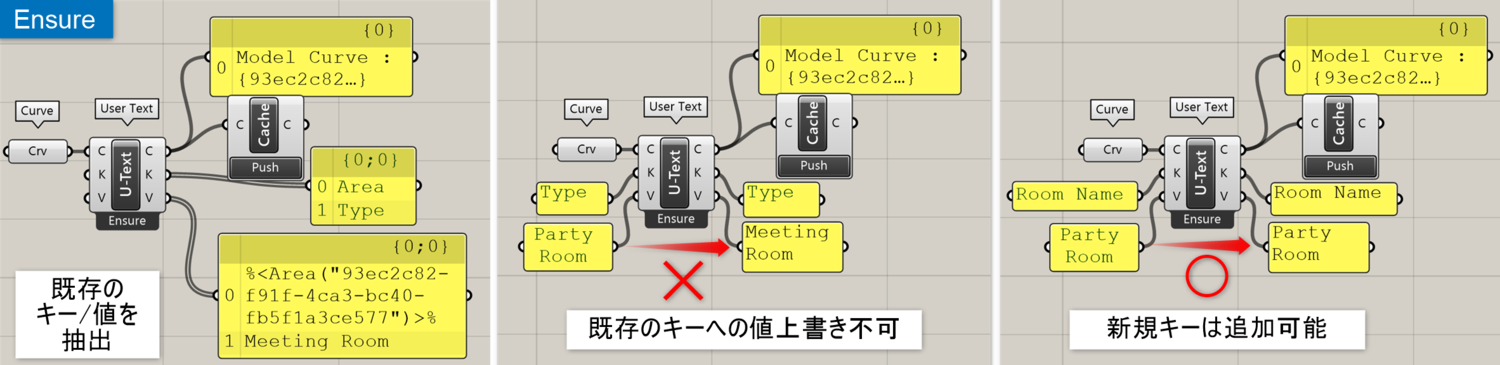
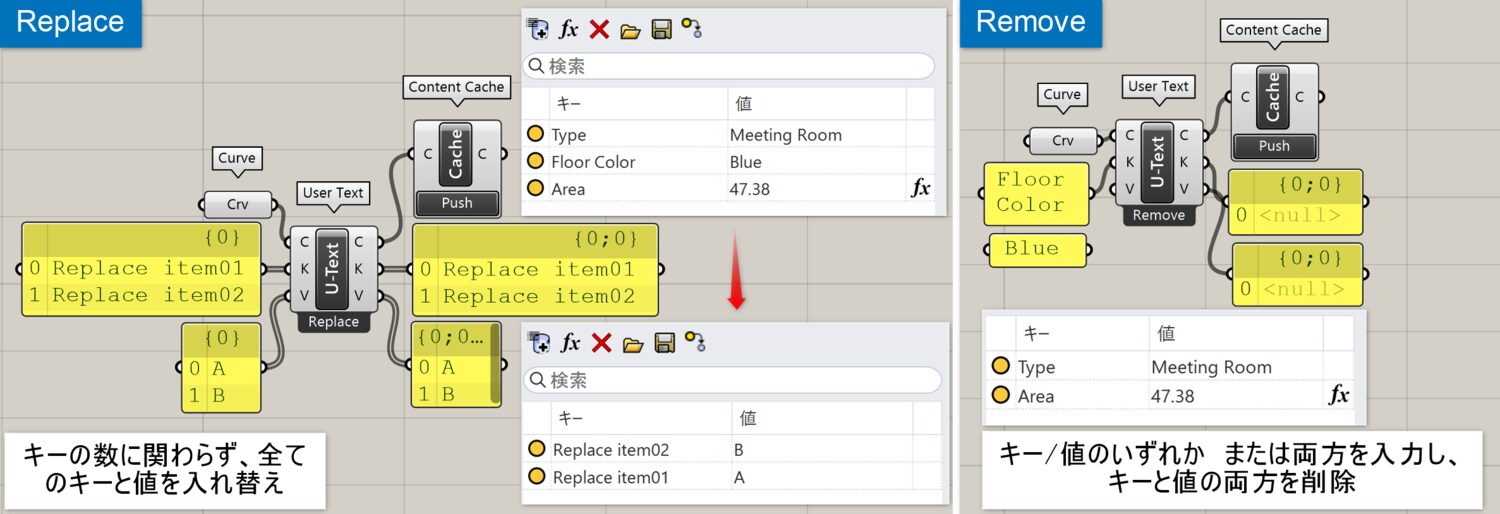
詳細2:[User Text]の5つの右クリックオプション(Ensure/Updeate/Merge/Replace/Remove)とその使用例。(デフォルトはMerge)
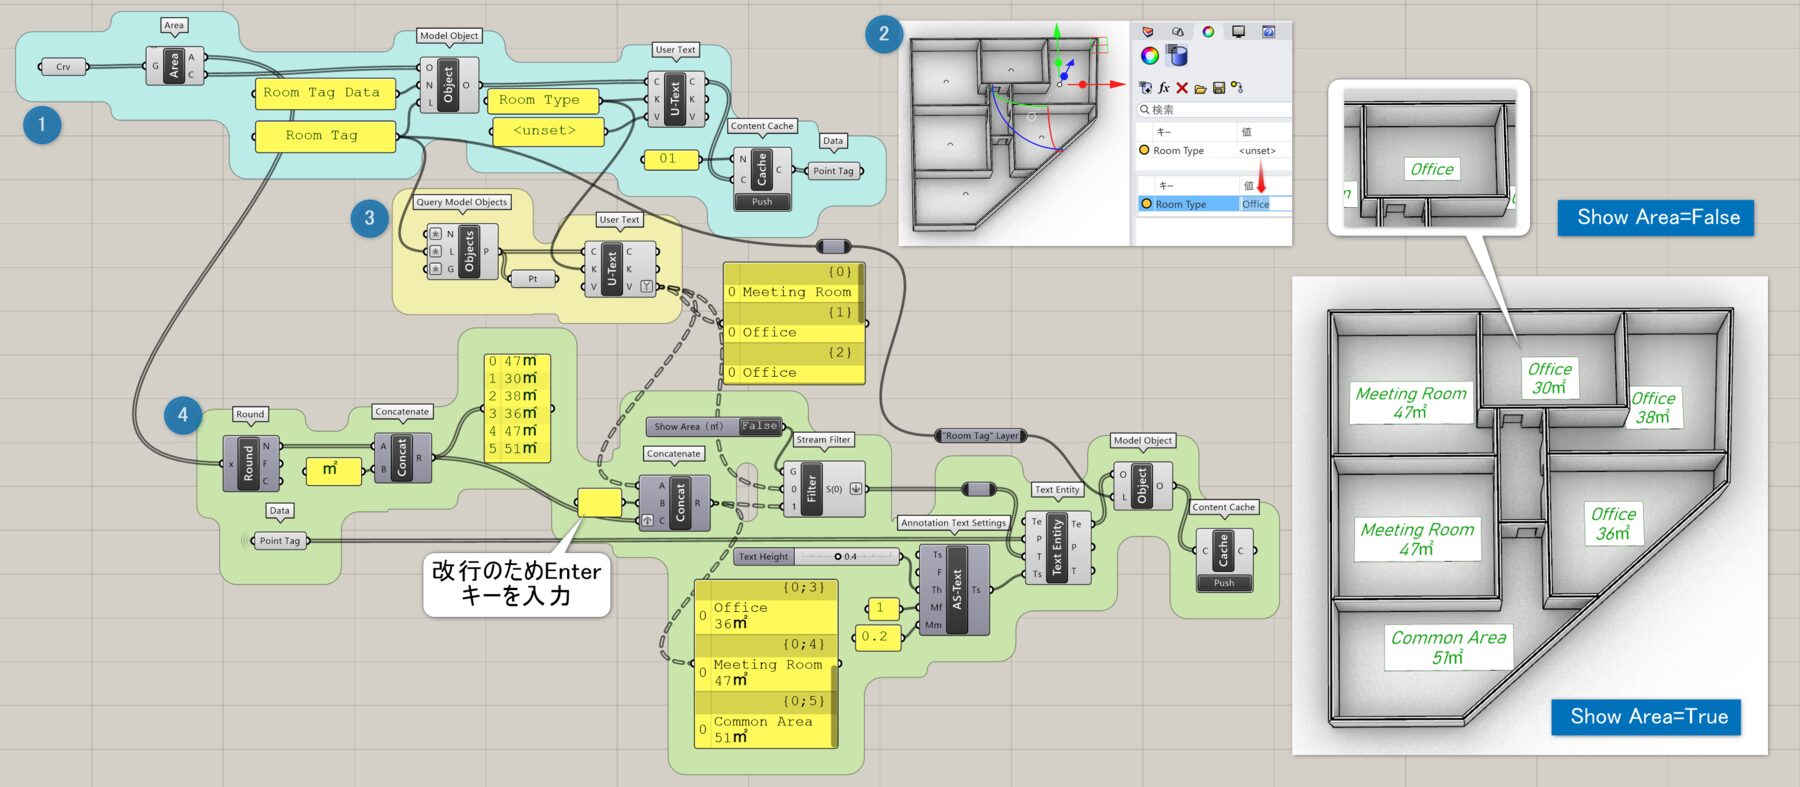
詳細3:[User Text]を使用した、テキストラベル作成のワークフローの一例。
①各部屋の中心にポイント(タグ)を設置し、そこに値は空のキー(Room Type)を[Uset Text]で割り当てベイク
②Rhino側で各部屋の値を入力
③[Query Model Object]と2つ目の[User Text]を使用して値を抽出
④[Text Entity]を使用してラベル化、[Stream Filter]で各部屋の面積の表示/非表示を切り替えられるようにしている。
Filter Content
B
Rhino>Content
フィルタリングしたいデータ(Content)とフィルタ(Filter)を入力することで、条件に合うデータのみを出力する。
フィルタの作成には、以下の[~ Filter]コンポ―ネントを用いる。
詳細1:[Import Content]や[Query Model Objects]などのコンポーネントで、入力時に名前やレイヤでフィルタをかける事も可能だが、[Filter Content]は各種「〜Filter」コンポーネントと組み合わせ、指定したModel Attribute Key(属性キー)に基づいてフィルタをかける場合に使用。図は、①[Equality Filter]と組み合わせ、User Text:Room-Typeの種類ごとに抽出②[Contains Text Filter]と組み合わせ、指定したマテリアルが適用されている部屋を抽出した例。また、オプション端子を追加する事で、読み込むアイテム数に制限をかけたり(Limit入力)、読み込んだアイテム数を表示(Count出力)する事も可能。
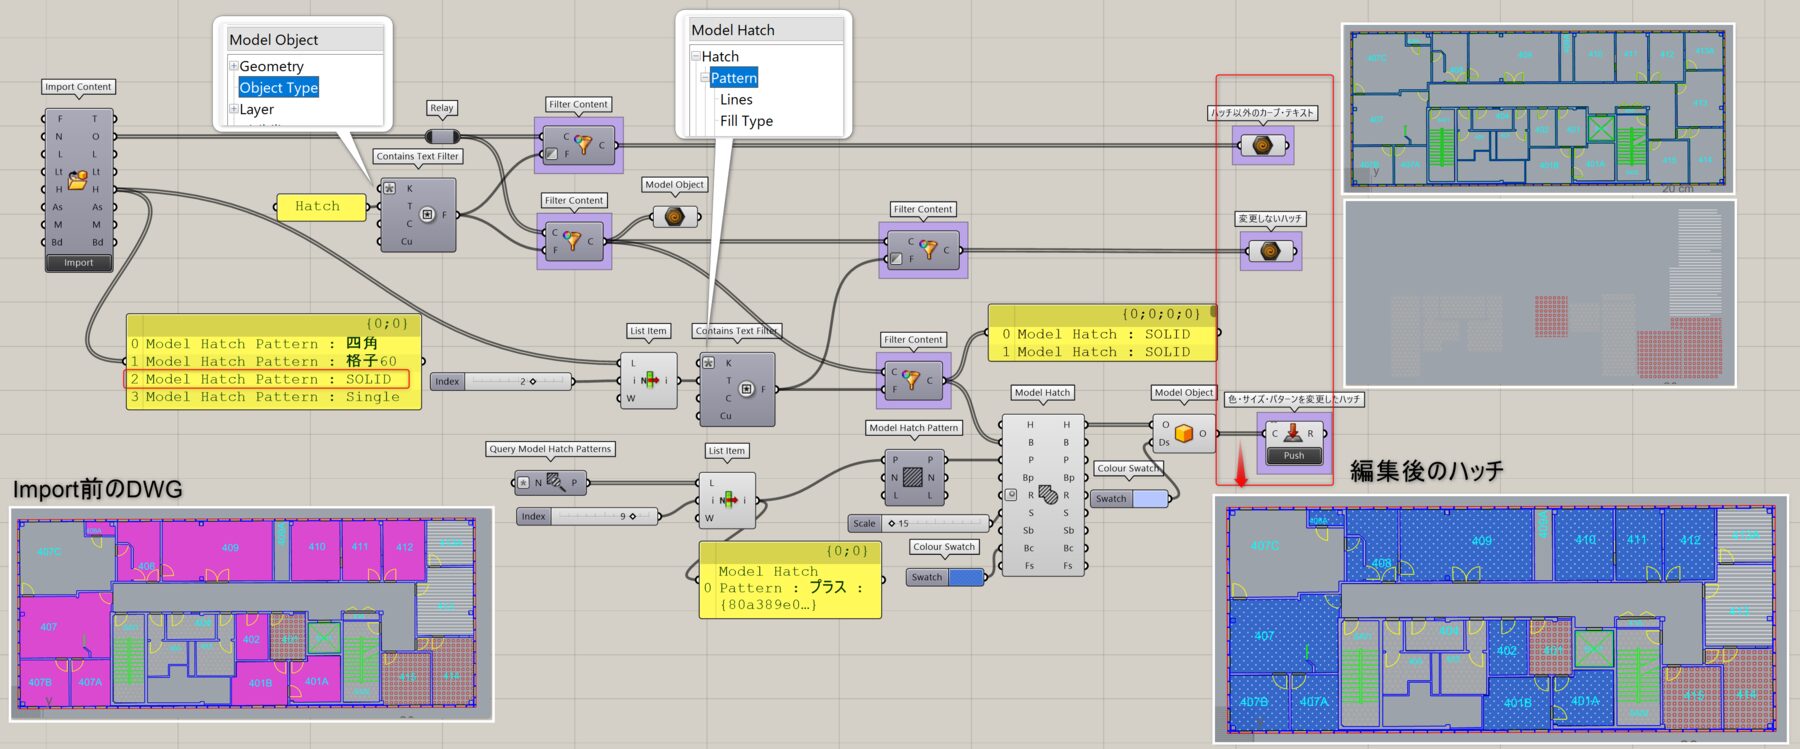
詳細2:[Import Content]で読み込んだDWGを、1つめの[Filter Content]と[Contains Text Filter]でハッチオブジェクトとそれ以外の曲線やテキストに分別し、2つめの[Filter Content]と[Contais Text Filter]で指定したハッチパターンのみ(ここではSOLID)を抽出後、そのハッチに対して[Model Hatch]や[Model Object]でハッチパターン、色、サイズ等を変更した例。[Filter Content]のInvertオプションを使用して、フィルタ抽出したものとそれ以外のオブジェクトに選り分けている。
Group Content
B
Rhino>Content
グループ化したいデータ(Content)と対象となるキー(Key)を入力することで、キーごとに階層化したデータとその値(Values)を出力する。
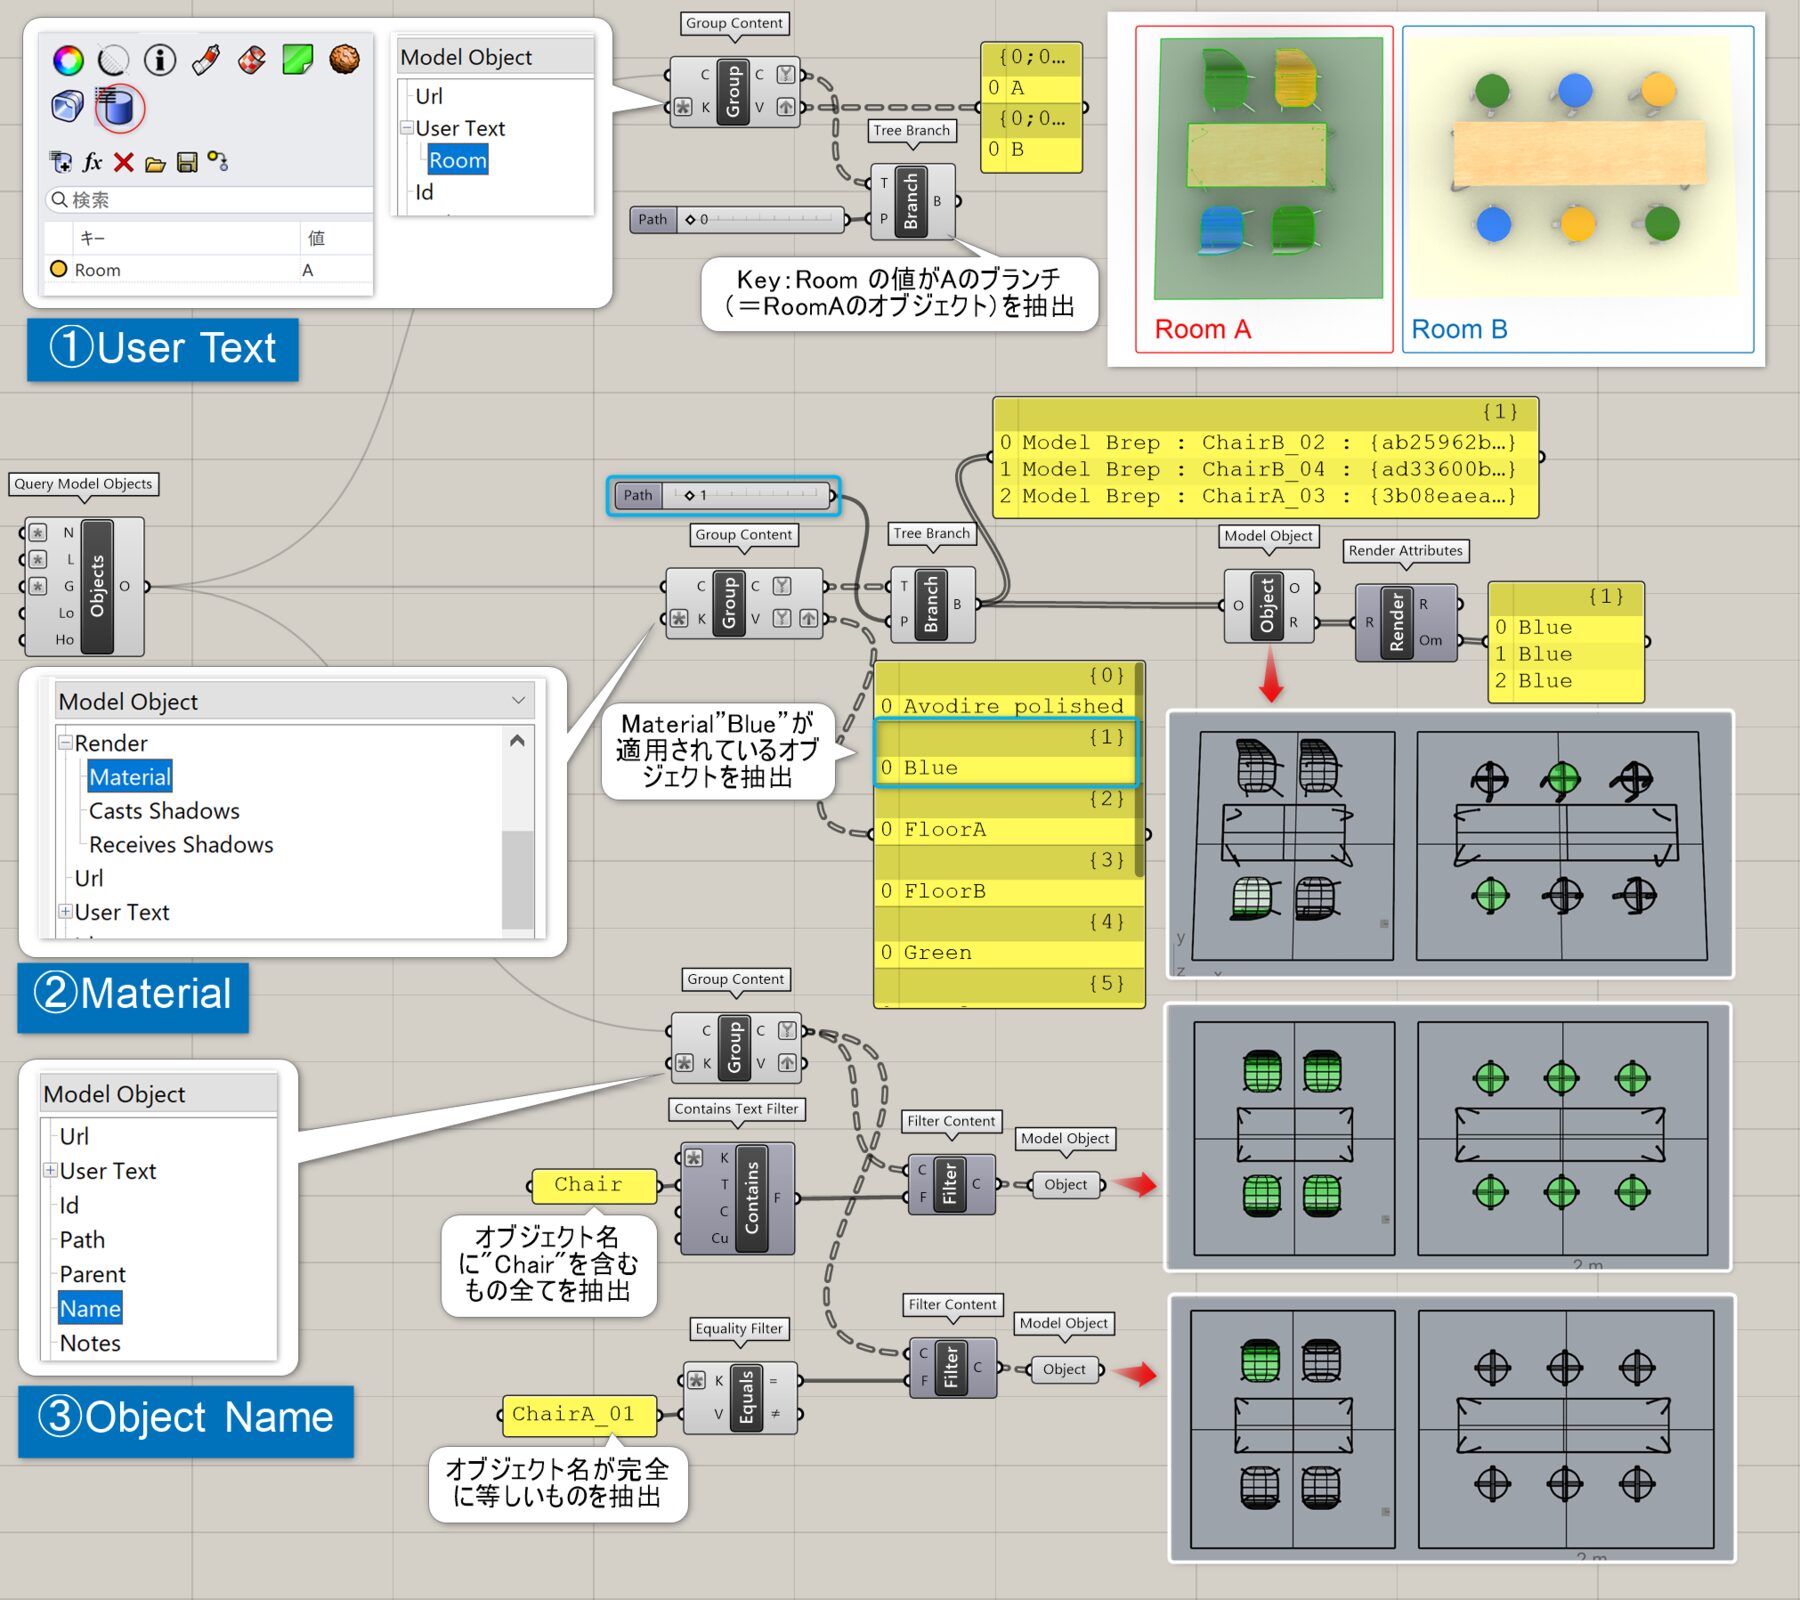
詳細1:[Group Content]で各種Key情報ごとに階層化したものを出力した例。
①User Text:キーにRoom、値にAとBを設定し、Room:Aのオブジェクトのみ[Tree Branch]で抽出
②Material:適用したマテリアルごとに階層化、「Blue」マテリアルが適用されているオブジェクトを抽出
③Object Name:オブジェクト名ごとに階層化、更にフィルタをかけるため、[Contains Text Filter]を使用して入力したテキストを含むオブジェクト名を、[Equality Filter]を使用して入力した名前に完全にマッチするオブジェクトを抽出
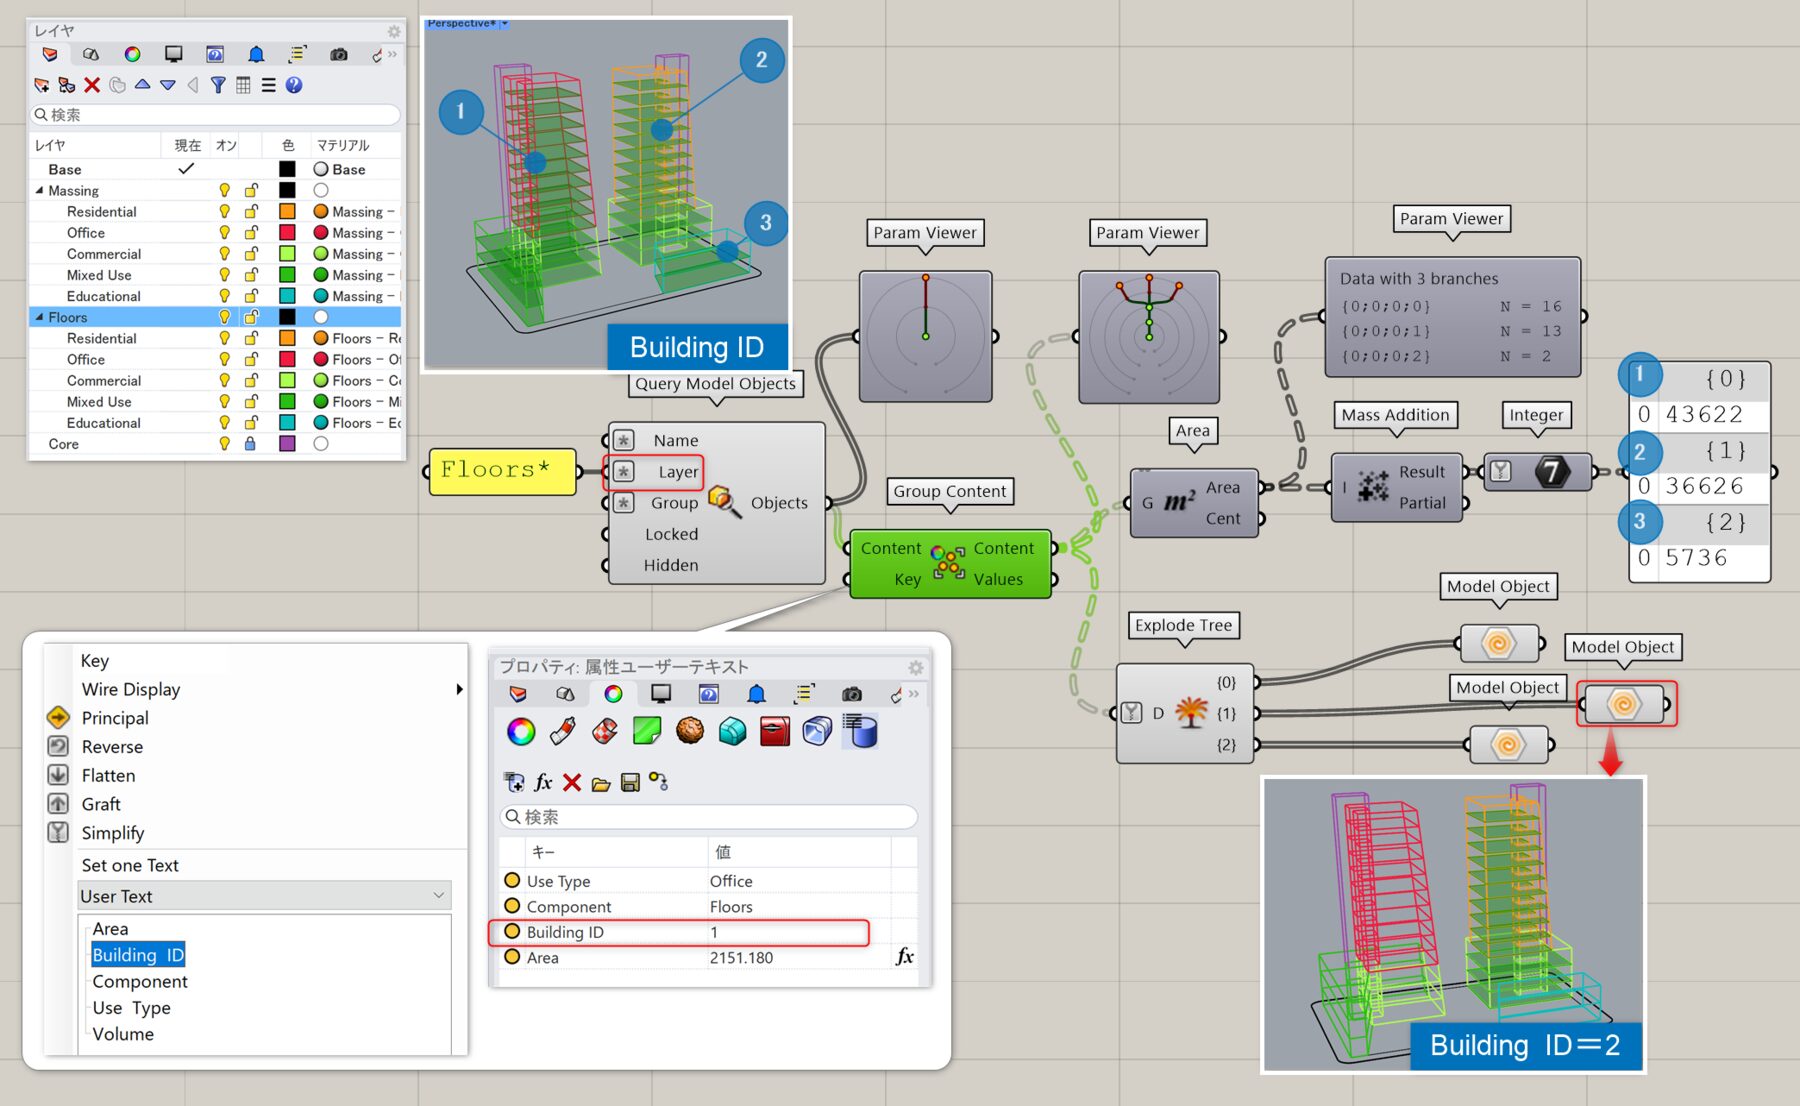
詳細2:[QueryModel Object]にて全ての建物のFloorを一括で読み込み後、[Group Content]でKey情報を各建物ごとに設定済みのIDに指定して階層化し、建物ごとの床面積を算出した例。
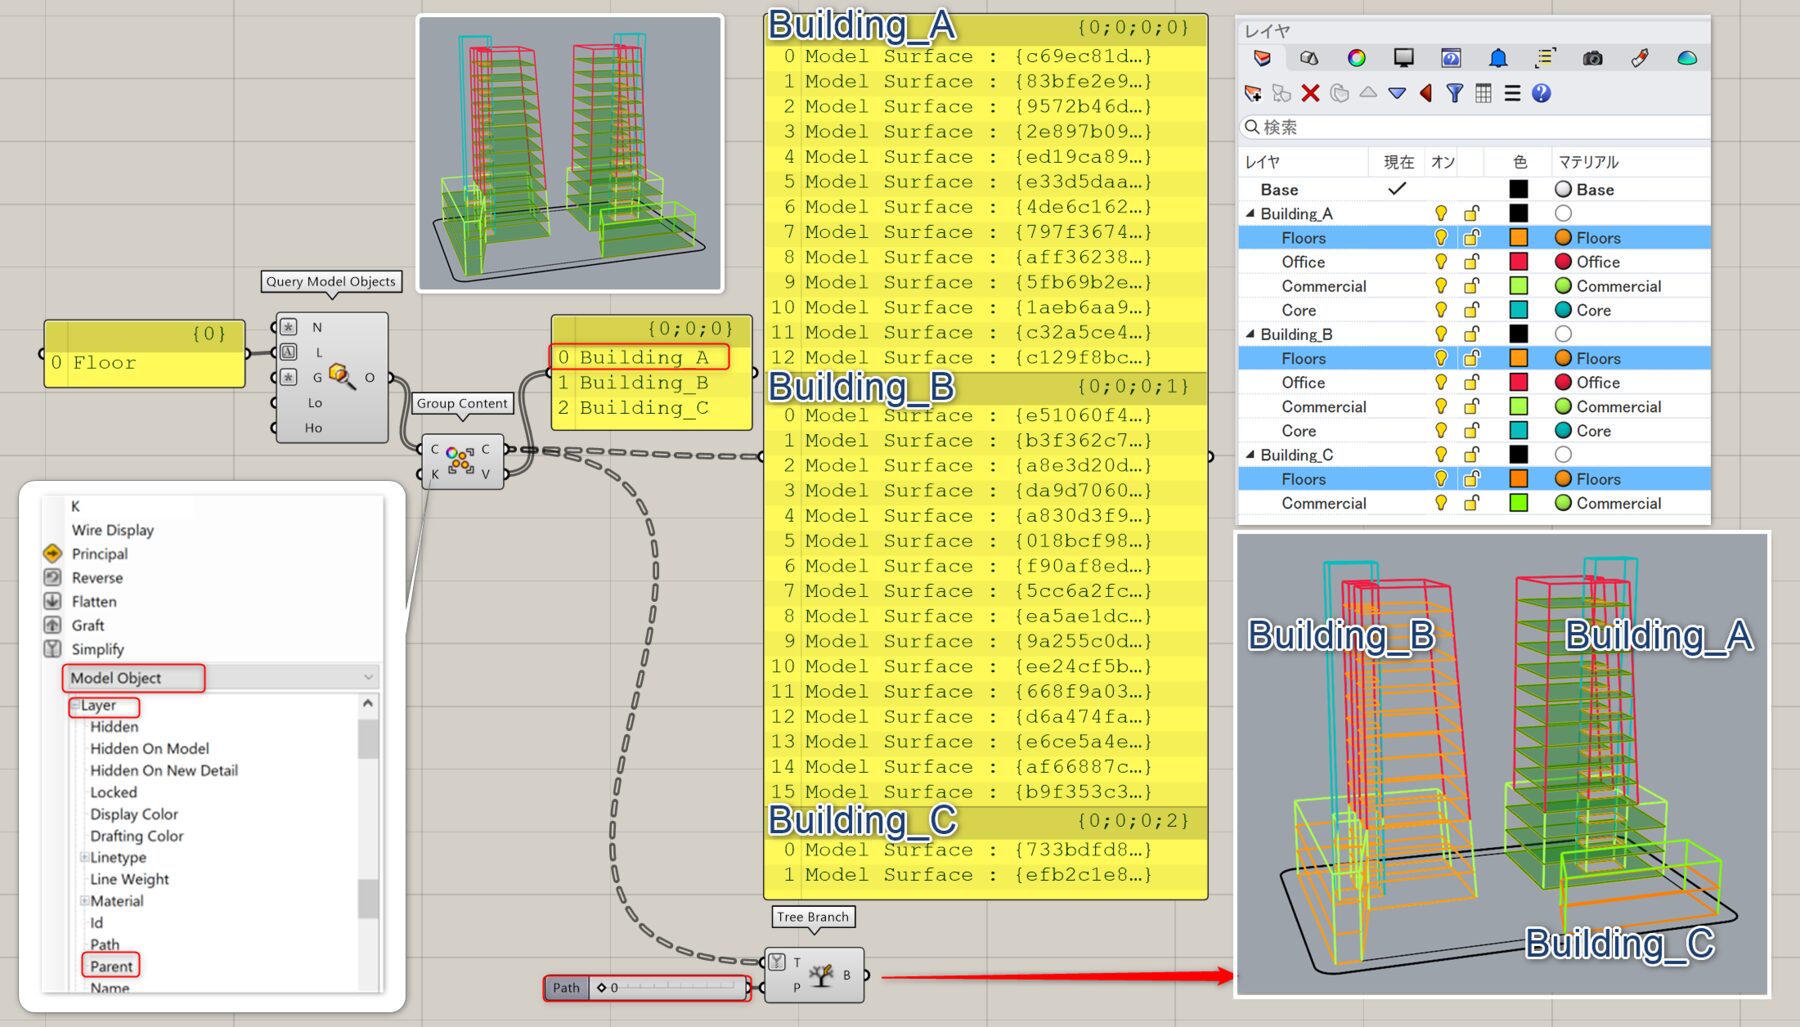
詳細3:異なる親レイヤに同名の子レイヤをもつ場合、[Query Model Object]で子レイヤの名前(ここではFloor)でフィルタリングして読み込み後、[Group Content]で親レイヤ名をKey情報として(Layer>Parent)階層化した例。最後に、[Tree Branch]で「Building_A」のFloorのみを抽出している。
Order Content
B

Rhino>Content
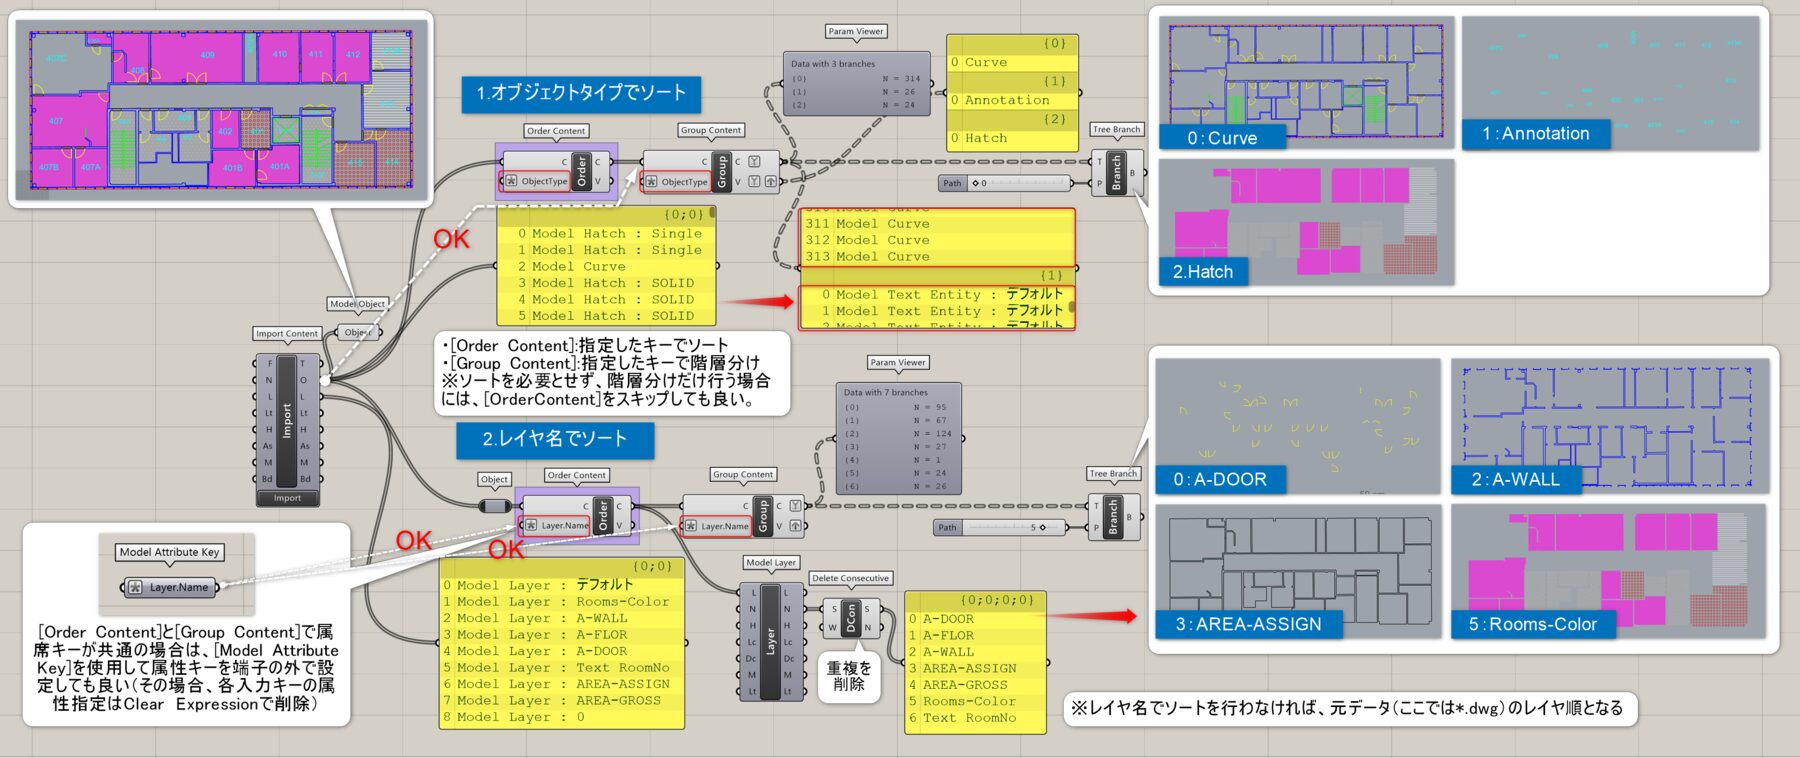
順番を変更したいデータ(Content)と対象となるキー(Key)を入力することで、キーごとに順番をソートしたデータとその値(Values)を出力する。
詳細1:[Import Contents]で読み込んだDWGファイルの要素を、[Order Content]を使用して1.オブジェクトタイプ 2.レイヤ名 の各属性キーにて並べ替えをした例。ここでは、同じ属性キーを使用して[Group Content]を適用し、並べかえたデータを種類ごとに階層分けして[Tree Branch]で抽出している。※ソートしたレイヤ名を確認するため、[Model Layer]を経由してレイヤ名を抽出後、[Delete Consecutive]で重複を削除している。
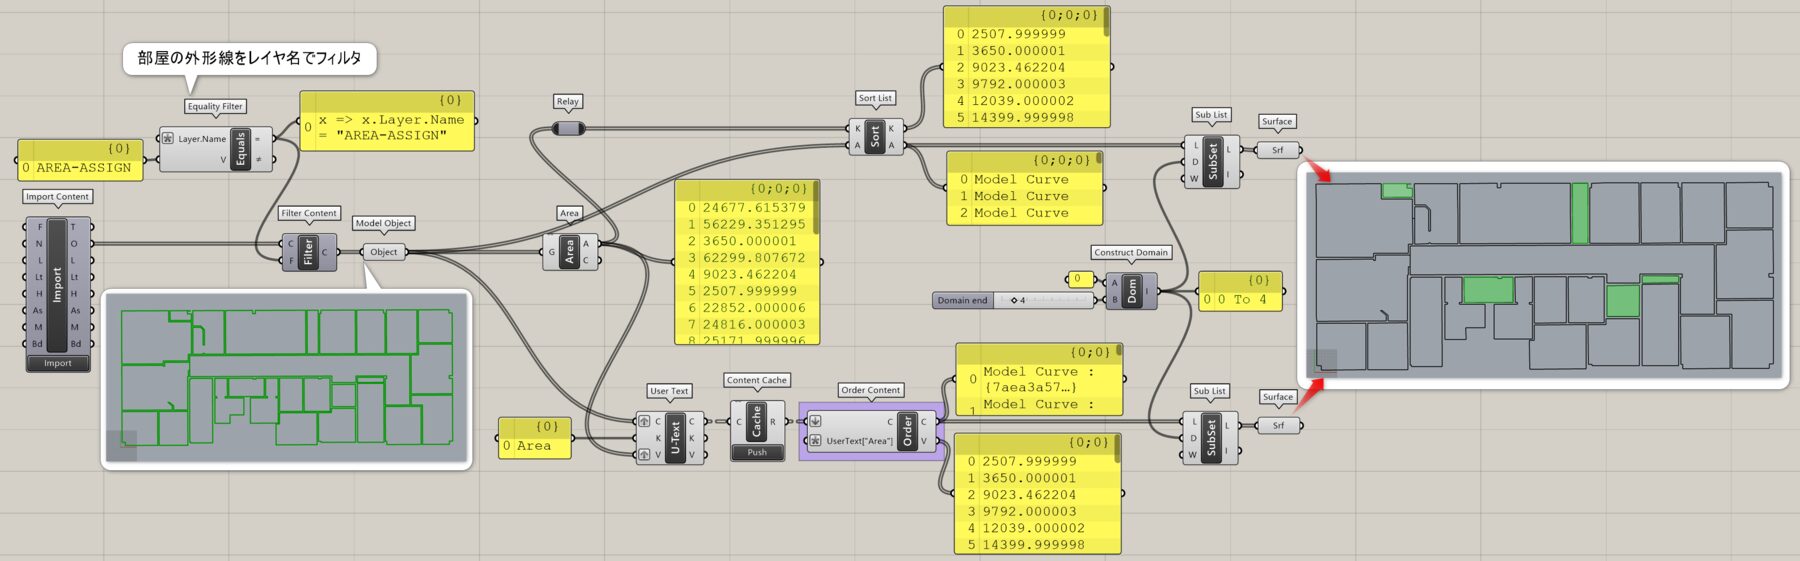
詳細2:図は、[Import Contents]で読み込んだDWGから部屋の外形線レイヤのみを[Equality Filter]で選別後、その面積を小さい順から5つ抽出した例。面積を使用してソートするだけであれば[Order Content]ではなく[Sort List]を使用可能。図の下部は[Order Content]の属性キーを使用するため、[User Text]で各部屋の曲線に「Area」キーを割り当てベイク後、それを使用してソートした例。
Equality Filter
B
Rhino>Content
キー(Key)と値(Value)を入力し、等しい(Equal)、または等しくない(Unequal)というフィルタ(Filter)を作成する。
詳細1:[Equality Filter]の属性キー(右クリックで指定)と値(Value)入力で指定した値が等しい(または等しくない)フィルタを出力。図では、属性キーにオブジェクト名とレイヤ名を指定し、[Equality Filter]から出力したフィルタを[Filter Content]を経由して、入力コンテンツから指定したオブジェクトをそれぞれ抽出した例。
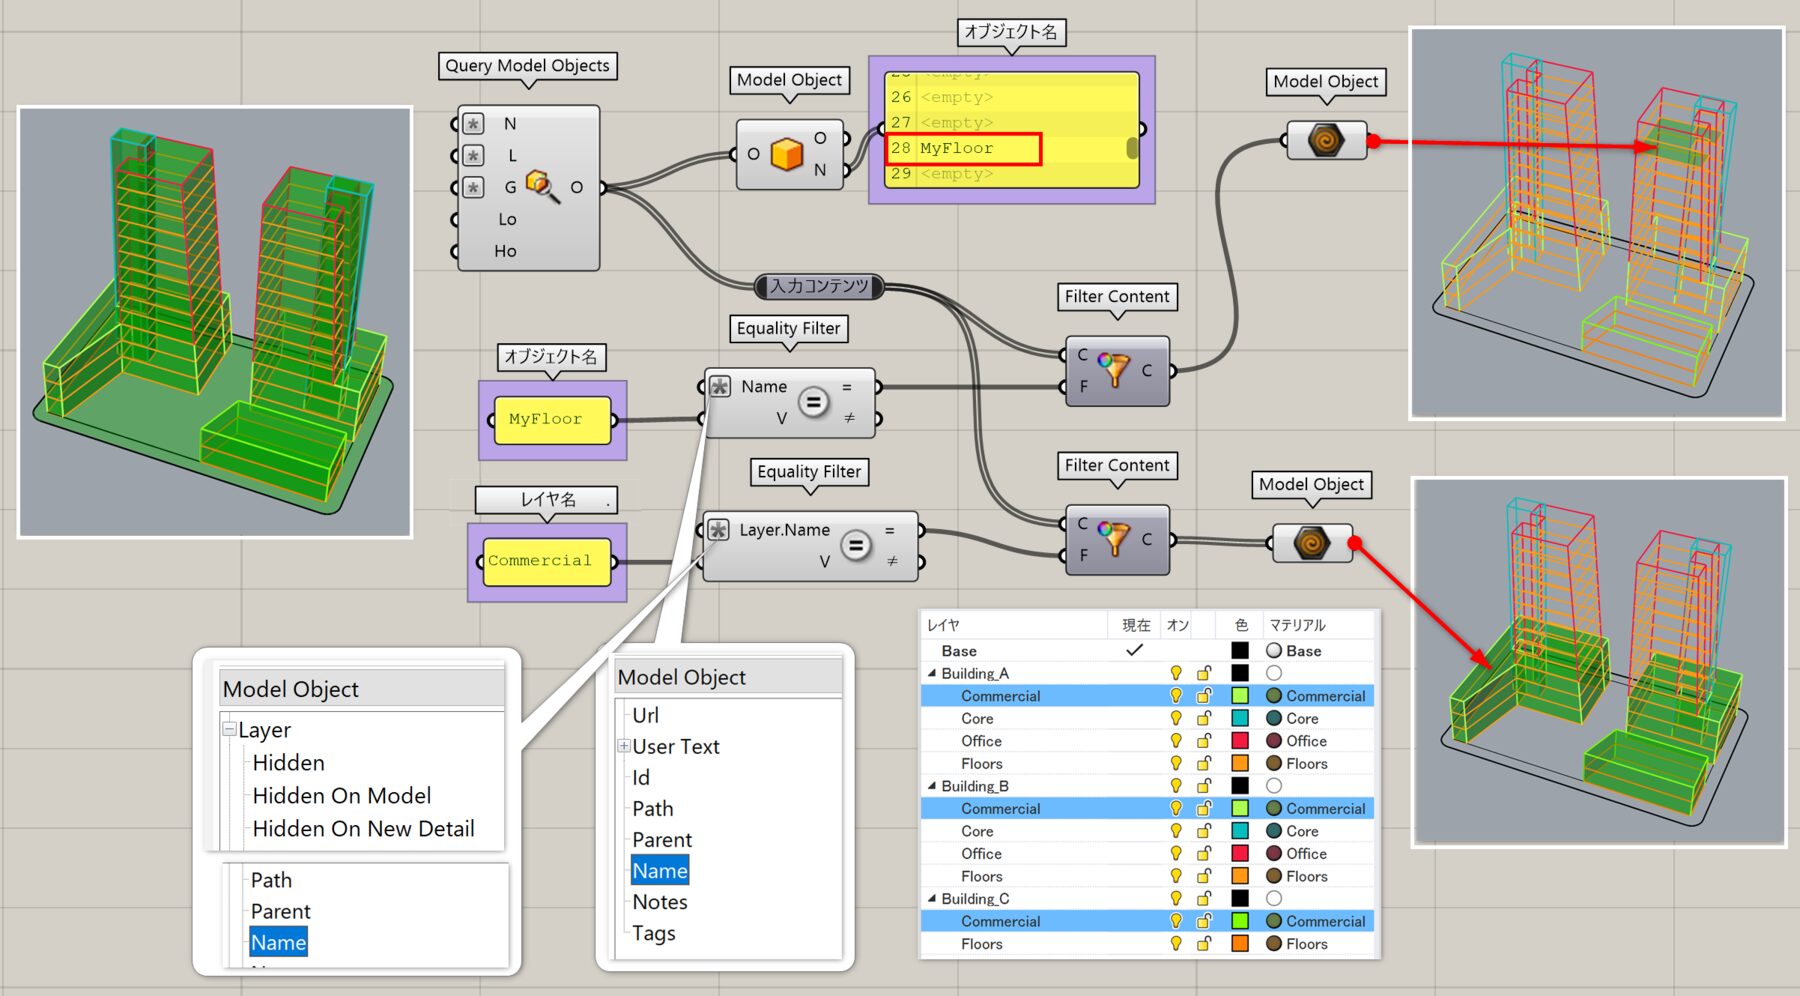
詳細2:[Equality Filter]使用時に[Filter Content]コンポーネントがデータ不足(オレンジ色)になる場合がある(フィルタとしては機能する)。理由として入力コンテンツ内に[Equality Filter]で指定したキーが割り当てられていないコンテンツが存在する場合が挙げられる。上図は、キーが存在しないオブジェクトのみを抽出するため、オブジェクトIDを利用して[Content Details]と[Match Text Filter]で問題を解消した例。下図は、[User Text]にてキーを抽出後、[Match Text][Mass Addition]、[Cull Pattern]のInvertオプションを使用してキーの存在しないオブジェクトを選別している。
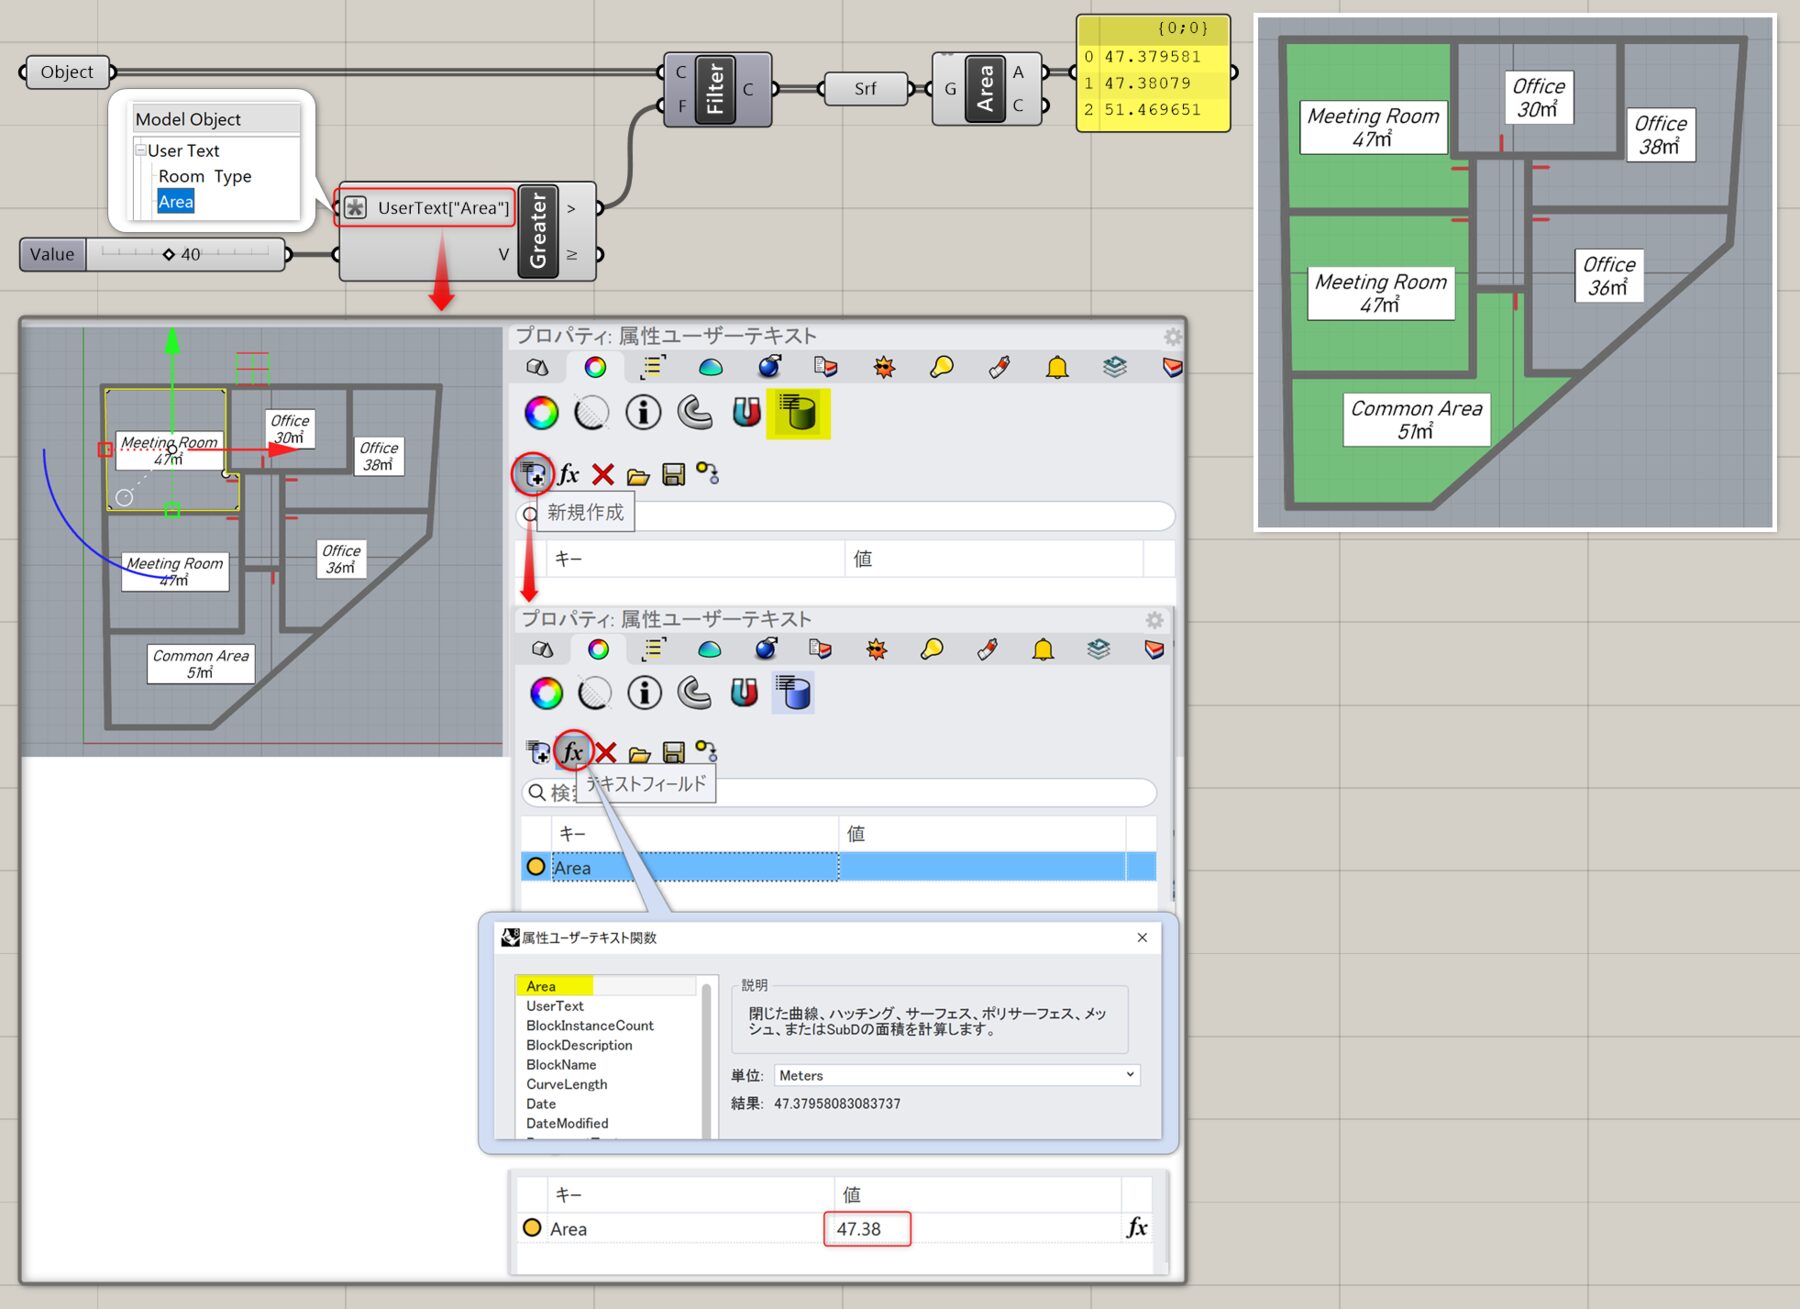
Greater Than Filter
B
Rhino>Content
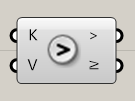
キー(Key)と値(Value)を入力し、より大きい(Greater than)、またはそれ以上(… or Equal)というフィルタ(Filter)を作成する。
詳細1:属性キー(Key)と値(Value)を入力し、より大きい、またはそれ以上というフィルタを作成する。
図は、部屋の曲線に対して設定したUser Text:Areaに指定した値より大きい部屋を抽出した例。
※Filter Contentに[Greater Than Filter]を適用する際、直接フィルタに[Area]の数字リスト等を入力する事はできないため、ジオメトリに紐づく「ユーザー定義の属性」(User Text)を使用する必要がある。ここでは、予め対象オブジェクトの属性ユーザーテキストに[Area]属性キーを設定しておき、その数値を使用してフィルタをかけている。
Intersection Filter
B
Rhino>Content
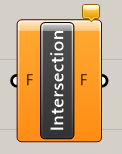
フィルタ(Filters)を複数入力し、入力条件の全てを満たすフィルタ(Filter)を作成する。
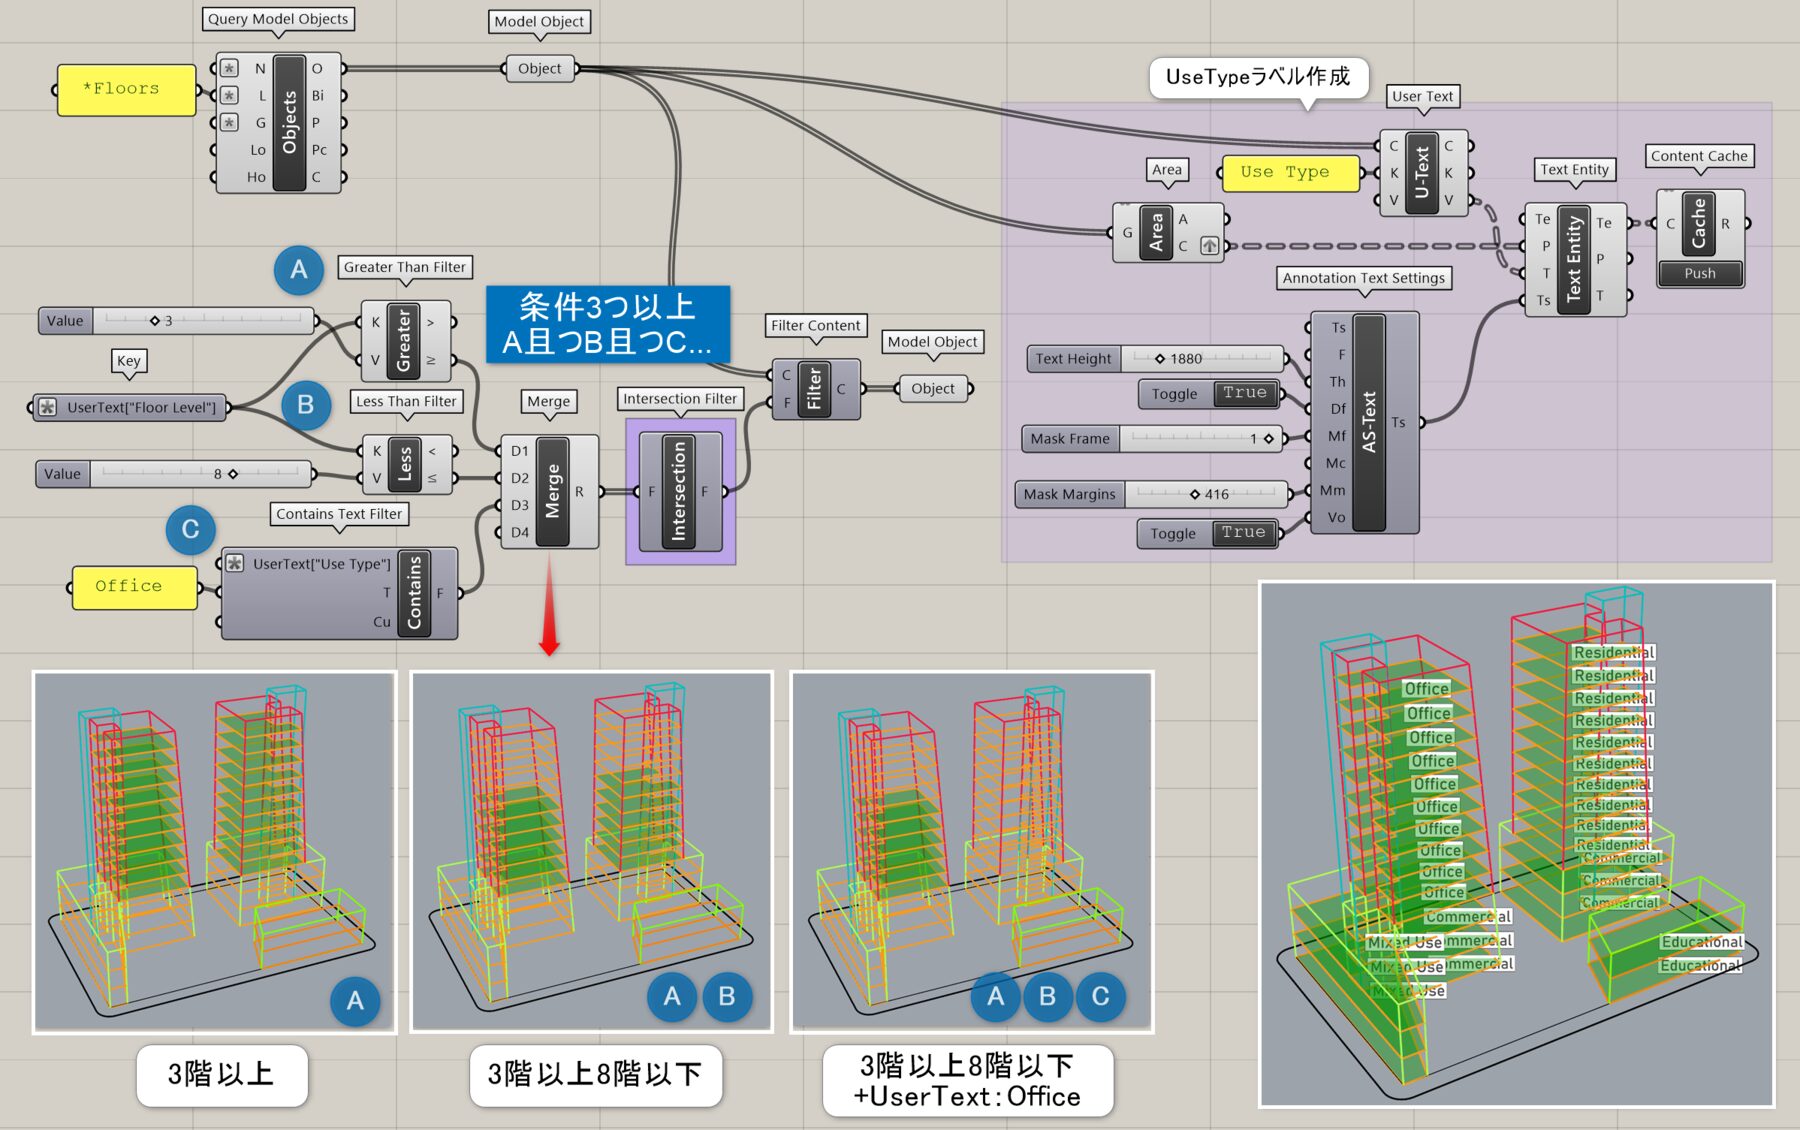
詳細1:入力した複数のフィルタの条件を全て満たすフィルタを作成する。[Logical And Filter]の入力は2つまでだが、[Intersection Filter]は3つ以上の場合にも使用可能。図は、[Query Model Objects]を使用してFloorオブジェクトを抽出後、[Intersection Filter]にフィルタA:[Grater Than Filter]で3階以上を指定 フィルタB:[Less Than Filter]で8階以下を指定 フィルタC:[Contains Text Filter]でUserTextにOfficeを含むオブジェクトを指定 の3つのフィルタを統合し、入力条件全てを満たすフロアを抽出した例。
Less Than Filter
B
Rhino>Content
キー(Key)と値(Value)を入力し、より小さい(Less than)、またはそれ以下(… or Equal)というフィルタ(Filter)を作成する。
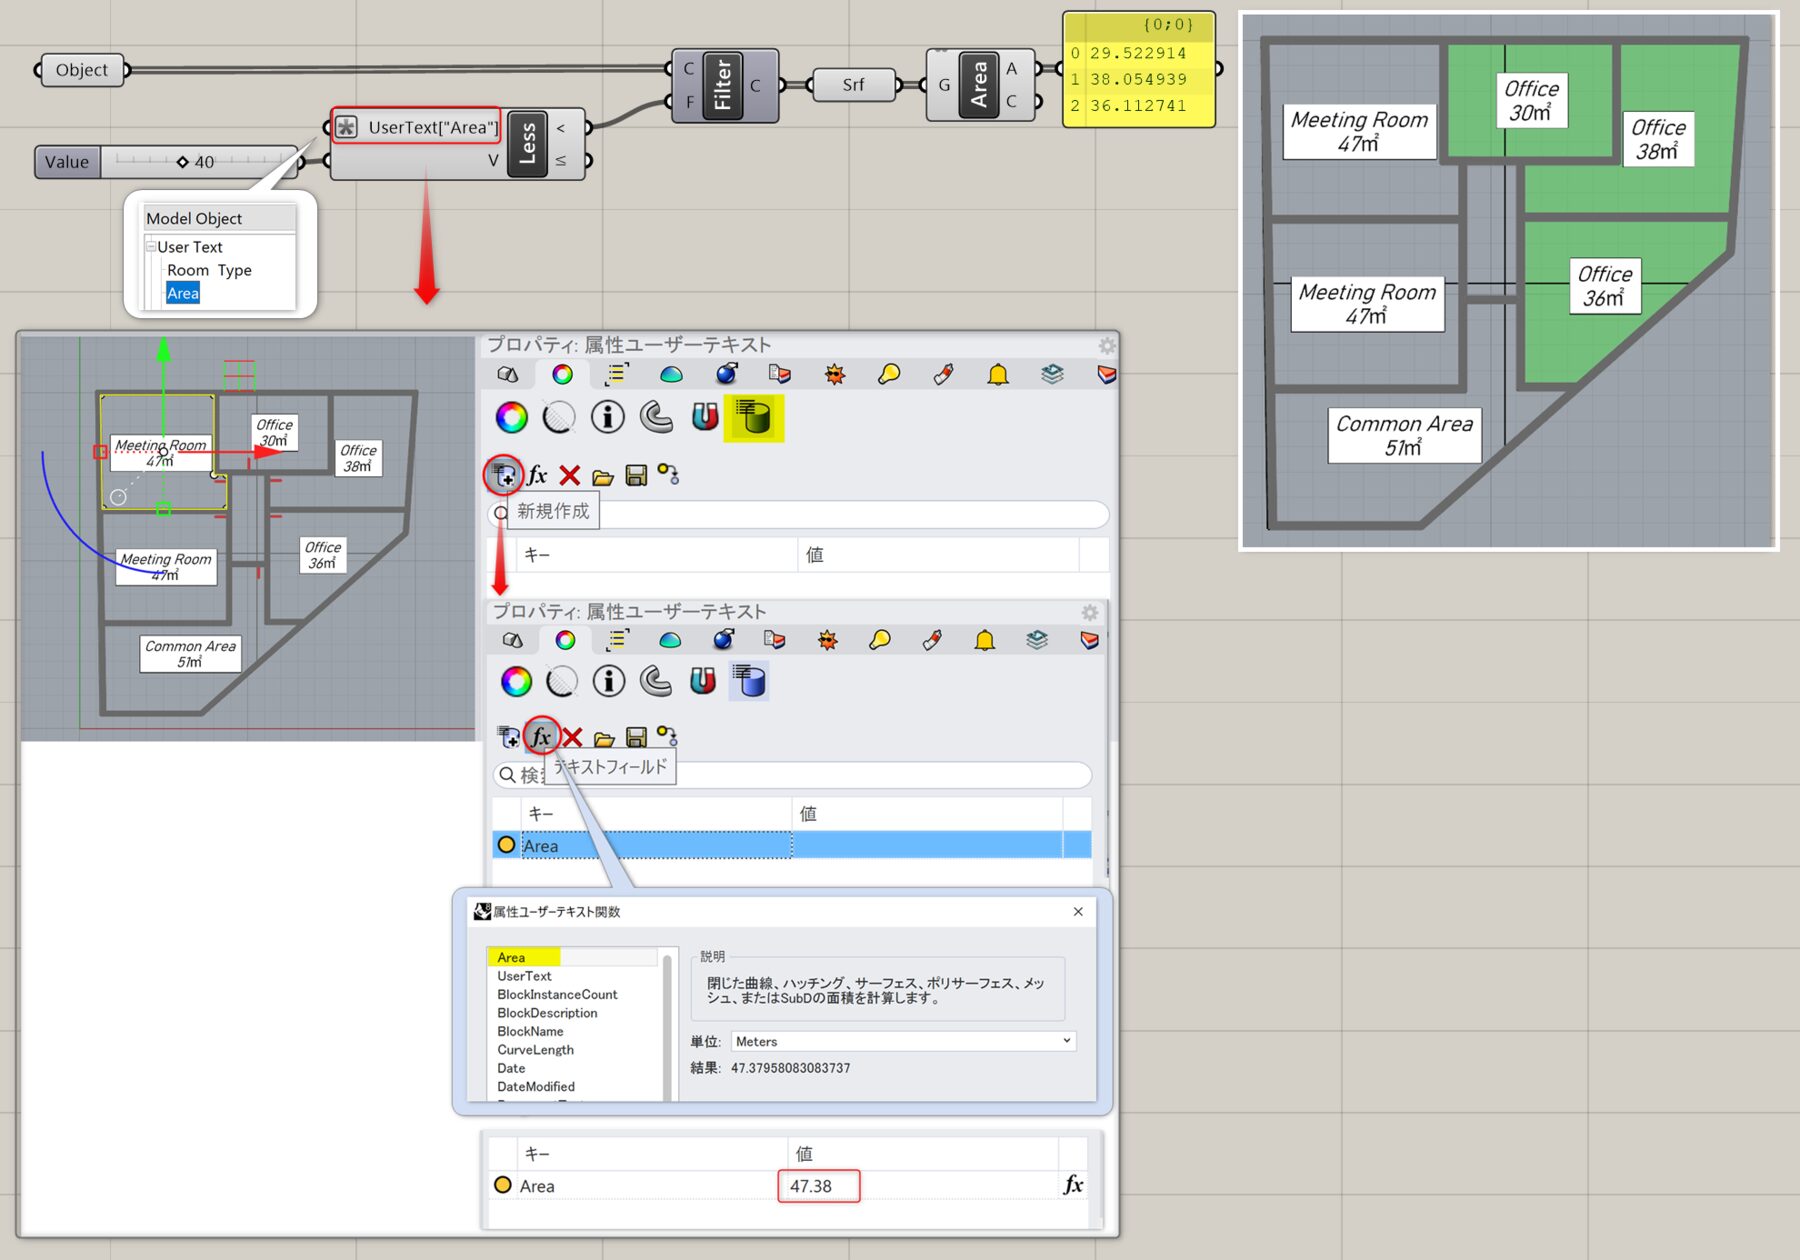
詳細1:属性キー(Key)と値(Value)を入力し、より小さい、またはそれ以下というフィルタを作成する。
図は、部屋の曲線に対して設定したUser Text:Areaに指定した値より小さい部屋を抽出した例。
※Filter Contentに[Less Than Filter]を適用する際、直接フィルタに[Area]の数字リストを入力する事はできないため、ジオメトリに紐づく「ユーザー定義の属性」(User Text)を使用する必要がある。ここでは、予めUser Textに[Area]属性キーを設定しておき、その数値を使用してフィルタをかけている。
Logical And Filter
B
Rhino>Content
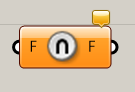
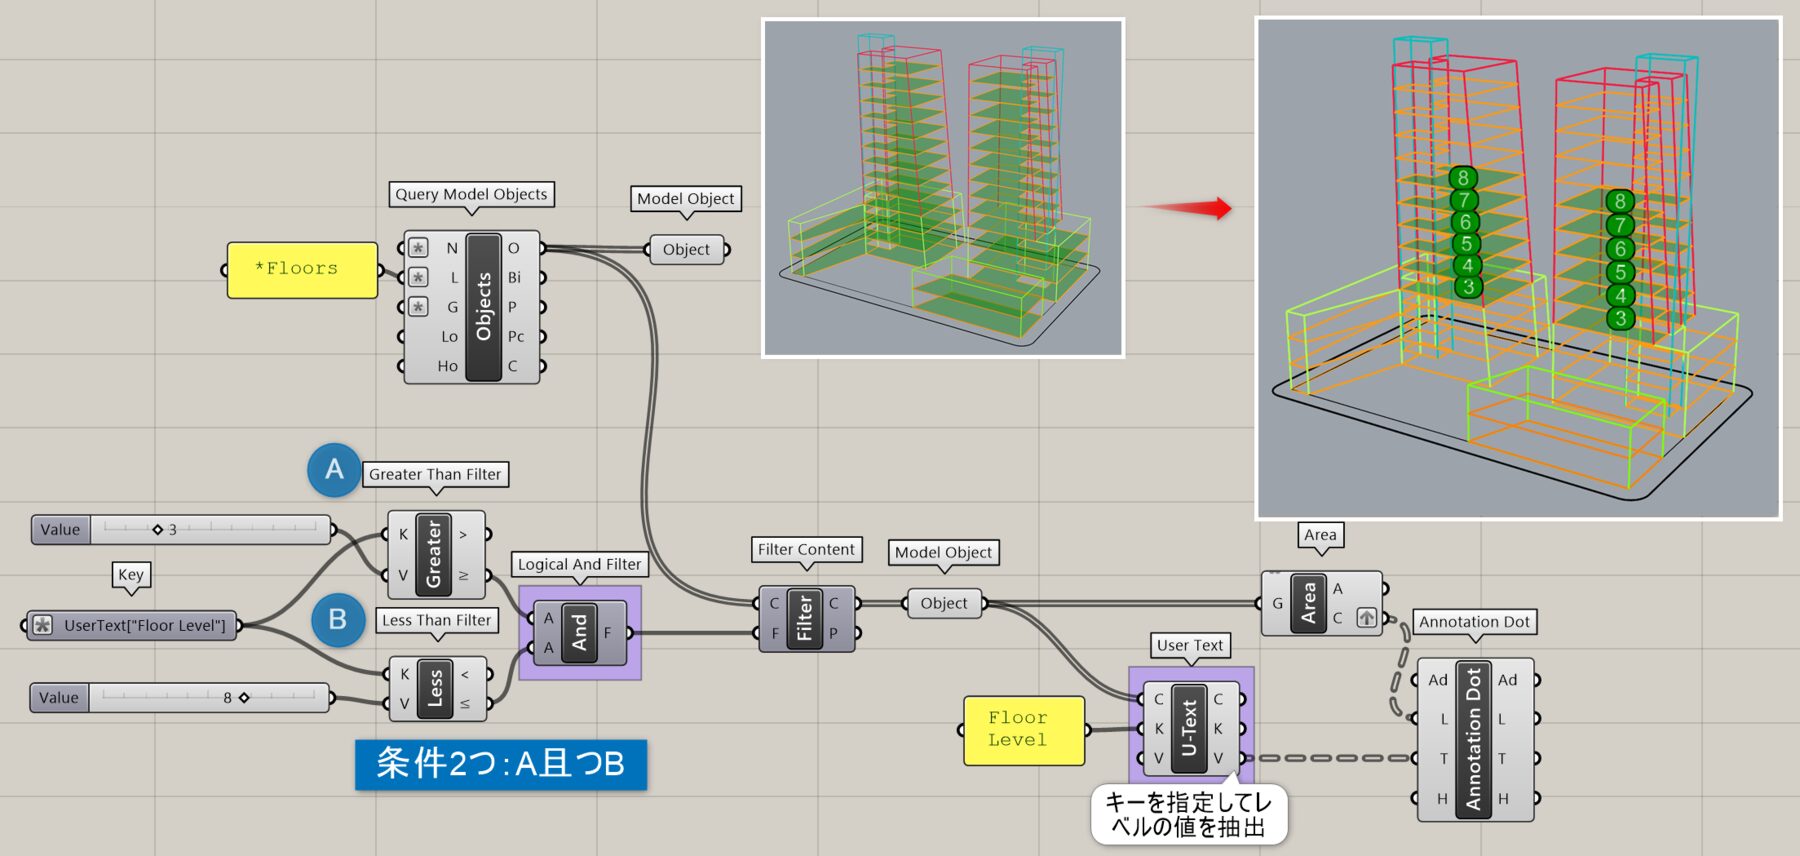
フィルタを2つ(Filter A, Filter B)入力し、両方を満たすフィルタ(Filter)を作成する。
詳細1:Filter AとFilter Bの条件を両方満たすフィルタを作成する。図は[Query Model Objects]を使用してFloorオブジェクトを抽出後、[Logical And Filter]でA且つBのフィルタ(フィルタA:[Grater Than Filter]で3階以上を指定 フィルタB:[Less Than Filter]で8階以下を指定)を作成し、3階以上8階以下のFloorを抽出した例。
Logical Not Filter
C
Rhino>Content
フィルタ(Filter)を入力し、反対の条件のフィルタ(Filter)を作成する。
Logical Or Filter
B
Rhino>Contents
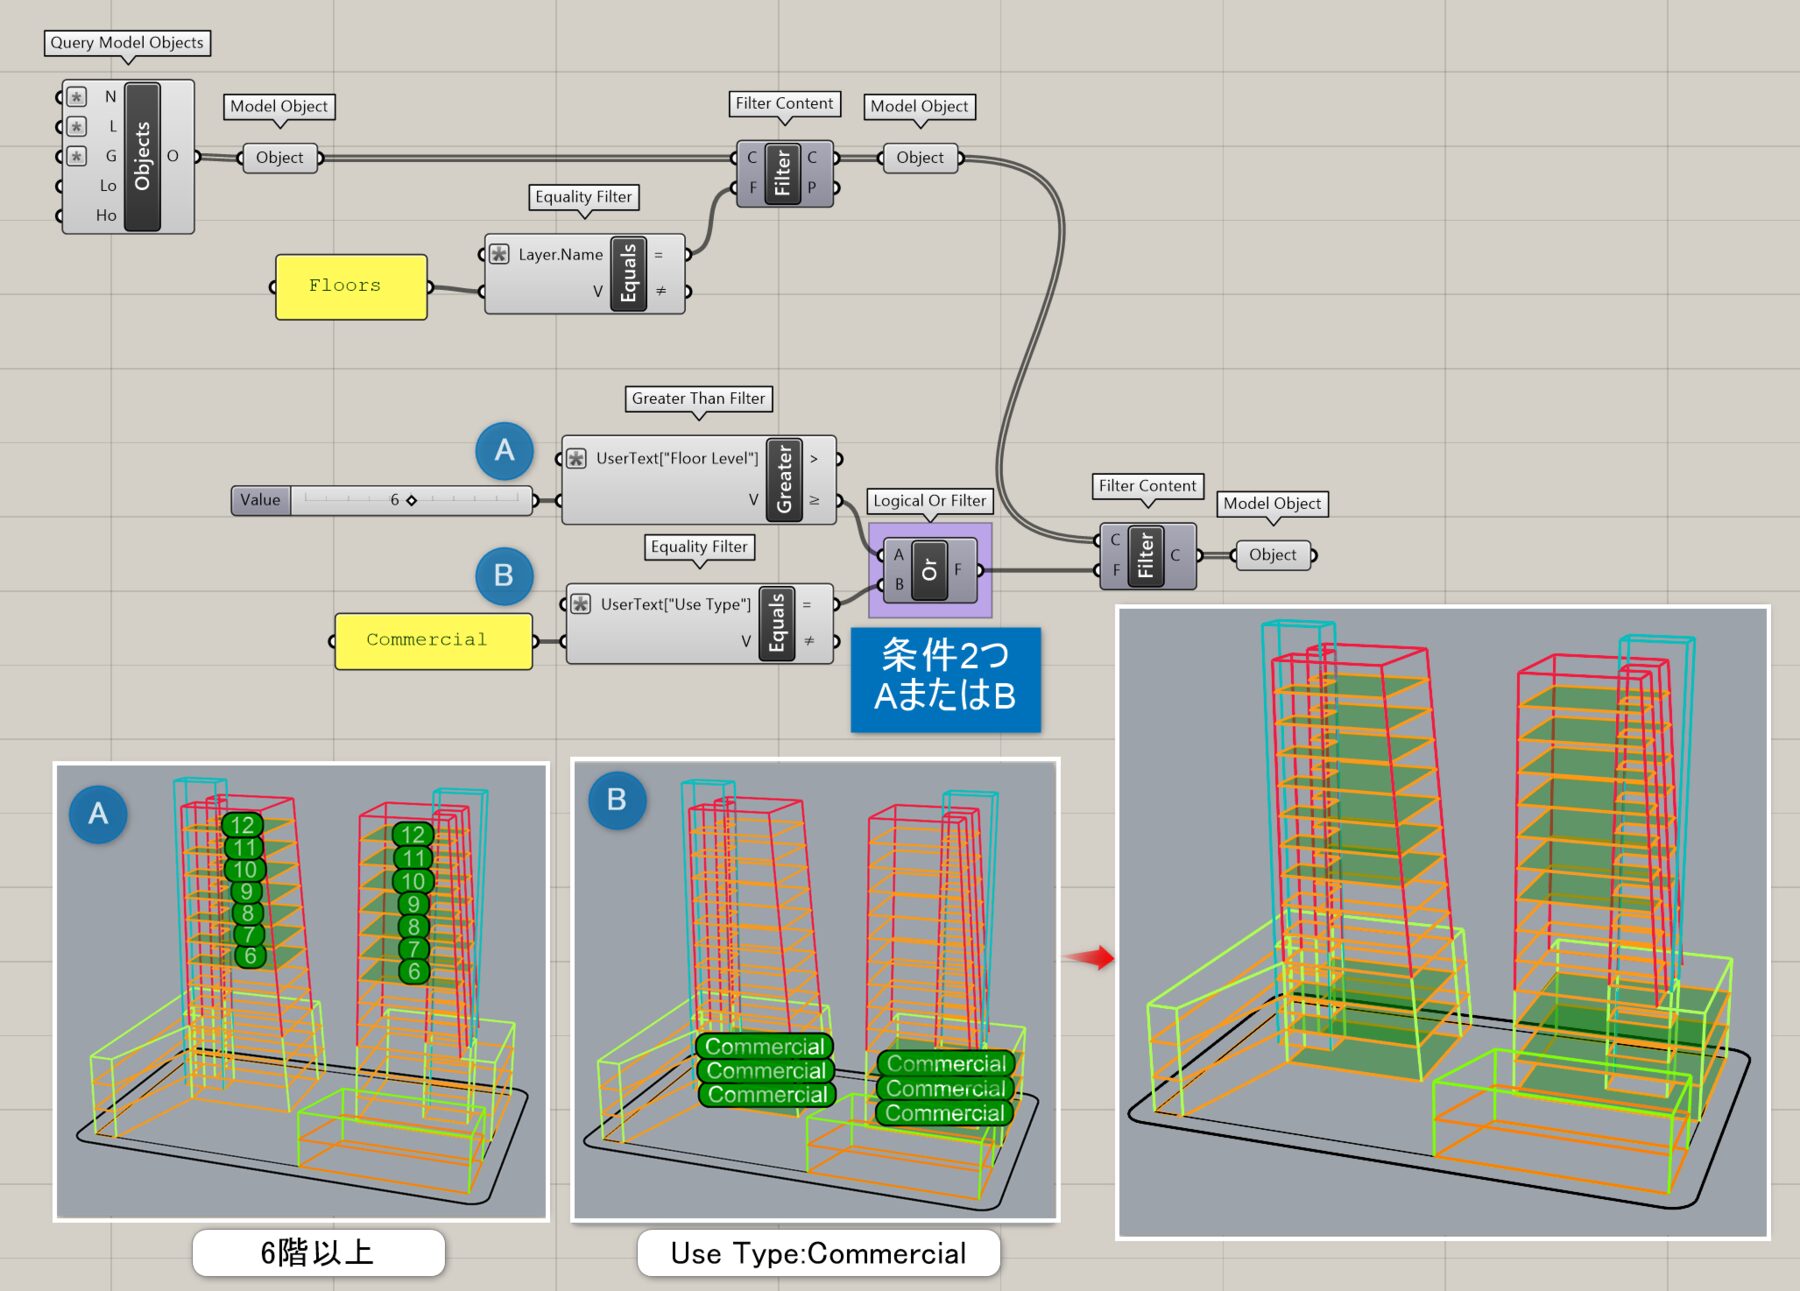
フィルタを2つ(Filter A, Filter B)入力し、どちらかを満たすフィルタ(Filter)を作成する。
詳細1:Filter AとFilter Bの条件をどちらか満たすフィルタを作成する。図は[Query Model Objects]を使用してFloorオブジェクトを抽出後、[Logical Or Filter]でAまたはBのフィルタ(フィルタA:[Grater Than Filter]で6階以上を指定 フィルタB:[Equality Filter]でUser Text/Use Type=Commercialを指定)を作成し、6階以上、またはUse Type=CommercialのFloorを抽出した例。
Union Filter
B
Rhino>Content
フィルタ(Filters)を複数入力し、入力条件のどれか1つでも満たす条件のフィルタ(Filter)を作成する。
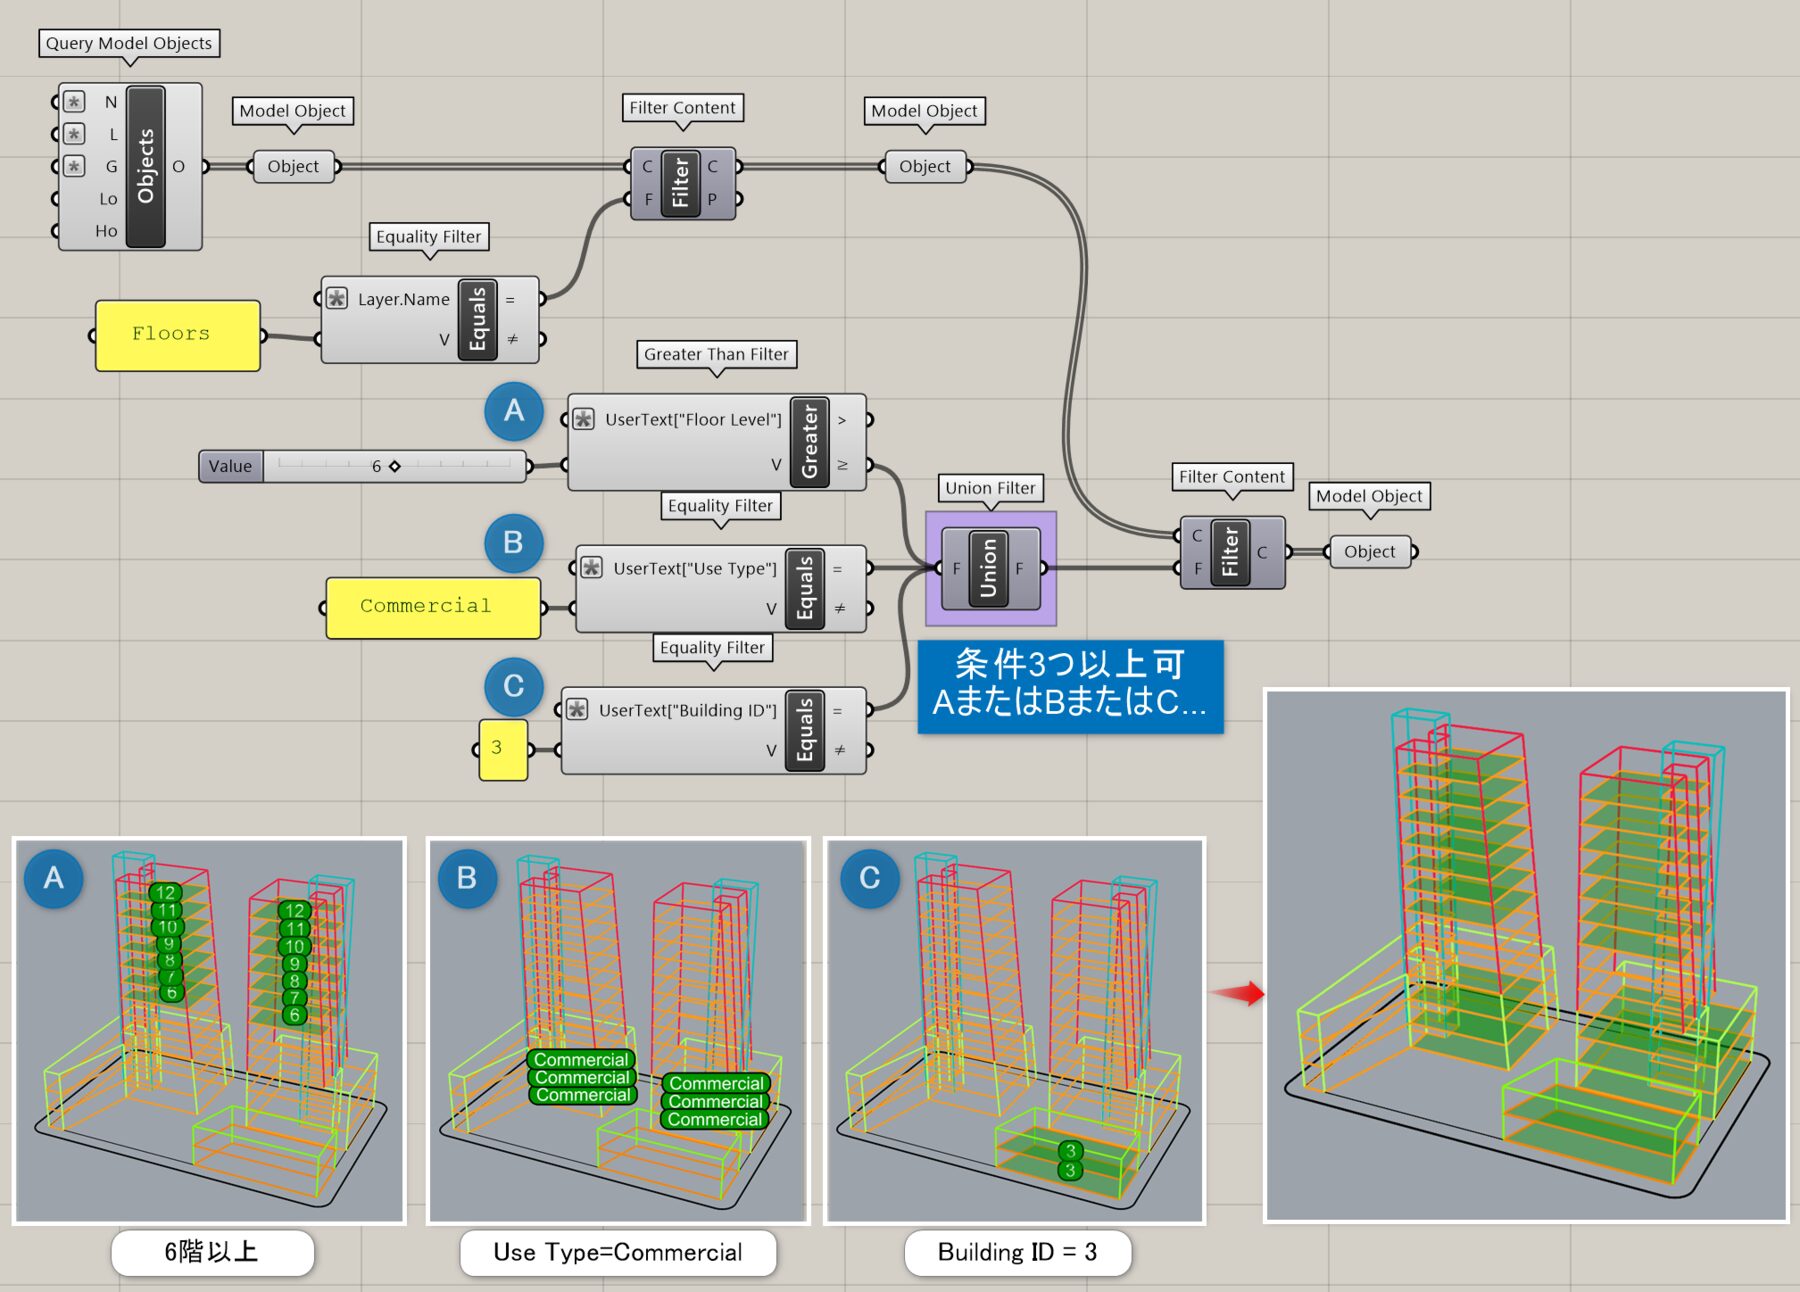
詳細1:入力した複数のフィルタの条件のいずれかを満たすフィルタを作成する。[Logical Or Filter]の入力は2つまでだが、[Intersection Filter]は3つ以上の場合にも使用可能。図は、[Query Model Objects]を使用してFloorオブジェクトを抽出後、[Union Filter]にフィルタA:[Grater Than Filter]で6階以上 フィルタB:[Equality Filter]でUser Text/Use Type=Commercial フィルタC:[Equality Filter]でUser Text/BuildingID=3 の3つを統合し、入力条件のいずれかを満たすフロアを抽出した例。
Contains Text Filter
B
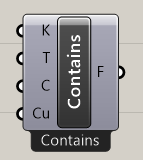
Rhino>Content
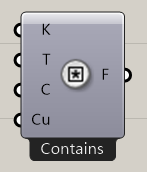
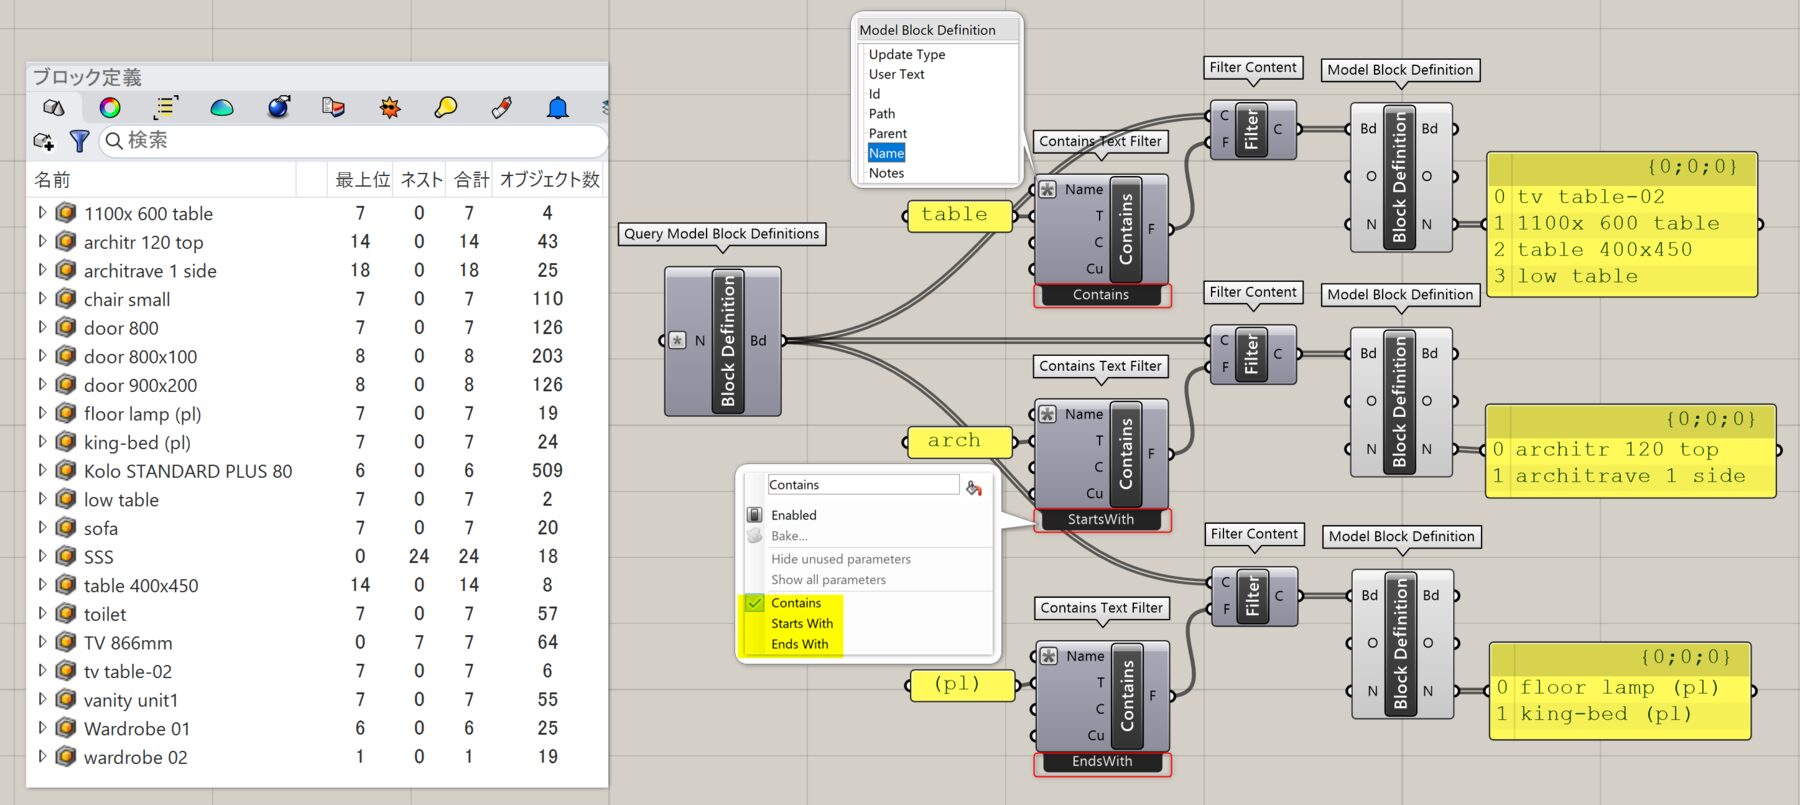
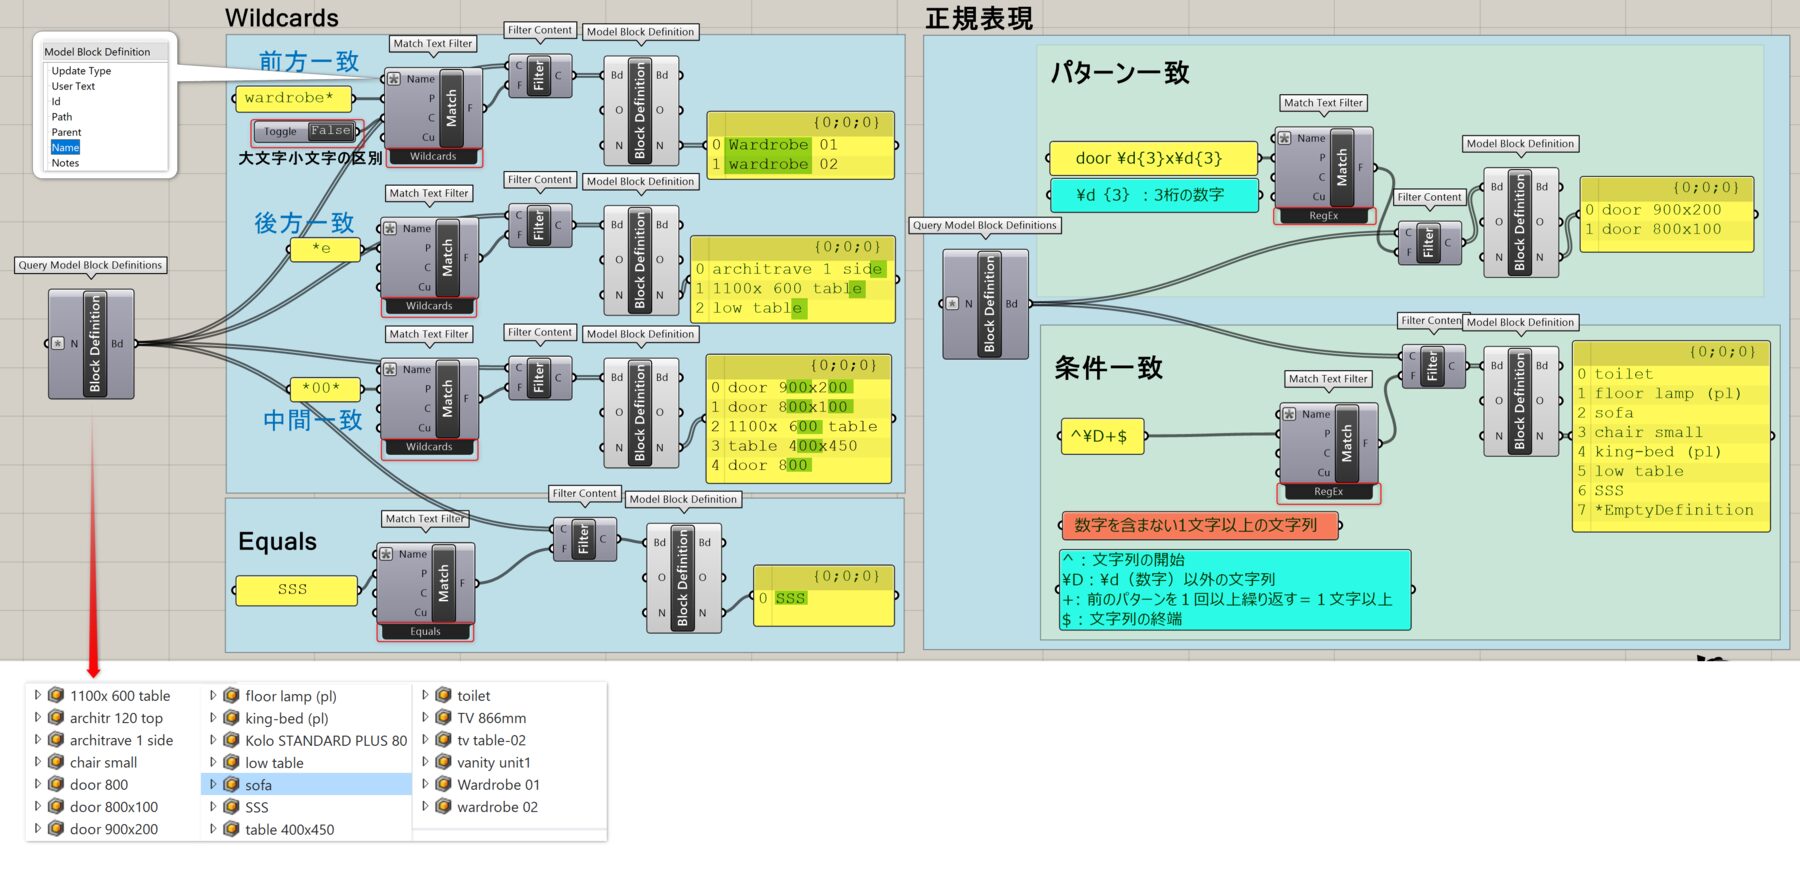
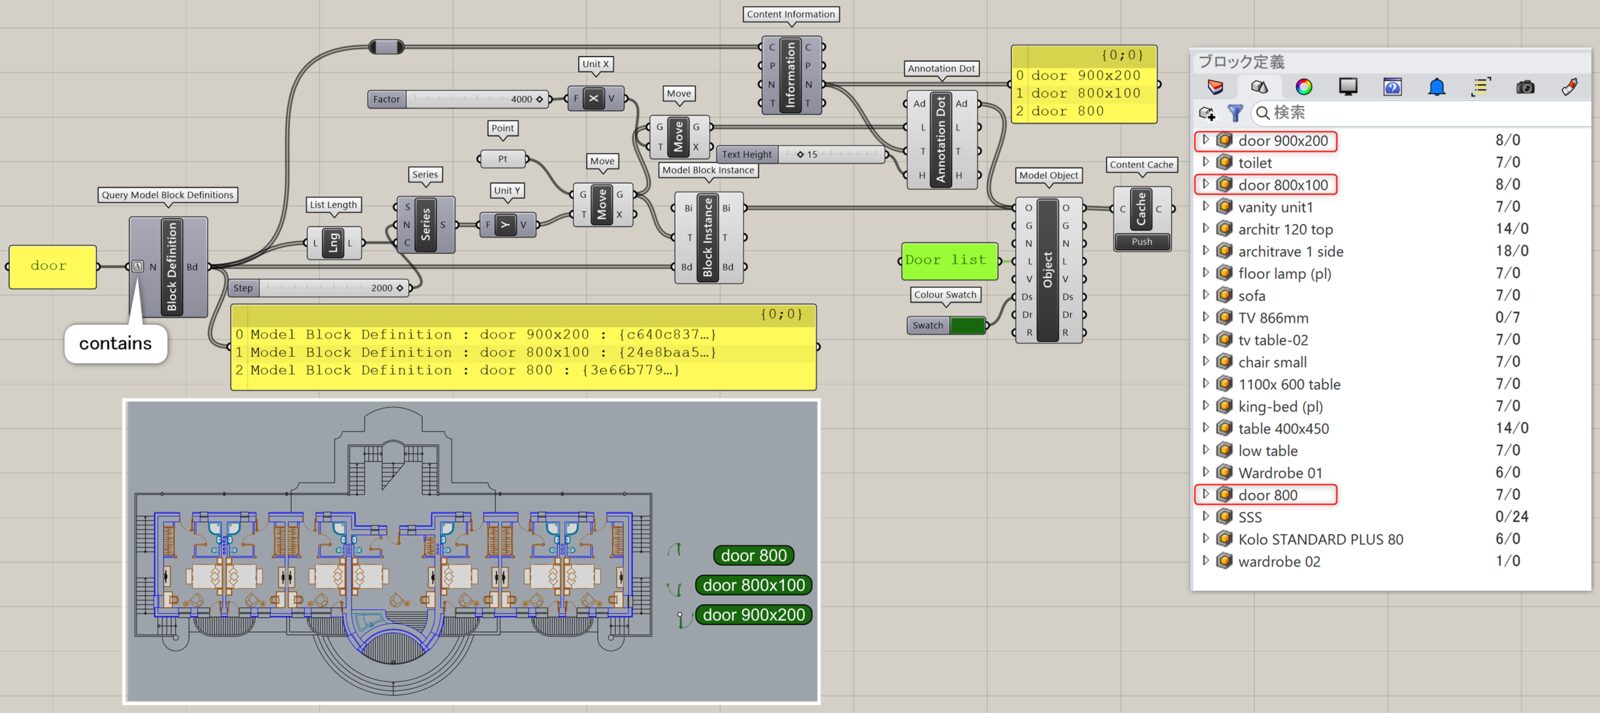
キー(Key)と文字列(Text)を入力し、その文字列を含むかどうかのフィルタを作成する。大文字・小文字を区別するか(Case)や、言語や国などの条件(Culture)も入力できる。コンポーネントの右クリックから、含む(Contains)、前方一致(Starts With)、後方一致(Ends With)の指定も可能。
詳細1:入力した文字列を含むかどうか、幅広く抽出可能なフィルタを作成する。図は、[Query Model Block Definition]を使用して読み込んだブロック名を[Contains Text Filter]のキーに設定し、デフォルトの「Contains(含む)」だけでなく、右クリックのオプションで「Start With(前方一致)」「Ends With(後方一致)」を指定した際を示した例。
Match Text Filter
B
Rhino>Content
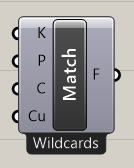
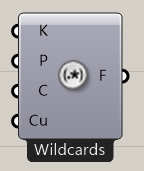
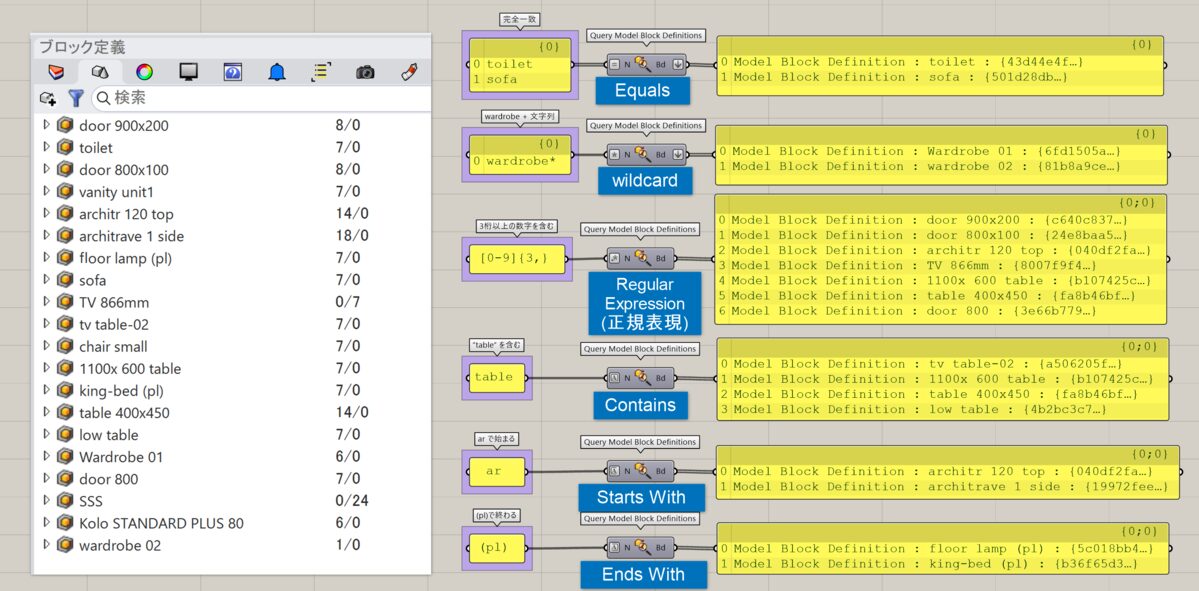
キー(Key)と文字列(Pattern)を入力し、その文字列に一致するかどうかのフィルタを作成する。大文字・小文字を区別するか(Case)や言語や国などの条件(Culture)も入力できる。コンポーネントの右クリックから、完全一致(Equals)、ワイルドカード表現(Wildcard characters)、正規表現(Regular Expression)の指定も可能。
詳細1:入力した文字列が部分的、または完全一致するかどうか、精密な抽出も可能なフィルタを作成する。図は、[Query Model Block Definition]を使用して読み込んだブロック名を[Match Text Filter]のキーに設定し、デフォルトの「Wildcards(含む)」だけでなく、右クリックのオプションで「Equality(完全一致)」「RegEX(正規表現)」を指定した際を示した例。「Wildcards」では、*(アスタリスク)の位置で前方、後方、中間一致を使い分ける事ができる。「RegEX」では、「door+3桁の数字×3桁の数字」というパターン指定や、「数字以外の文字列」という条件指定を例にあげている。
※[Equality Filter]の詳細にも[Match Text Filter]の使用例あり
Import Contents
B
Rhino>Content
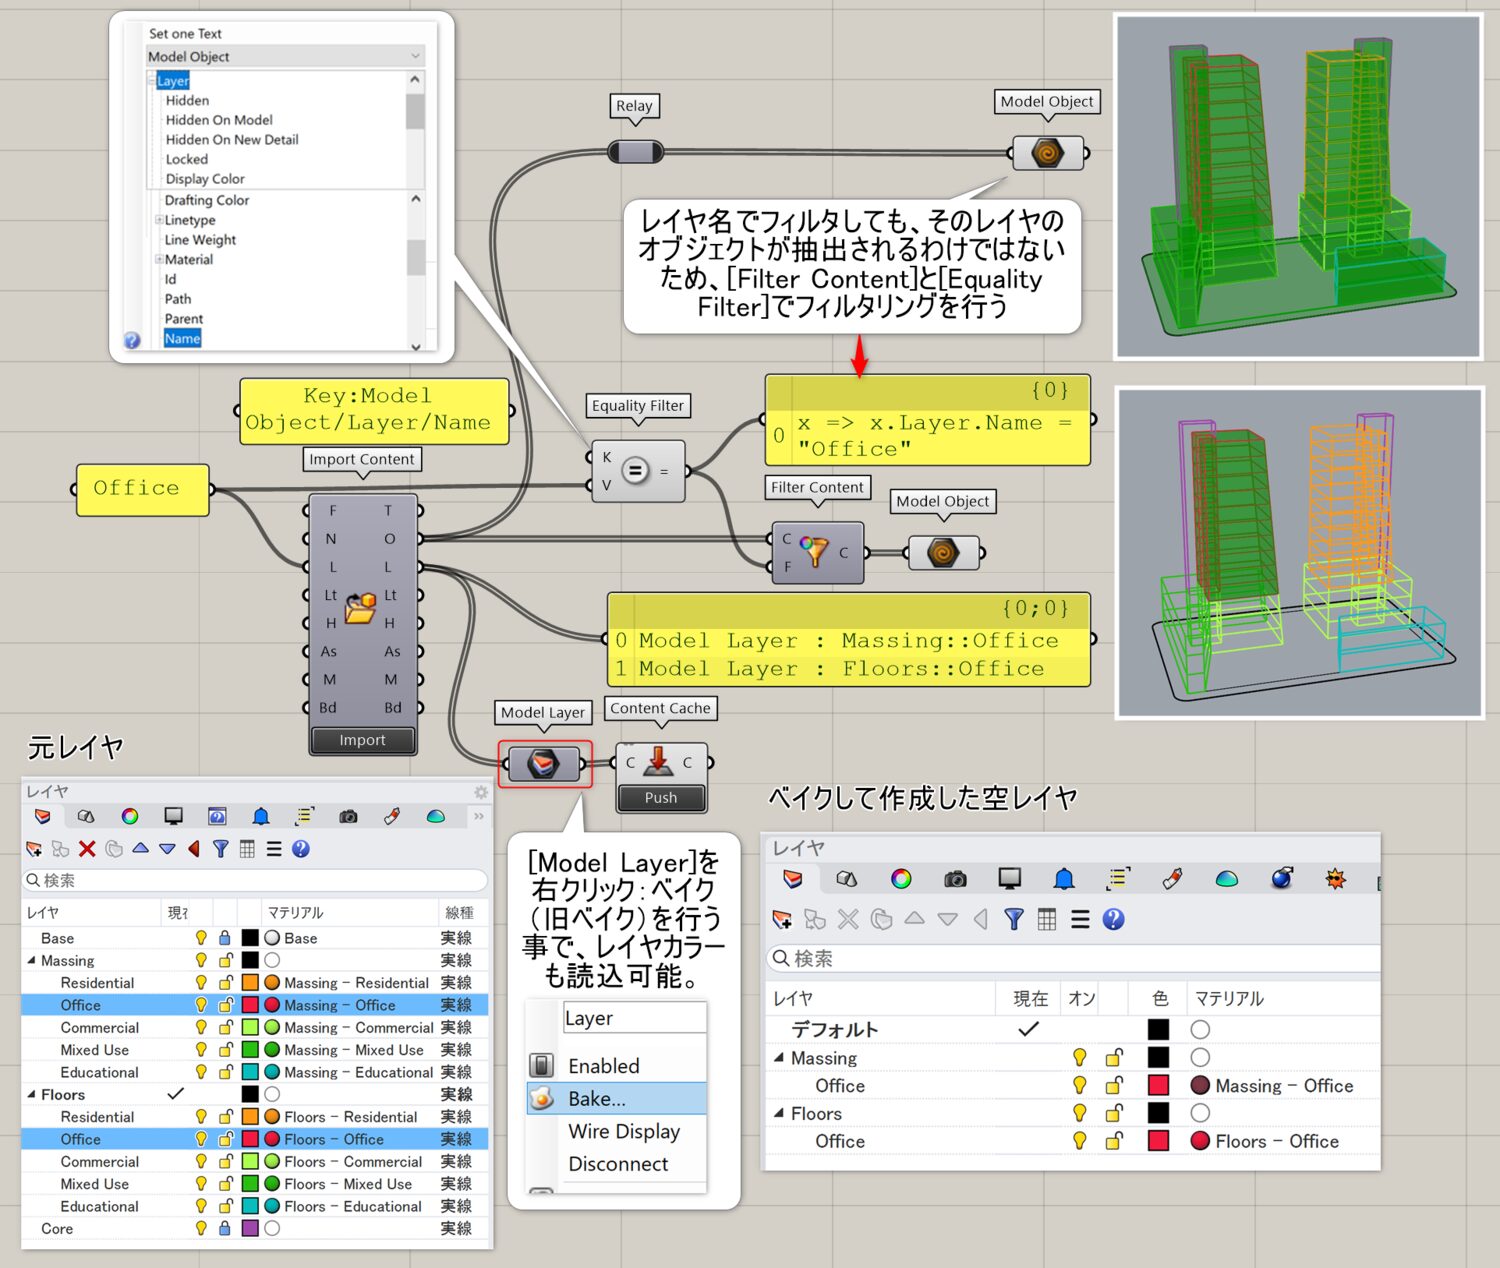
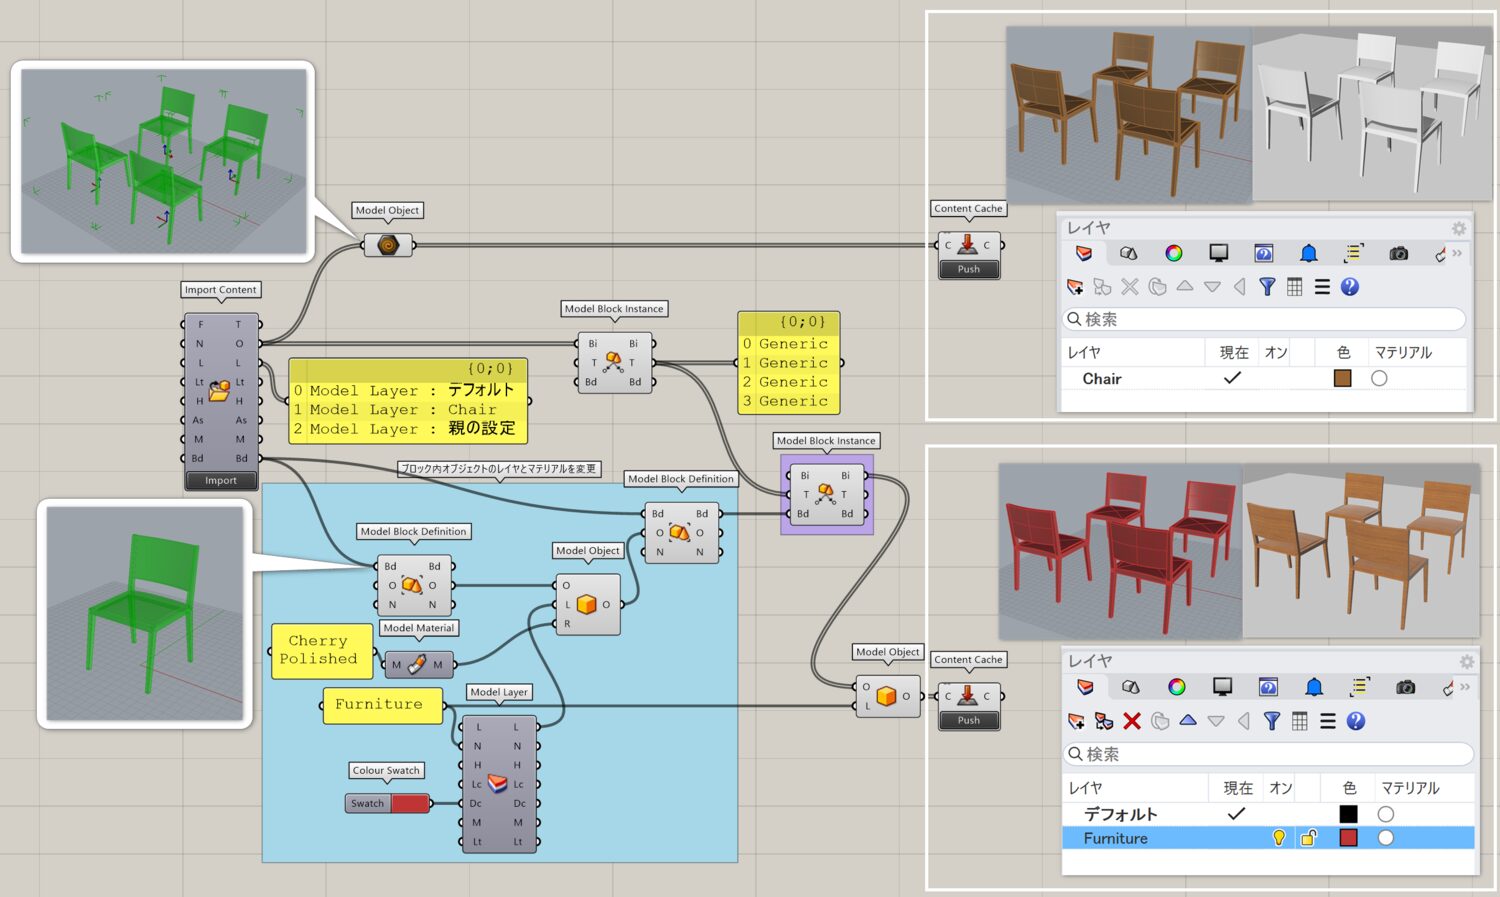
3dmのファイルパス(File Path)を入力することで、ドキュメント内のオブジェクト(Objects)やレイヤ(Layers)、線種(Linetypes)、ハッチパターン(Hatch Patterns)、注釈スタイル(Annotation Styles)、マテリアル(Materials)、ブロック定義(Block Definitions)などを取得する。設定後、下部のImportボタンをクリックして読み込む。また各種値を入力することで、インポートするデータを絞り込むことも可能。
詳細1:.3dmのファイルパスを入力する事で、オブジェクトやレイヤ、線種、ブロックなどをインポートする。インポートされるのは「定義」のため、レイヤの場合レイヤ内のオブジェクトがインポートされるわけではない。図は、レイヤ内のオブジェクトをインポートするため、[Filter Content]と[Equality Filter]を使用した例。[Equality Filter]では、キーを「Layer>Name」に設定している。また、レイヤ名をベイクすると空レイヤを作成できる。
詳細2.ブロックをインポートした際には、O出力(オブジェクト)からはブロックインスタンスが、Bd出力(ブロック定義)からは、原点を基点として登録したブロック定義が取得可能。図は、Bd出力を利用してレイヤとレイヤカラー、マテリアルを変更し、ベイクした例。Grasshopperレイヤが自動作成されないようにするため、新規レイヤ名(Furniture)を[Model Object]にてブロック内オブジェクトとブロックインスタンスの両方に適用している。
Query Directory
B

Rhino>Content
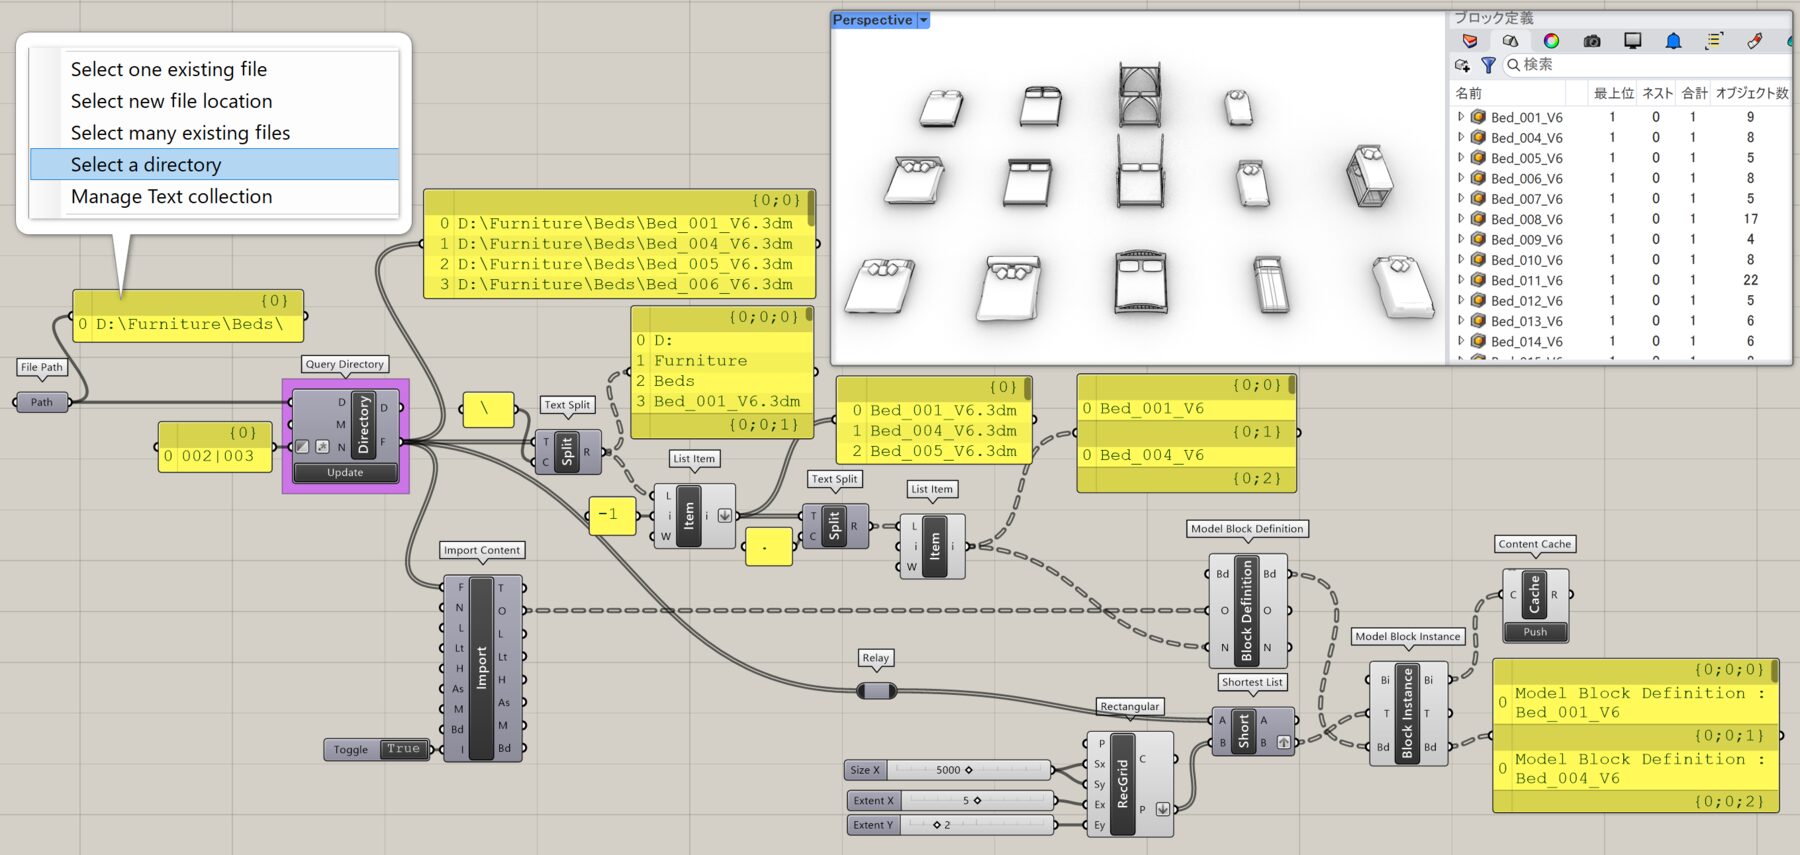
フォルダのパス(Directory)を入力し、該当するフォルダ(Directories)、該当するファイル(Files)を出力する。設定後、下部のUpdateボタンを押して読み込む。オプションでサブフォルダを幾つまで検索するか(Max Depth)、フォルダ・ファイルの検索する名前(Name)も設定できる。
詳細1:[Query Directory]と[Import Contents]を使用してフォルダ内の家具をインポートし、[Model Block Definition]と[Model Block Instance]を使用してグリッド上のポイントにベイクした例。図では、「正規表現」と「Invert」オプションを使用して、除外したい番号を含むファイル名を複数指定(002|003)している。
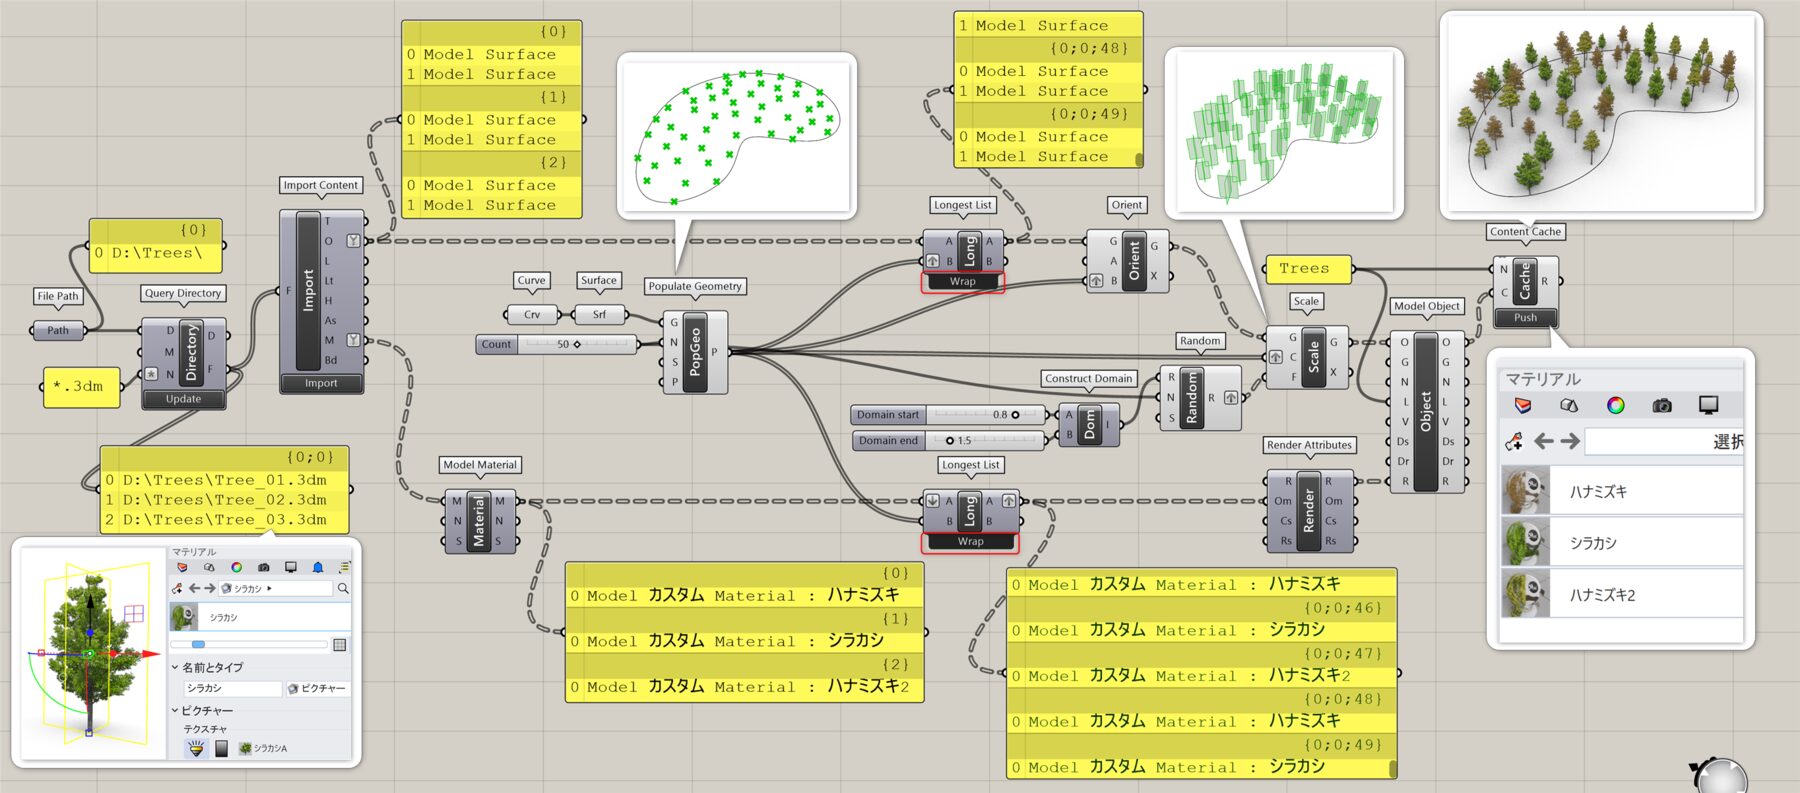
詳細2:平面を2枚組み合わせて画像を貼った樹木オブジェクトのファイルを[Query Directory]を使用してインポートし、[Populate Geometry]で配置した点リストに配置後、ベイクした例。インポートの際、「ワイルドカード(*)」オプションを使用して、同フォルダ内の指定のファイル形式のみ( *.3dm)を読み込むフィルタリングを設定している。マテリアルもインポートできるので、[Render Attributes]を経由して[Model Object]に割り当てている。樹木/マテリアルと配置する点の数が異なるため、[Longest List]のWrapオプションを用いて点の数と同じ数になるまで樹木/マテリアルの配置が繰り返されるよう、調整済み。
Model
Hide Model Layer
C
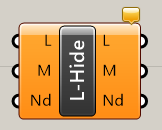
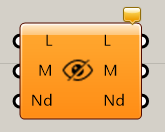
Rhino>Model
レイヤ(Layer)を入力し、モデルオン(Model)、新規詳細オン(New Detail)のオン・オフを取得する(レイヤパネルの右側にある設定項目)。もしくは個々に値を入力し、新しくレイヤを作成することも可能。通常のビューとレイアウト上での表示・非表示を切り分けることができる。
Model Layer
A
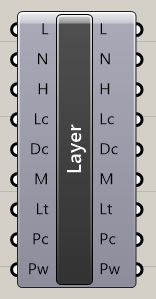
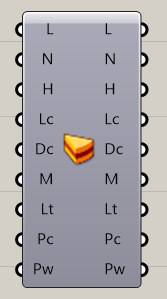
Rhino>Model
レイヤ(Layer)を入力し、レイヤ名(Name)や表示・非表示(Hidden)やロックされているか(Locked)、レイヤ色(Layer Colour)、レイヤマテリアル(Material)、線種(Linetype)などを取得する。もしくは個々に値を入力し、レイヤを作成・修正することも可能。BakeやPushを行うことでRhinoに反映される。
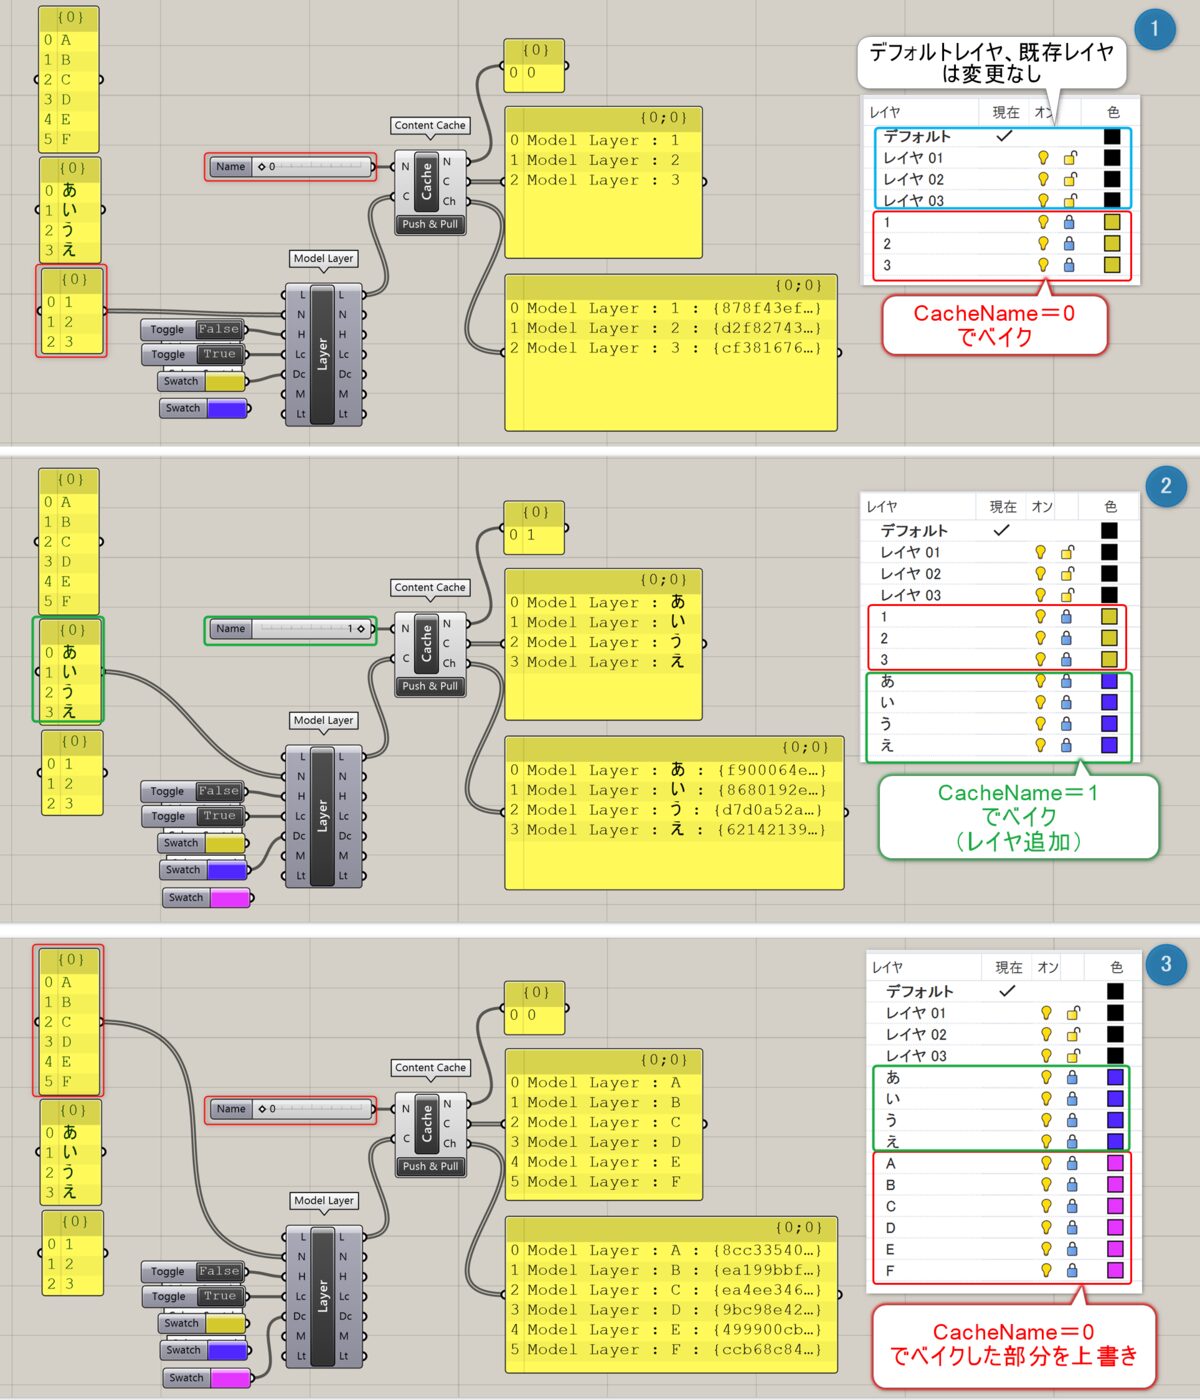
詳細1:[Model Layer]のレイヤ名を複数種類準備し、[Content Cache]でベイクしてRhinoに空レイヤを作成した例。ここでは、①Cache名=0にて、数字レイヤ名をベイク②Cache名=1にて、かなレイヤ名をベイク(レイヤを追加)③再度Cache名=0に戻してアルファベットレイヤ名をベイク(数字レイヤ名を上書き)している。
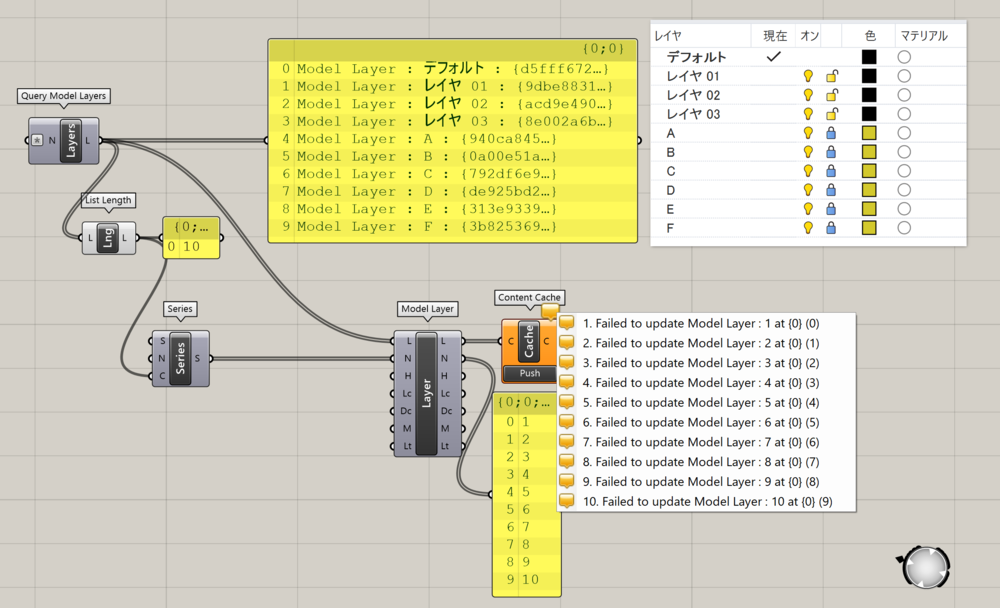
詳細2:[Query Model Layers]で参照したレイヤ名は、[Model Layer]にて新規レイヤ名で上書き→ベイクする事はできない。
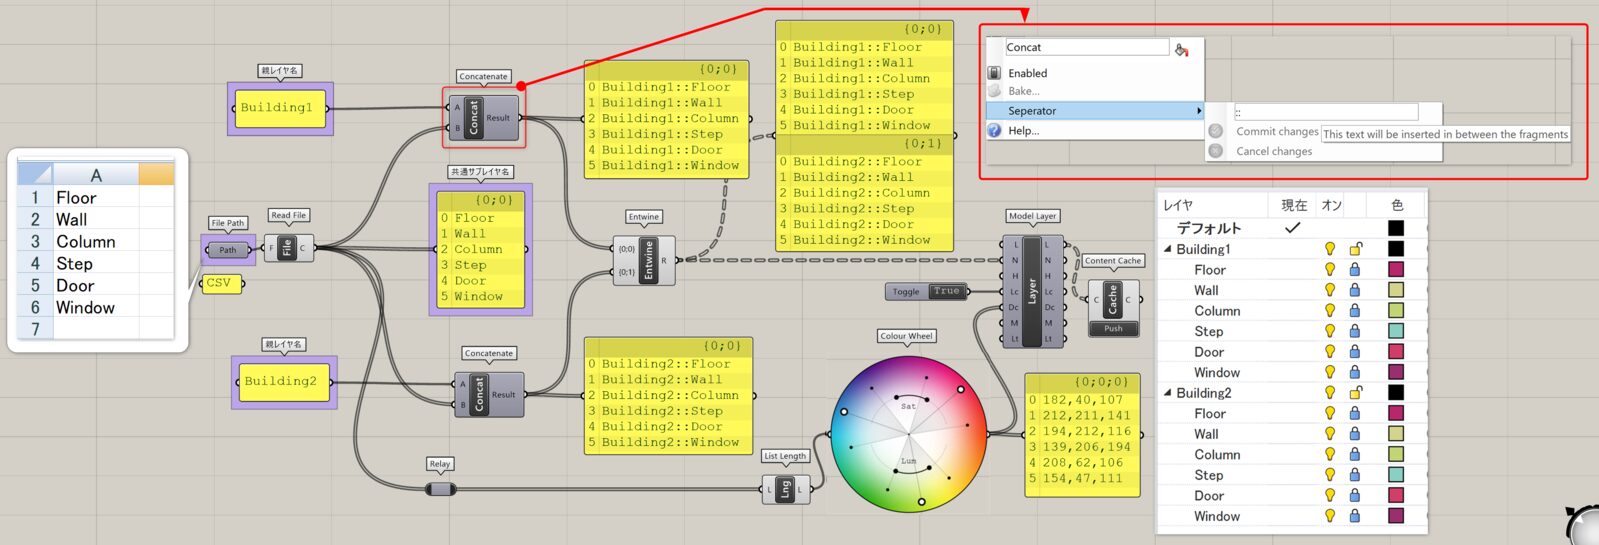
詳細3:[Model Layer]にて共通の子レイヤ名を持つ階層のあるレイヤを作成した例。共通の子レイヤ名はcsvファイルから読込み、階層は[Concatinate]コンポーネントを右クリックしてSeperatorとして::(コロン2つ)を入力する事で作成、各レイヤの表示色は[Color Wheel]から取得している。
クリックで拡大表示できます。
詳細4:[Model Layer]の「Layer」入力で3dmファイル内の任意のレイヤを指定し、[Query Model Object]によってレイヤ内のオブジェクトを抽出した例。ここでは、[Model Layer]と[Model Object]を使用してレイヤカラーとレイヤマテリアルを変更後、ベイクしている。
クリックで拡大表示できます。
Query Model Layers
B
Rhino>Model
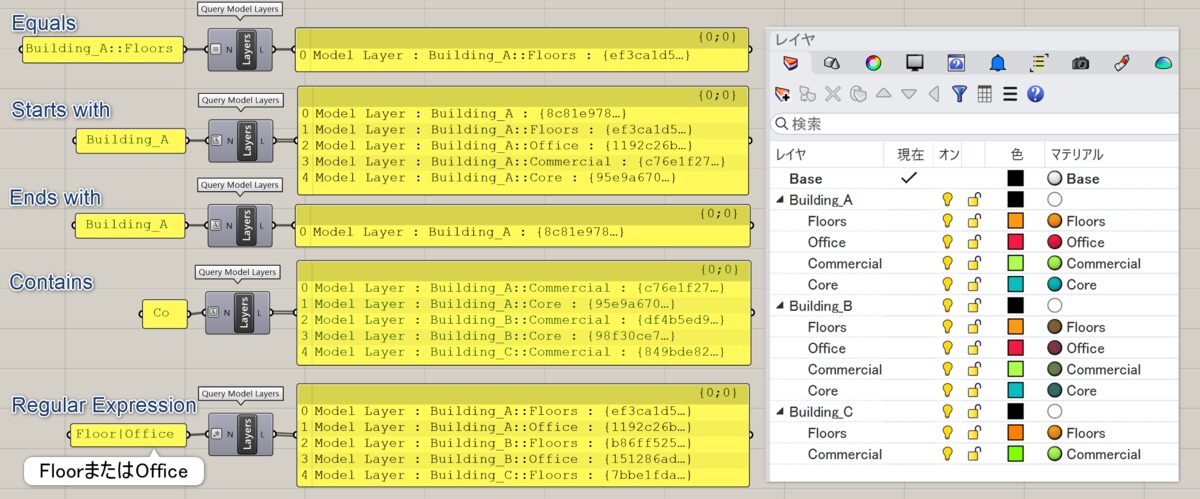
レイヤ名(Name)を入力し、3dm内から該当するレイヤを出力する。端子メニューのMatchMethodから、完全一致(Equals)やワイルドカード(Wildcards)などの一致条件を変更できる。
詳細1:3dm内から該当するレイヤを抽出する。端子メニューのMatchMethodを変更して、様々な条件でレイヤを抽出した例。Starts With/Ends Withなどにおいては、階層のあるレイヤの場合フルパスで検索する。
詳細2:[Query Model Layers]で抽出するものはレイヤ名なので、オブジェクトではない。レイヤ名を[Query Model Object]に接続するとレイヤ内のオブジェクトが抽出できるが、直接接続しても読み込めない場合がある。図は、[Content Details]のP(Path)出力を経由してオブジェクトを抽出した例。
クリックで拡大表示できます。
Explode Object
C
Rhino>Model
オブジェクト(Object)を入力し、分解したオブジェクト(Objects)を取得できる。ポリカーブはそれぞれの曲線、Brepはそれぞれのサーフェス、ブロックインスタンスはそれぞれの形状といった形に分解される。
Model Block Instance
B
Rhino>Model
ブロックインスタンス(Block Instance)を入力し、3次元変形の行列(Transform)やブロック定義(Block Definition)などを取得する。もしくは個々に値を入力し、ブロックインスタンスを作成・修正することも可能。Transformには、点や平面も入力できる。
詳細1:Rhinoのブロックインスタンスを入力し、配置する事が可能。入力できるオブジェクトはブロックインスタンス(Bi)またはブロック定義(Bd)なので、通常オブジェクトの場合は[Model Block Definition]を経由してブロック定義を入力する必要がある。配置する位置として入力するTransformには、各コンポーネントから出力されるTransform出力の他、点や平面も入力できる。ブロックインスタンスは、カギカッコが表示される。図は、[Model Block Definition]でブロック定義を行った柱を、[Curve|Curve]で抽出したグリッドの交点に配置した例。ここでは、[Annotation Dot]を使用して名前の表示も行っている。
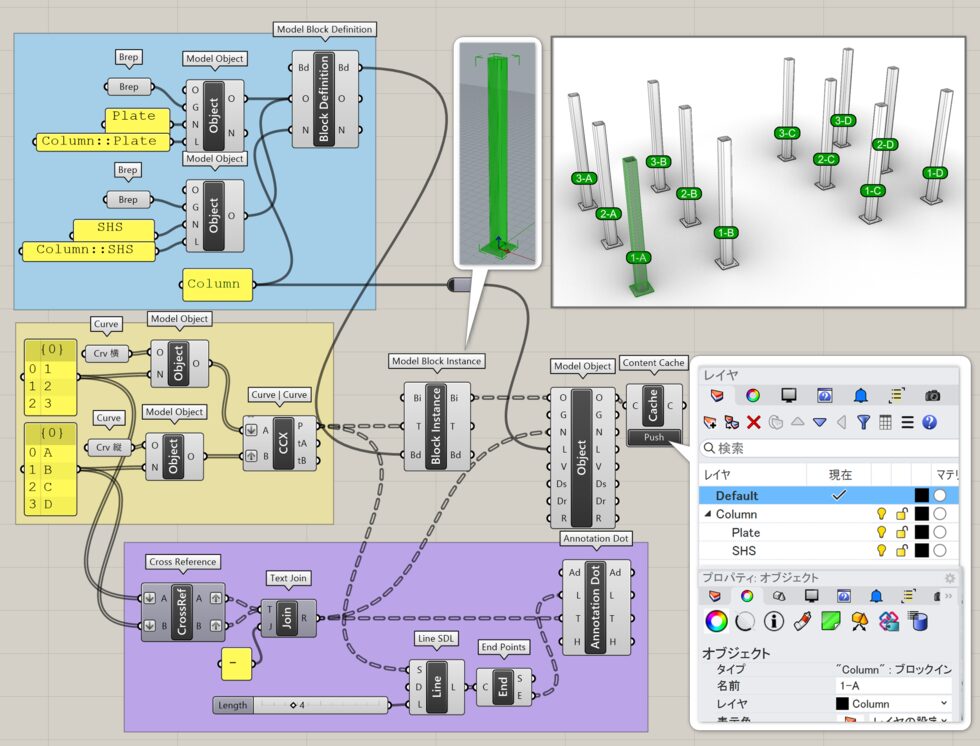
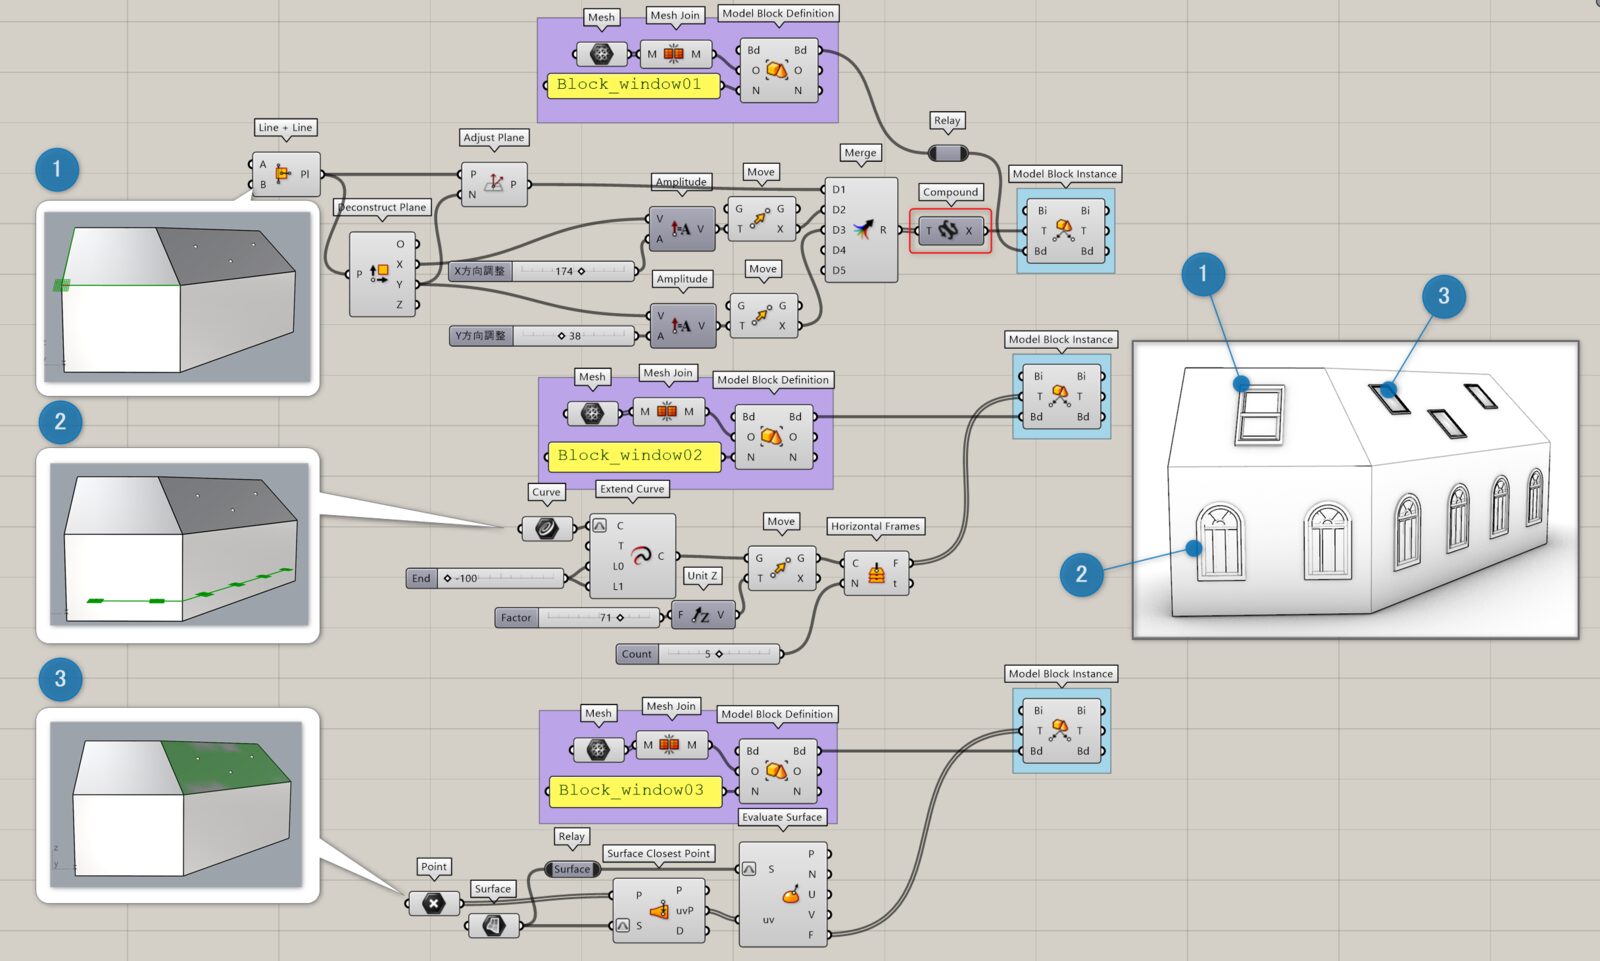
詳細2:[Model Block Instance]でブロックを配置するためのTransform入力は1つしかないため、回転、移動、スケール、平面の向きなど複数のTransformを扱うにはTransformを合成する必要がある。図は、ブロック配置に①[Compound]を使用した例。他、②Curveに[Horizontal Frames]を使用したり、③サーフェス上の点に配置し、[Evaluate Surface]から平面を取得した例。
クリックで拡大表示できます。
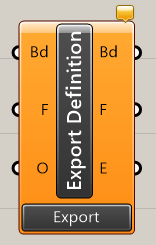
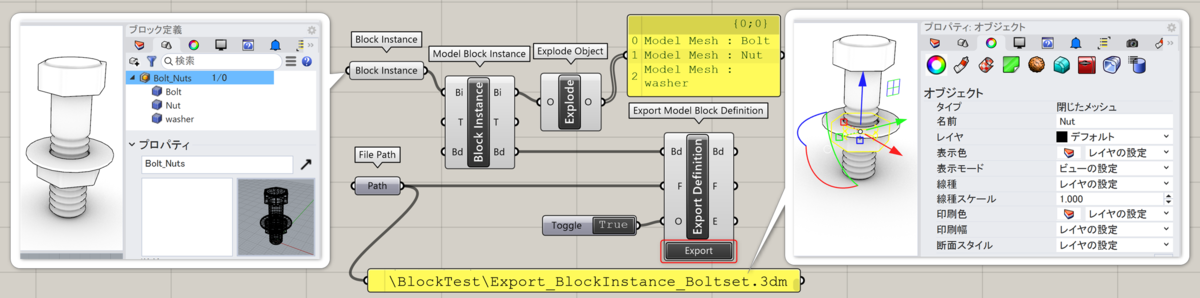
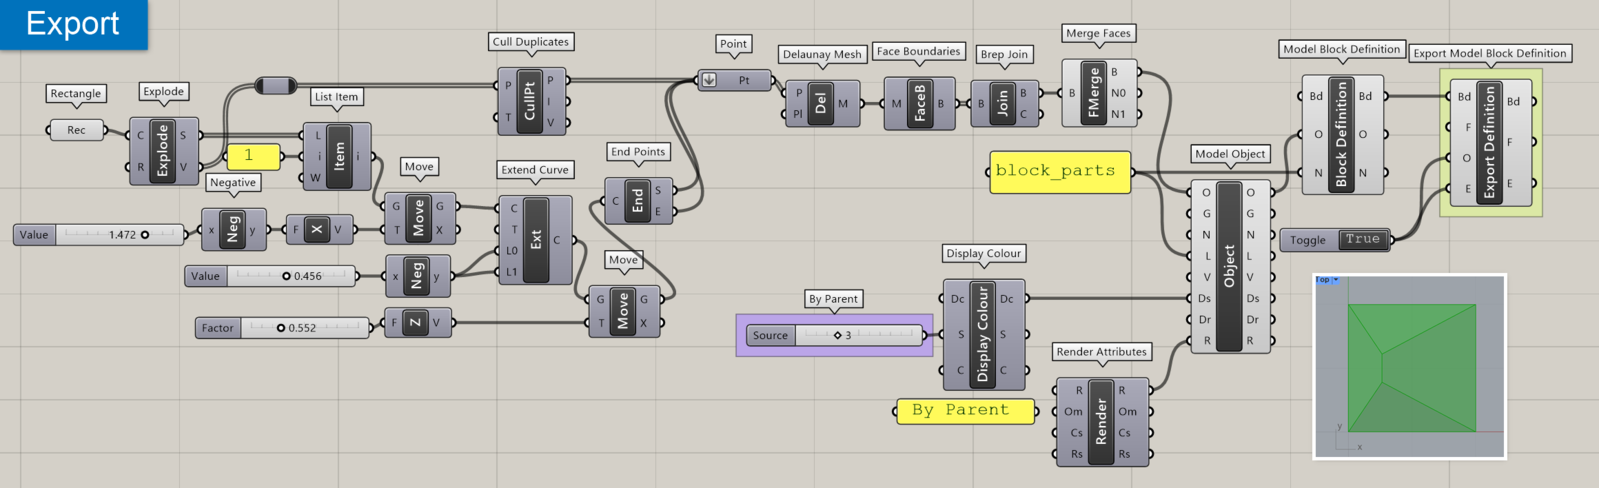
Export Model Block Definition
B
Rhino>Model
ブロック定義(Block Definition)、保存するファイルパス(File Path)、上書きするか(Overwrite)を設定し、3dmファイルを出力できる。設定後、コンポーネント下部のExportボタンを押して出力する。
詳細1:ブロック定義の中にあるジオメトリを3dmとして保存する。ブロック定義をExportするが、保存されたファイル内ではブロック定義は分解されている。リンク/埋め込みの設定は[Import Model Block Definition]コンポーネント側で行う。
詳細2:[Export Model Block Definition]から出力された3dmファイルを[Import Model Block Definitions]で読み込むと、3dmファイル名がブロック定義名になるため、同じにすると良い。(図・中段)図は、Exportファイル名とブロック定義名が異なる場合、[Data Output]と[Data Input]による*.ghdataファイルを利用し、[Content Infomation]のName出力を経由してブロック定義名を受け渡した例。(図・上段/下段)

詳細3:[Export Model Block Definition]にて出力したブロックを、[Import Model Block Definition]で読み込んだ後に表示色やマテリアルやを個別に変更するためには、Export側とImport側でソースを指定する必要がある。図は、Aで作成したブロックをDisplay Color>SourceやRender Attribute>Object Material を「By Parent」にしてExportし、BでImportした後に「By Object」に指定して個別に色やマテリアルを設定した例。
クリックで拡大表示できます。
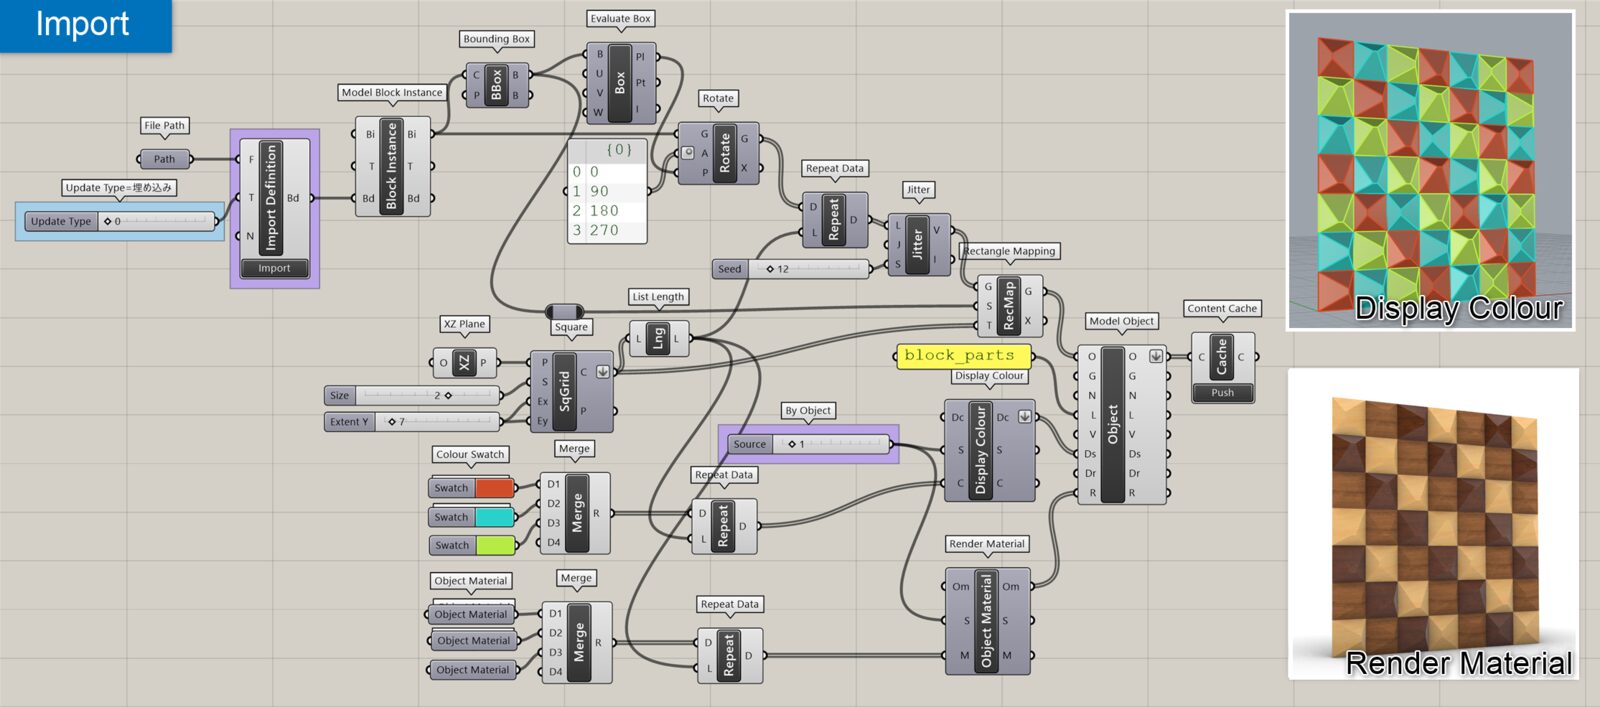
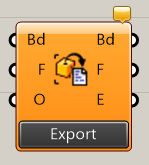
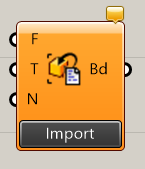
Import Model Block Definition
B

Rhino>Model
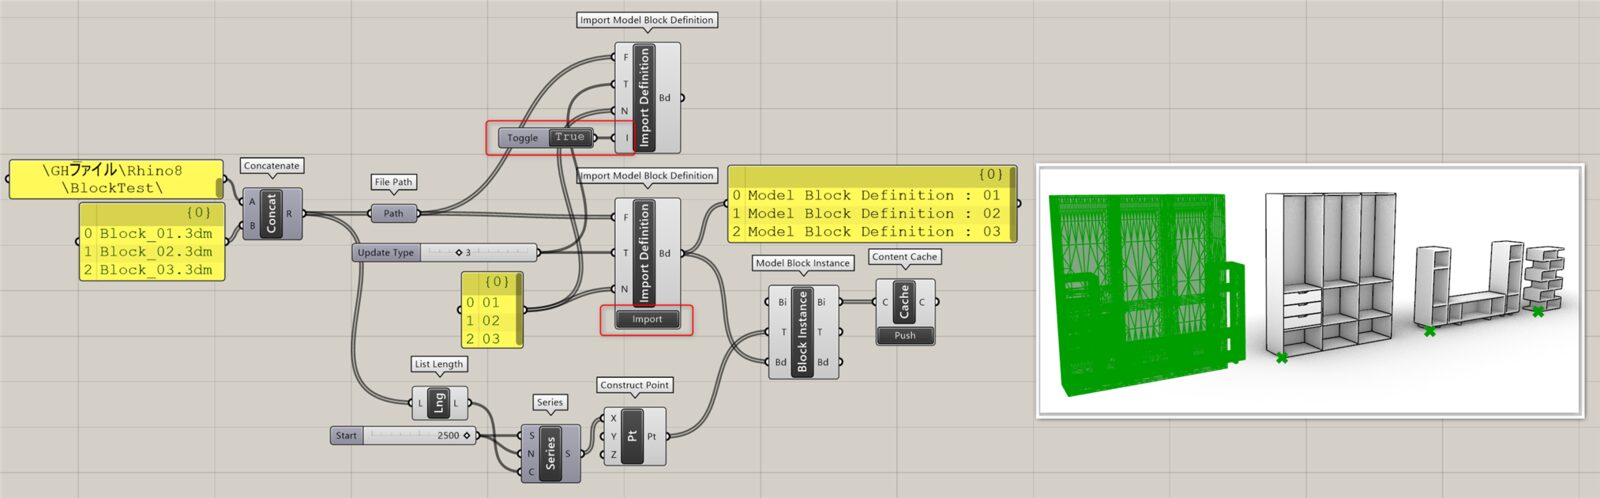
3dmファイルのパス(File Path)、ブロックの埋め込み方法の設定(Update Type)、ブロック定義名(Name)を設定しブロック定義をインポートする。設定後、コンポーネント下部のImportボタンを押して読み込む。
詳細1:[Query Model block definitions]は現在開いている3dmファイルからブロックを抽出するが、このコンポーネントはパスを指定して外部から3dmファイルを読み込み、ブロック定義を行う。ファイル内のオブジェクトはブロックである必要はなく、Brepやメッシュなど通常オブジェクトの状態でも可。通常は「Import」ボタンを押すと読み込むが、コンポーネントを拡大表示して追加できるオプション入力の「I(Import)端子」に「True」をつなぐ事で、ボタンを押さなくても読み込める。(更新しない場合は、Trueボタンを切り替える必要あり)
図は、複数パスと同数のブロック定義名を指定しインポート後、[Model Block Instance]にて読み込んだオブジェクトを配置した例。
クリックで拡大表示できます。
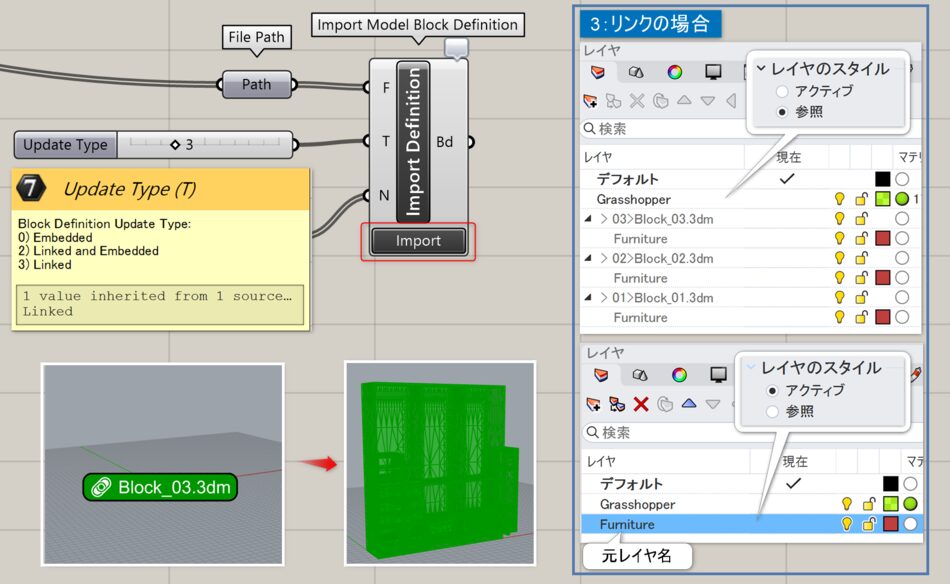
詳細2:ブロックの埋め込み方法は、埋め込み(0)、埋め込みおよびリンク(2)、リンク(3)をT(Update Type)入力で設定。3=リンクに指定してある場合、Importボタンを押す前などリンクが切れている状態ではパスで指定したファイル名が緑色の注釈ドットで表示される。また、リンクの場合は読み込んだ際のレイヤをブロック定義パネル>レイヤのスタイルで「アクティブ」(現在アクティブなファイルにレイヤを保存)か「参照」(ブロック定義名/参照ファイル名>元ファイルのレイヤ名 の形式でレイヤを参照)に指定可能。
Model Block Definition
B
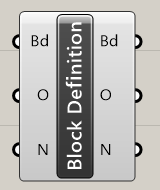
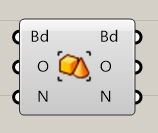
Rhino>Model
ブロック定義(Block Definition)を入力し、オブジェクト(Objects)や定義名(Name)などを取得する。もしくは個々に値を入力し、ブロック定義を作成・修正することも可能。
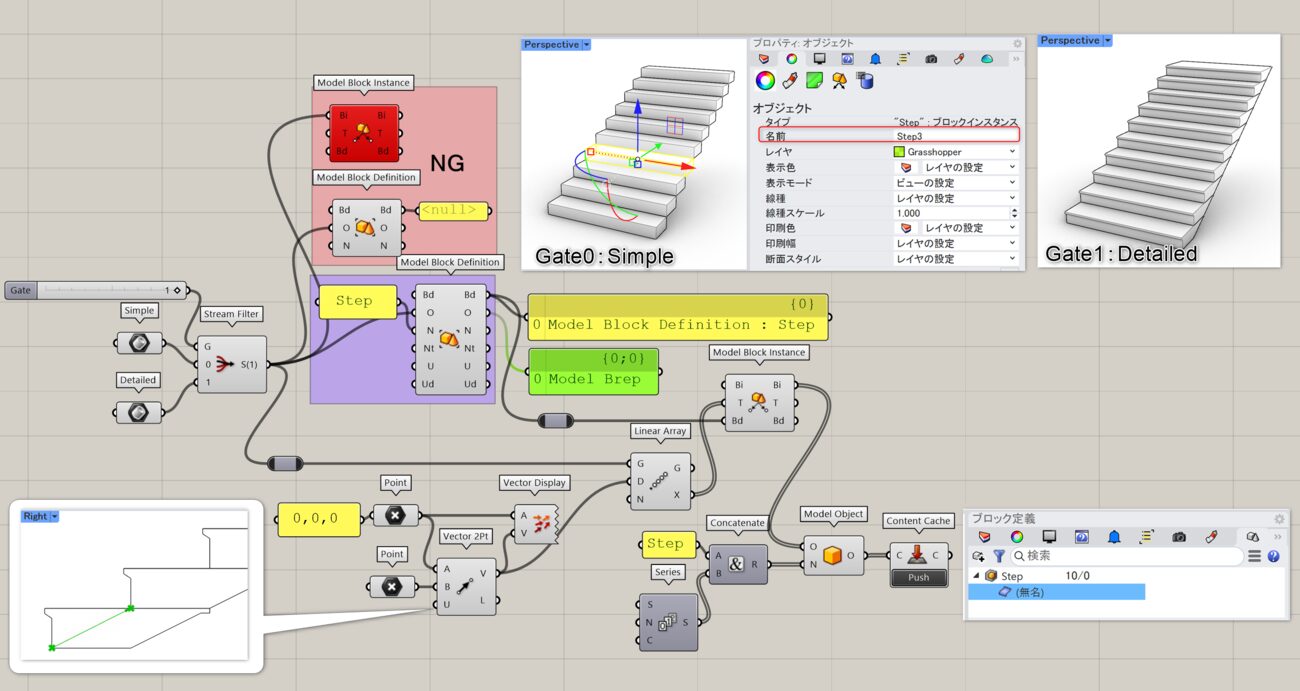
01.RhinoオブジェクトやGHで作成した曲線、サーフェス、Brep,mesh,SubDなどのオブジェクトを入力し、ブロック定義を作成する。ブロックの基点は原点となる。
コンポーネントを拡大しオプションを開くことで、Notes,URL,URL Discriptionなどの情報も入力可。定義名は未入力だと機能しない。作成したブロック定義をベイクするとオブジェクトとしては出力されないが、Rhino上の「ブロックパネル>ブロック定義」内にブロックが生成される。[Model Block Instance]に入力しベイクする事で、ブロックインスタンスとして配置可能。図は、階段のStepとなるBrepを[Model Block Definition]で定義し、[Block Instance]で階段状に配置後、[Content Cache]でベイクした例。[Model Object]にて連番で名前を入力し、それぞれに異なる名前を付与している。ベイク後のオブジェクトは「ブロック定義」パネルで確認できる。※ベイク後のレイヤに関しては、[Model Object]参照
クリックで拡大表示できます。
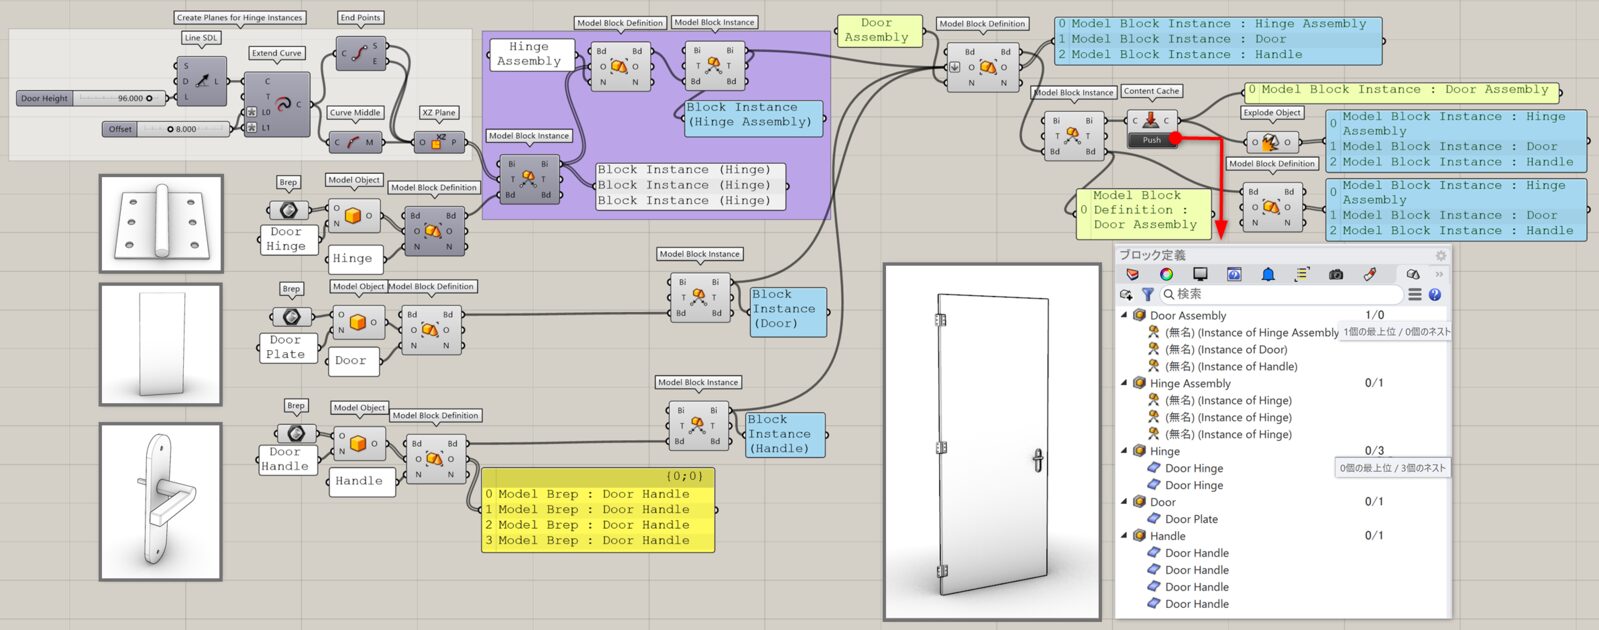
詳細2:3種類のBrepをBlockとして定義し、更に次のBlock定義でネスト化し、アセンブリとしてまとめた例。ベイク後、ブロックインスタンスのネスト内容はブロック定義パネルでも確認できる。ネスト化されたブロック定義は、再度[Model Block Definition]のO出力にて、ブロックインスタンスは[Explode Object]にて、それぞれのブロックインスタンスに分解可能。
クリックで拡大表示できます。
Quely Model Block Definitions
B
Rhino>Model
ブロック名(Name)を入力し、3dm内から該当するブロックを出力する。端子メニューのMatchMethodから、完全一致(Equals)やワイルドカード(Wildcards)などの一致条件を変更できる。
詳細1:3dm内にあるブロックから該当するブロックを抽出する。図は入力端子を右クリックして選択できる各MatchMethodの使用例。
詳細2:DWGファイル内のブロックから、”door”を含むものを「MatchMethod」オプションを「Contains」に設定して抽出。更にブロック名を[Content Information]を経由して抽出し、[Anotation Dot]に接続して部材リストを作成した例。
クリックで拡大表示できます。
Model Earth Location
C
Rhino>Model
位置(Location)を入力し、名前(Name)、モデル内の位置を表す平面(Anchor)、緯度(Latitude)、経度(Longitude)、高さ(Elevation)などを取得する。もしくは個々に値を入力し、位置を修正することも可能。
Quely Model Location
C
Rhino>Model
3dm内で設定した位置(Location)を出力する。位置は地球上の緯度や経度と値を持つ情報。
Objects
Model Object
A
Rhino>Objects
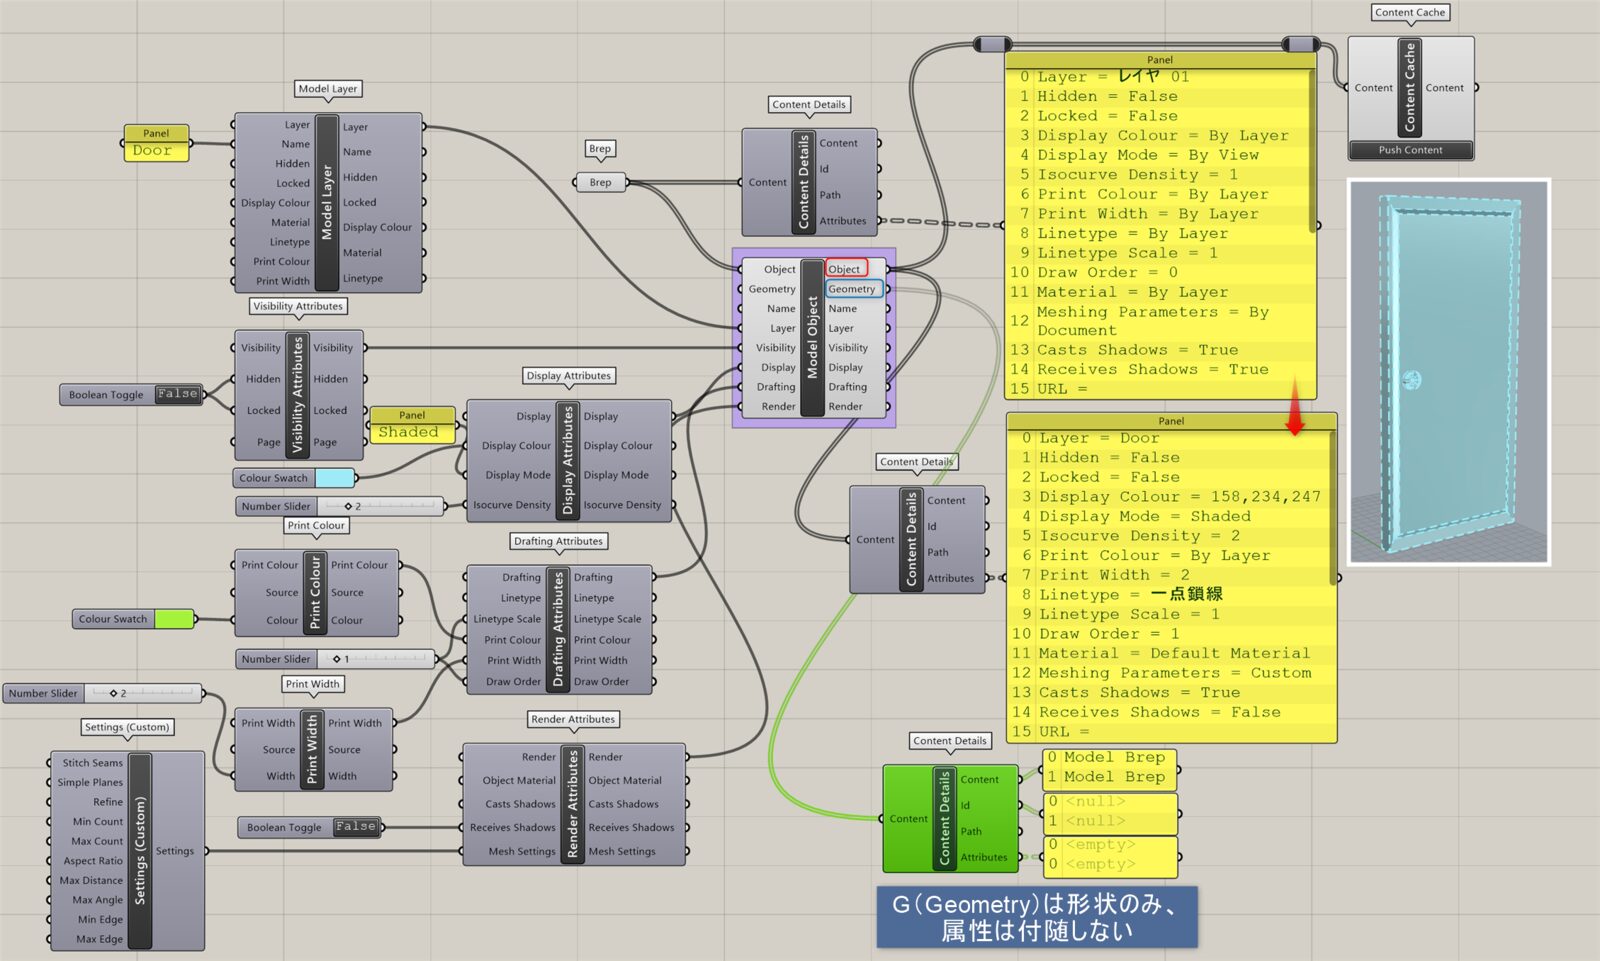
オブジェクトを入力し(Object)、形状データ(Geometry)やオブジェクト名(Name)、レイヤ名(Layer)、表示やロック(Visibility)、表示色(Display)、線種(Drafting)、レンダー設定(Render)などの属性情報を取得する。もしくは個々に値を入力し、属性情報を持ったオブジェクトを作成・修正することも可能。
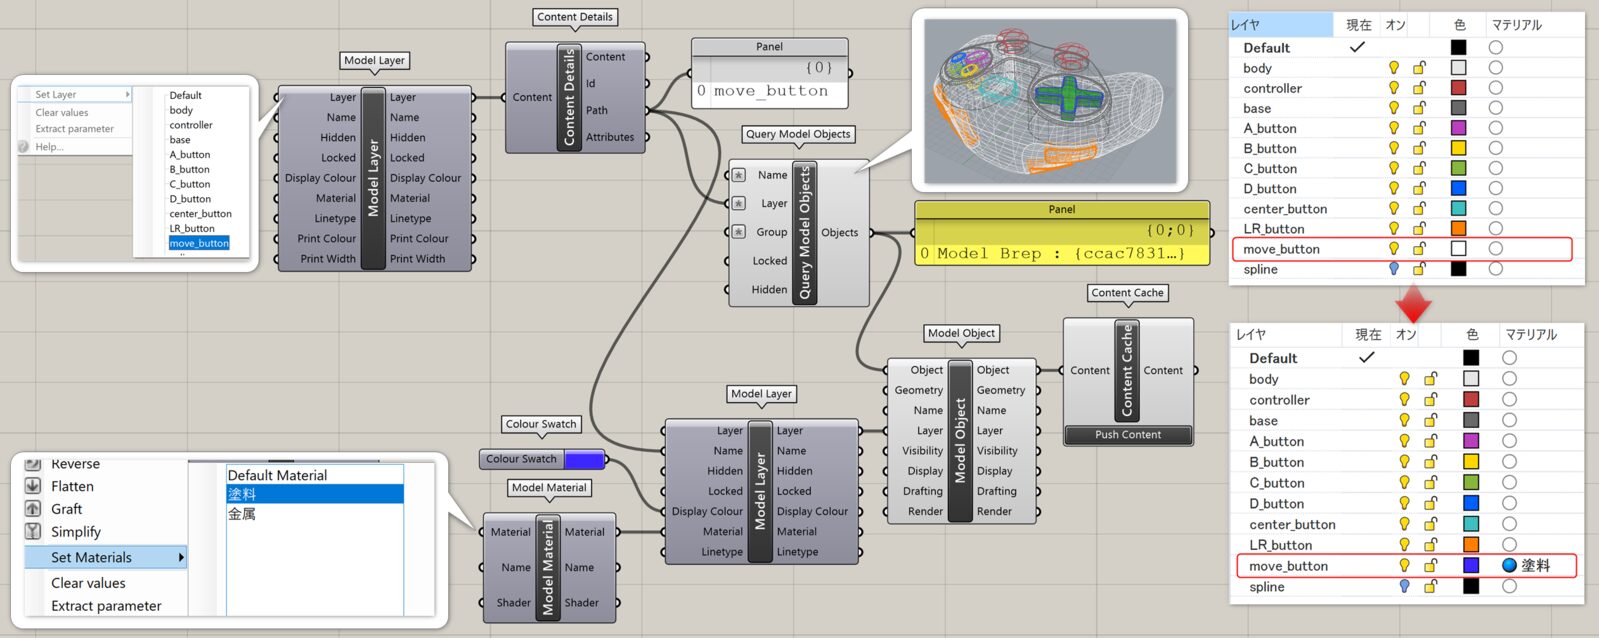
詳細1:[Model Object]を使用すると、様々な属性情報(Attributes)を取得、または割り当てる事ができる。属性情報を持ったオブジェクトから情報を入出力する場合は、O(Model Object)端子につなぐ。G(Geometry)端子はオブジェクトの形状のみで、属性情報は付属しない。
また、入出力端子には、更に各種コンポーネントを接続してより詳細な属性情報を設定できる。図は各端子に接続可能なコンポーネントを示し、[Model Object]で属性情報を更新した例。オブジェクトに設定されている属性情報(Attributes)は、[Content Details>Attributes]にて確認できる。クリックで拡大表示できます。
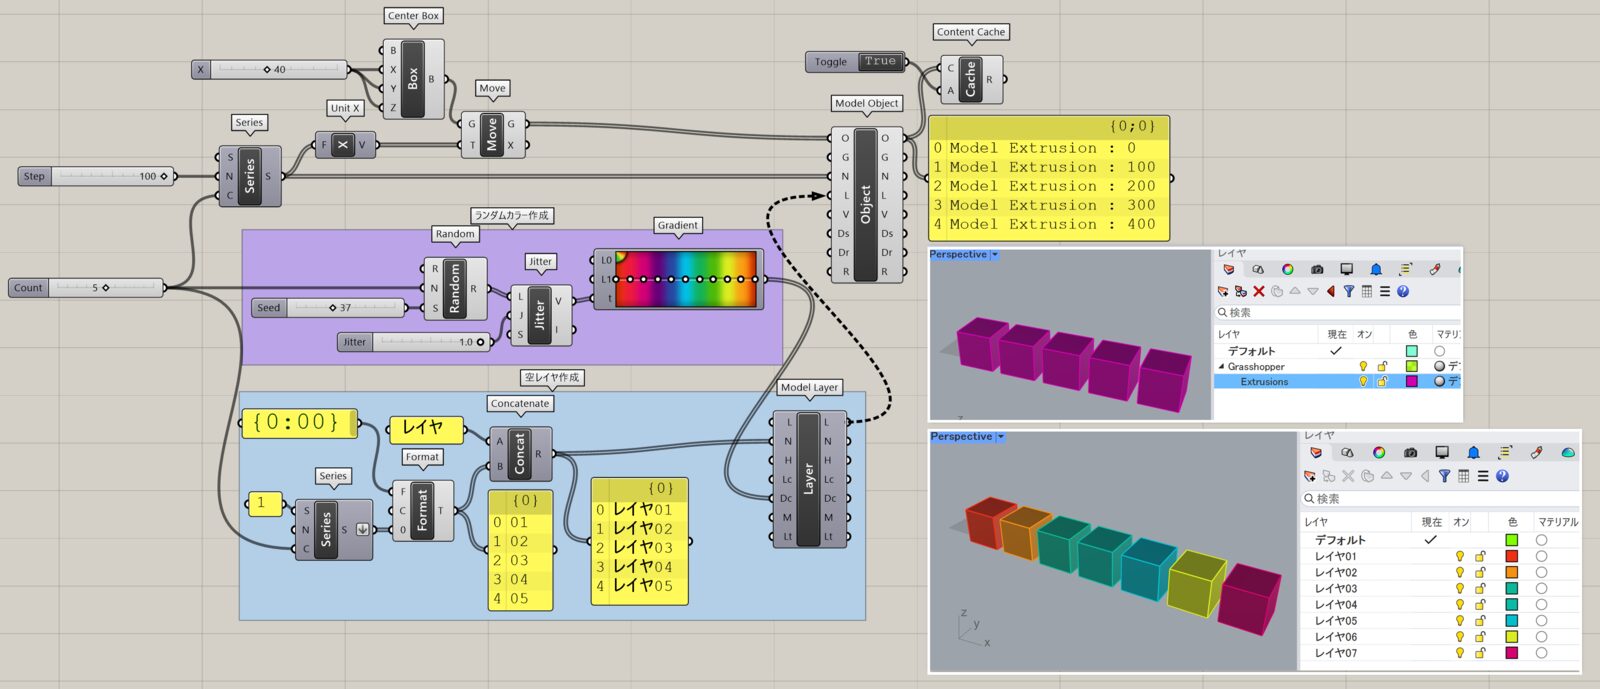
詳細2:通常、[Model Object]からレイヤ名を指定せずベイクすると、「Grasshopper>オブジェクトタイプ名(曲線ならCurvesなど)」というレイヤが自動で作成され、そこに格納される。図は、先に[Model Layer]で空レイヤを作成しておき、[Model Object]のL(レイヤ名)入力に接続してベイクする事で、入力オブジェクトのリストを各レイヤに1つずつ格納した例。ランダムなレイヤカラーは[Gradient]で作成し、[Model Layer]を経由して割り当てている。クリックで拡大表示できます。
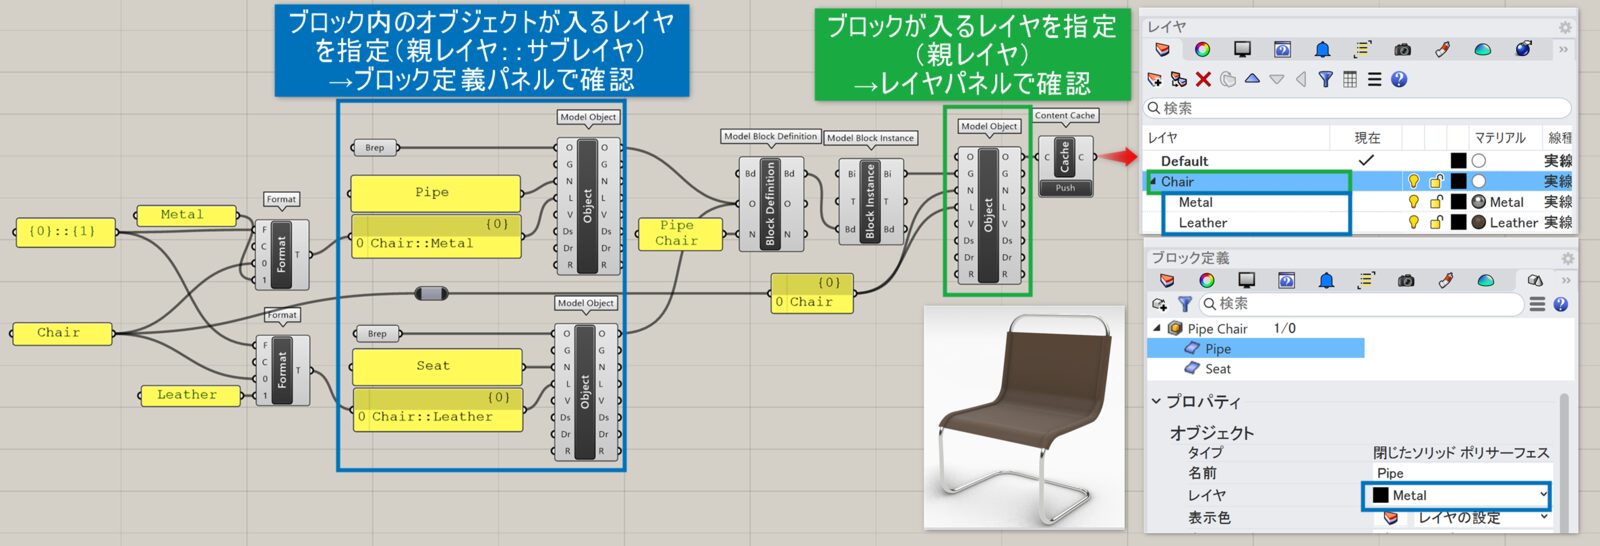
詳細3:ブロックの場合は、[Model Block Instance]の後にレイヤ名を指定するとそこに格納されるが、ブロック内の各オブジェクトは「Grasshopper」レイヤに格納されてしまう。図は、ブロック内オブジェクトに対しても、[Model Object]にて「親レイヤ::サブレイヤ」の形式で名前を指定し、Grasshopperレイヤが作成されないようにした例。(ここでは省略したが、ベイクした時にレイヤマテリアルを指定するには[Model Layer]が必要)クリックで拡大表示できます。
詳細4:[Model Object]のG入力と[Move]を利用して、オブジェクトのコピーを[Content Cache]でベイクした例。途中で[Model Block Definition]でブロック定義を行い、[User Text]でキー情報を追加している。クリックで拡大表示できます。

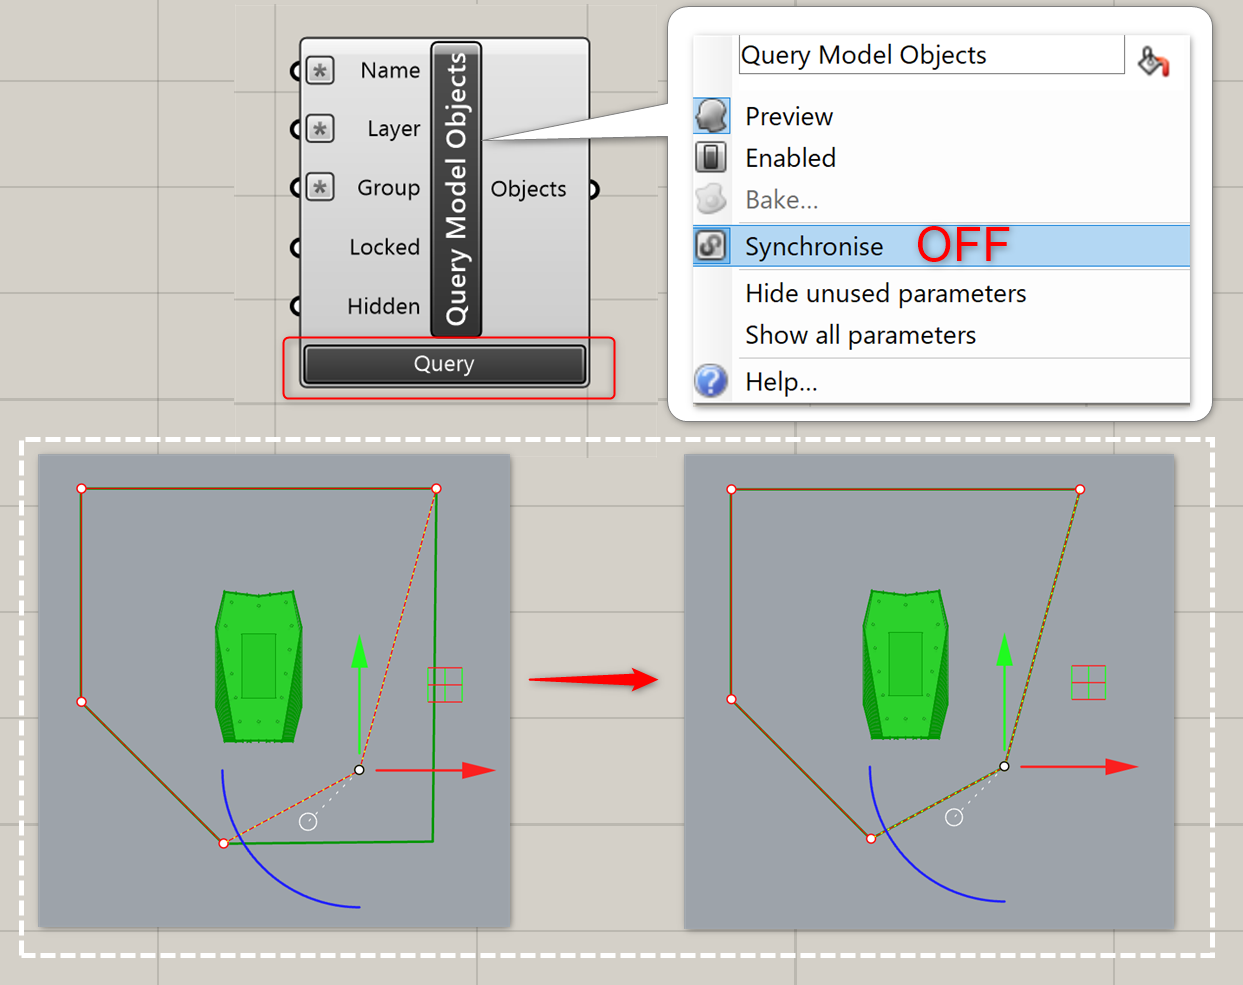
Query Model Objects
B
Rhino>Objects
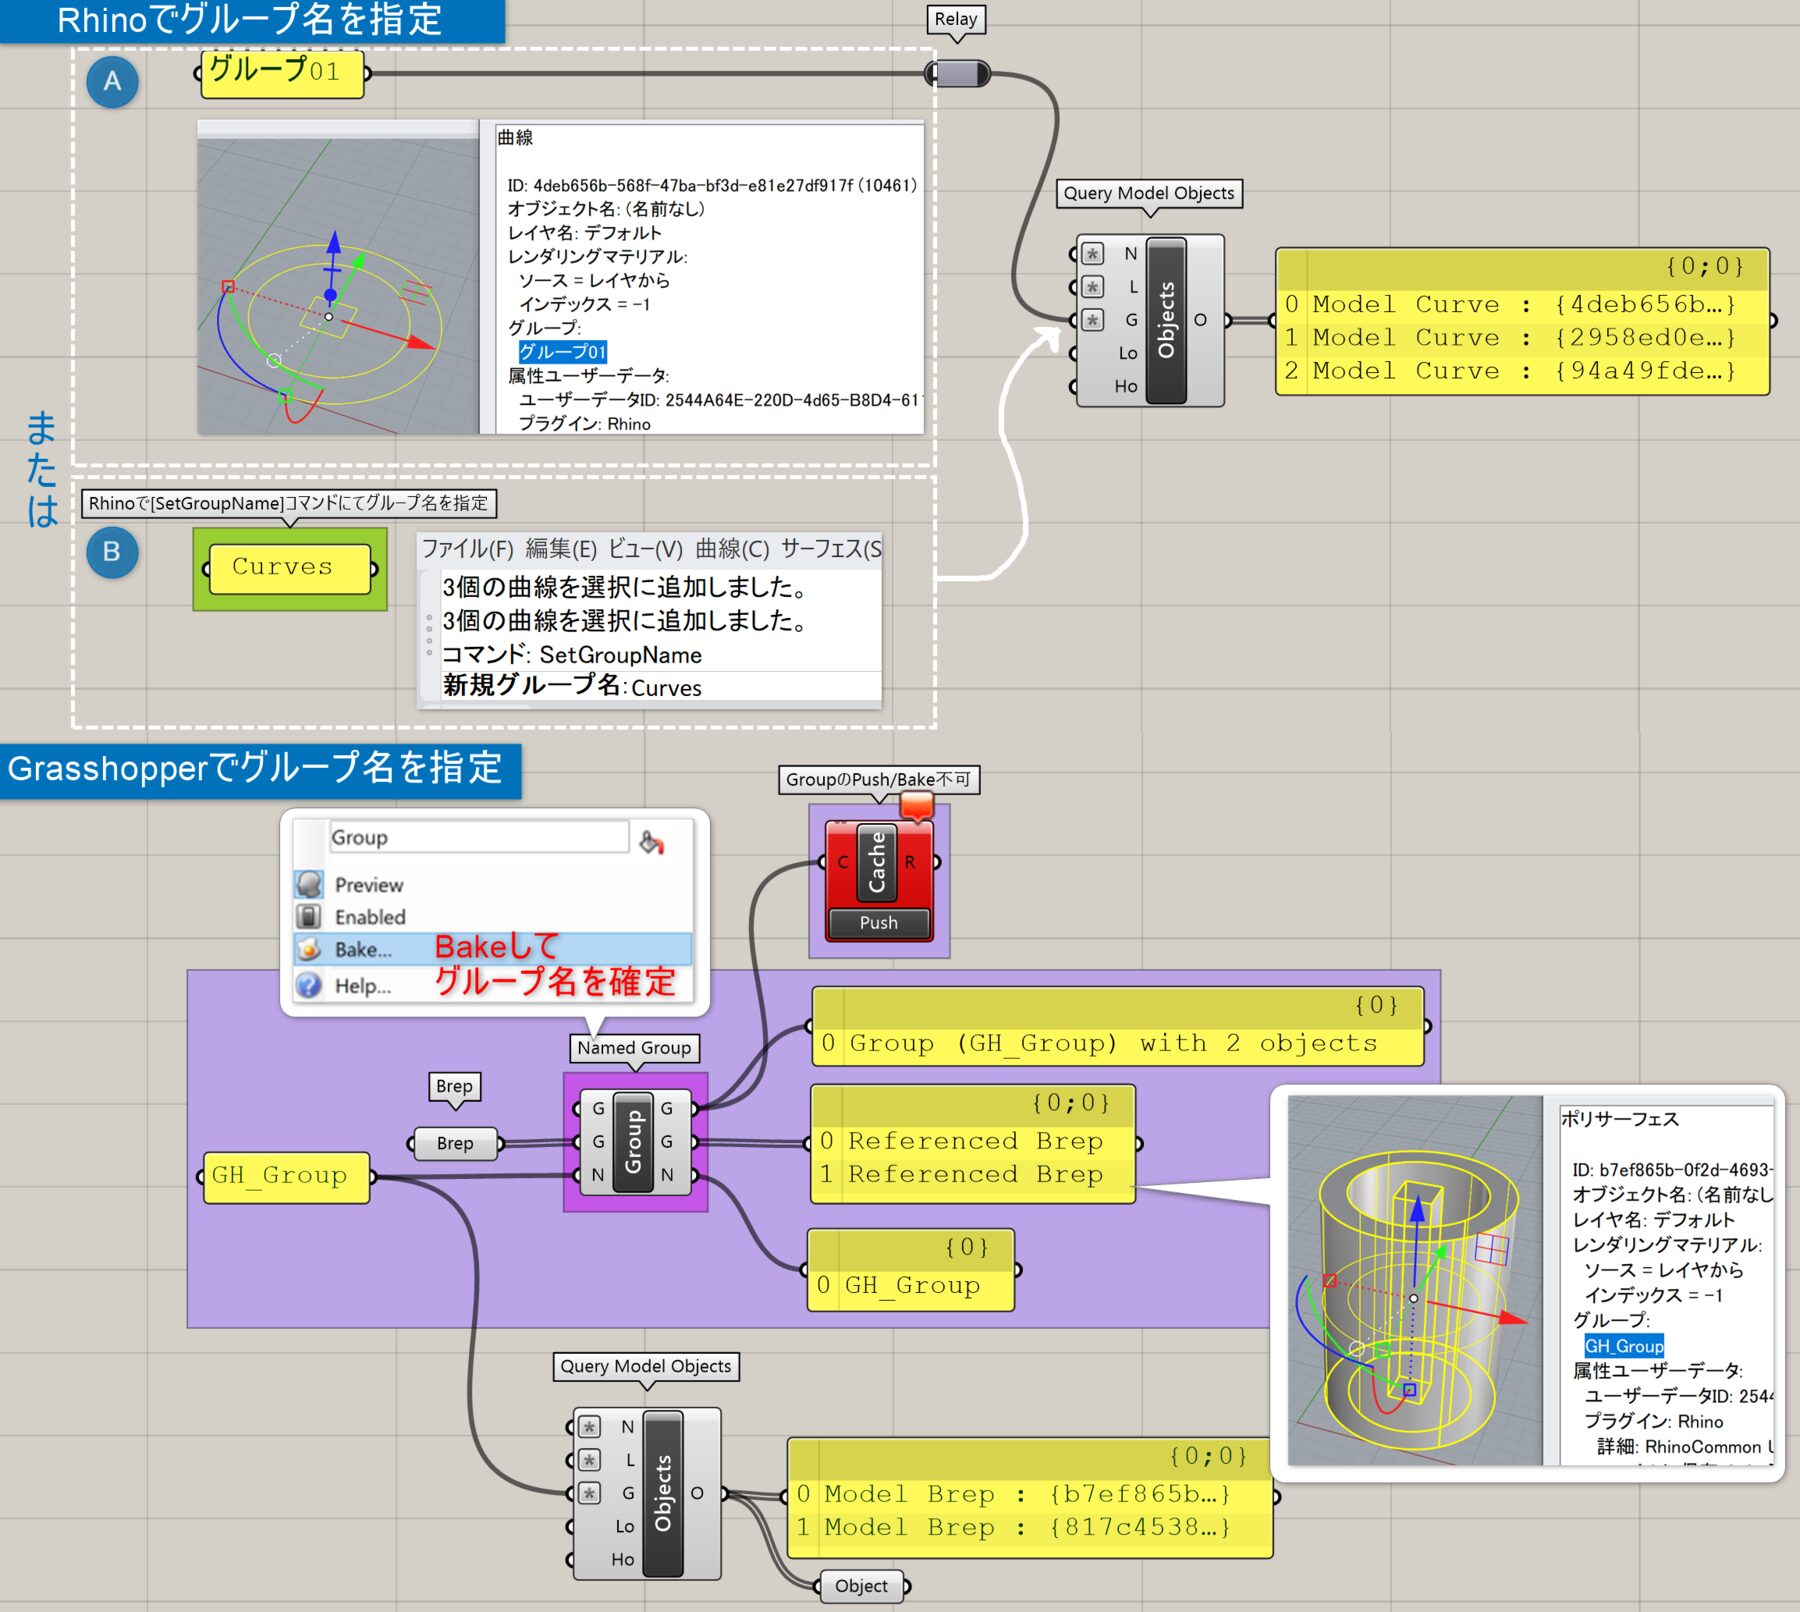
オブジェクト名(Name)、レイヤ名(Layer)、グループ名(Group)、ロックされているか(Locked)、表示非表示(Hidden)を入力し、3dm内から該当するオブジェクトを出力する。端子メニューのMatchMethodから、完全一致(Equals)やワイルドカード(Wildcards)などの一致条件を変更できる。
詳細1:Geometry pipelineのように自動で3dm内のオブジェクトを出力できるが、より細かくフィルタをかけられる。返されるオブジェクトには各オブジェクトの属性情報も含まれる。ロック/非表示オブジェクトは読み込まないなどのオプションも可。図は階層のあるレイヤを読み込む際、端子のMatch Method>ワイルドカードオプションを使用して読み込むレイヤを切り替えた例。他のMatch Methodの働き方については、[QueryModel Block Definition]も参照。
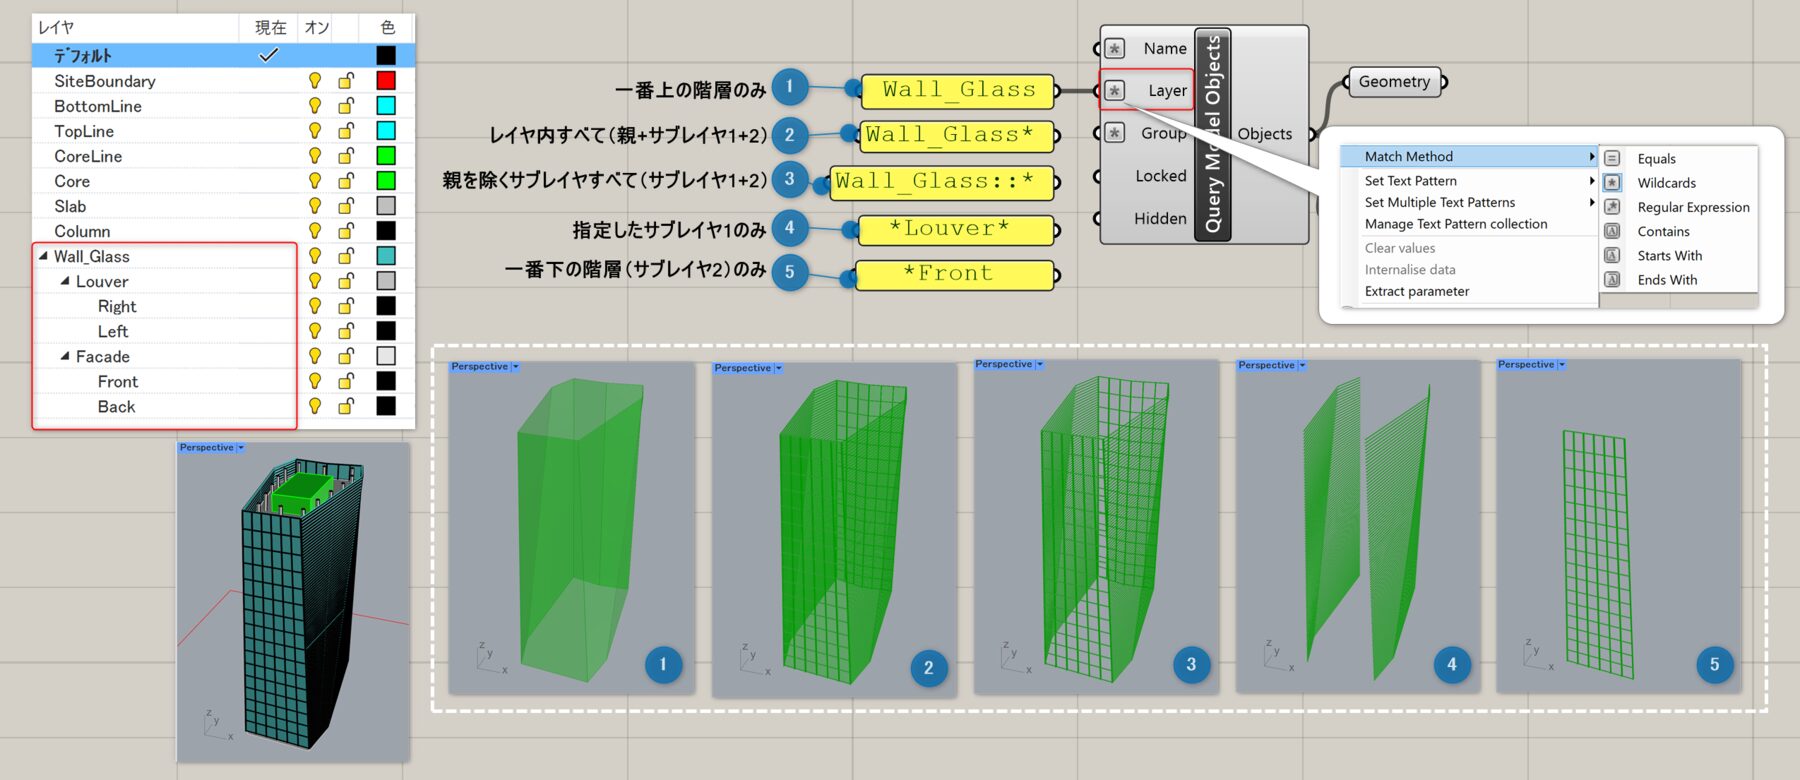
詳細2:RhinoとGHでそれぞれグループ名を指定してオブジェクトを抽出した例。Rhinoで任意のグループ名を指定する場合は、[SetGroupName]コマンドを使用。GHでグループ名を指定するには、[Named Group]を右クリックして従来のBakeを行うと確定される。
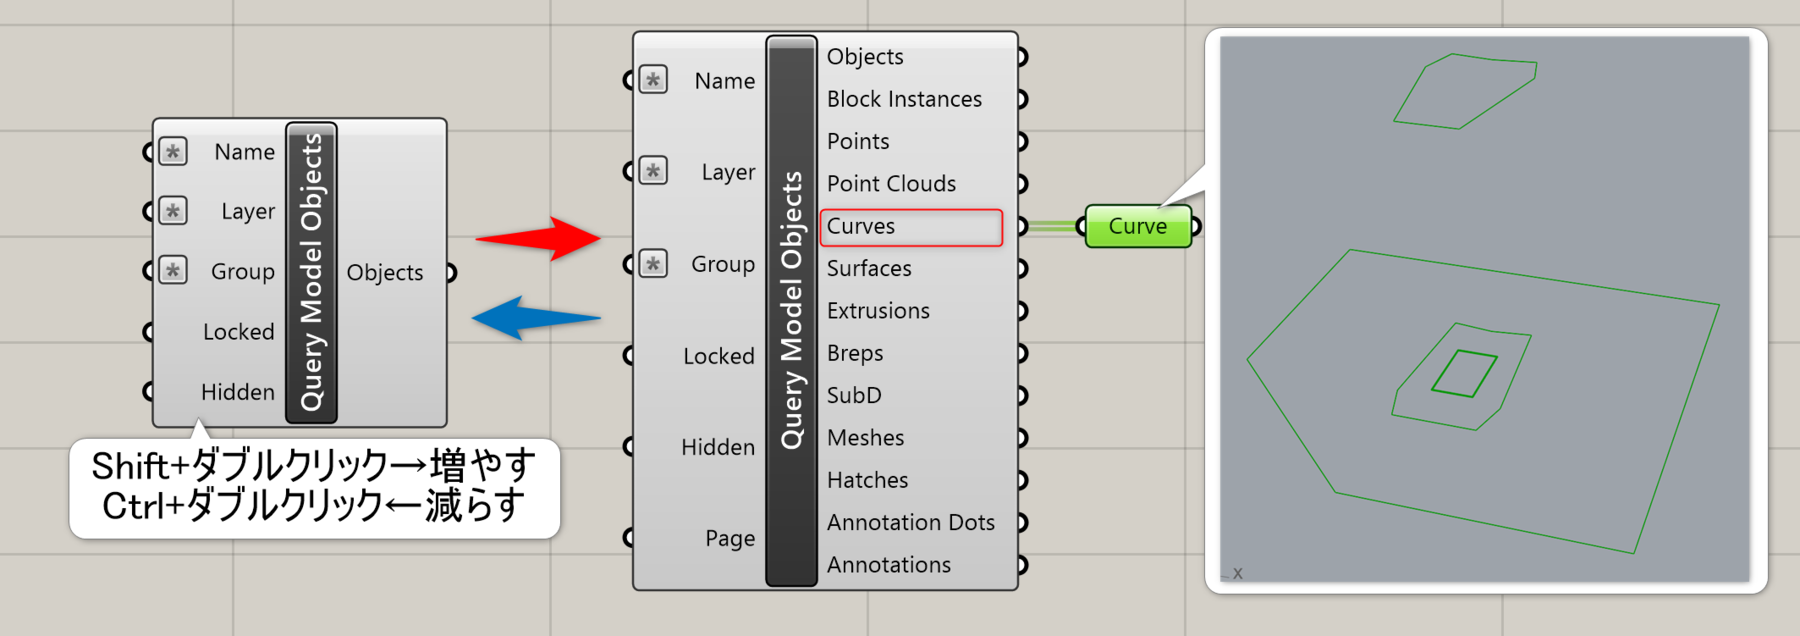
詳細3:コンポーネントを拡大表示し、+ボタンで出力を追加すると、オブジェクトのタイプごとに出力可能。※Shiftキーを押しながらダブルクリックするとすべての端子を表示できる(Ctrlキーはその逆)。図は、入力時にフィルタをかけず、出力時にCurveオブジェクトのみ出力端子から抽出した例。
詳細4:デフォルトではRhino上でのオブジェクトの変更が同期するよう、”Synclonize”オプションがオンになっているが、オフにすると同期がオフになり、ボタンを押して更新する事が可能。※入力端子の内容変更はボタンの使用に関わらずリアルタイム
Display Attributes
C
Rhino>Objects
表示属性(Display)を入力し、表示色(Display Colour)や表示モード(Display Mode)などを取得する。もしくは個々に値を入力し、表示属性を作成・修正することも可能。表示モードを設定することでオブジェクト毎にシェーディングやレンダリングなどの表示を変更可能(RhinoのSetObjectDisplayModeコマンド)。
Display Colour
C
Rhino>Objects
表示色(Display Colour)を入力し、表示色の設定方法(Source)や色(Colour)などを取得する。もしくは個々に値を入力し、表示色を作成・修正することも可能。Sourceは[レイヤの設定](By Layer)や[親の設定](By Parent)といった形で何から表示色を取得するかの設定項目。
Drafting Attributes
C
Rhino>Objects
線種属性(Drafting)を入力し、線種(Line Type)や線種スケール(Line Type Scale)などを取得する。もしくは個々に値を入力し、線種属性を作成・修正することも可能。
Object Linetype
C
Rhino>Objects
線種(Line Type)を入力し、線種の設定方法(Source)やモデルの線種(Model Line Type)などを取得する。もしくは個々に値を入力し、線種を作成・修正することも可能。Sourceは[レイヤの設定](By Layer)や[親の設定](By Parent)といった形で何から線種を取得するかの設定項目。
Print Colour
C
Rhino>Objects
印刷色(Print Colour)を入力し、印刷色の設定方法(Source)や色(Colour)などを取得する。もしくは個々に値を入力し、印刷色を作成・修正することも可能。Sourceは[レイヤの設定](By Layer)や[親の設定](By Parent)といった形で何から印刷色を取得するかの設定項目。
Print Width
C
Rhino>Objects
印刷幅(Print Width)を入力し、印刷幅の設定方法(Source)や幅(Width)などを取得する。もしくは個々に値を入力し、印刷幅を作成・修正することも可能。Sourceは[レイヤの設定](By Layer)や[親の設定](By Parent)といった形で何から印刷幅を取得するかの設定項目。
Render Attributes
C
Rhino>Objects
レンダー属性情報(Render Attributes)を入力し、マテリアル(Object Material)や影を作るか(Cast Shadows)、影を受けるか(Receive Shadows)などを取得する。もしくは個々に値を入力し、レンダー属性情報を作成・修正することも可能。
Render Material
C
Rhino>Objects
オブジェクトマテリアル(Object Material)を入力し、マテリアルの設定方法(Source)やマテリアル(Material)などを取得する。もしくは個々に値を入力し、オブジェクトマテリアルを作成・修正することも可能。Sourceは[レイヤの設定](By Layer)や[親の設定](By Parent)といった形で何からマテリアルを取得するかの設定項目。
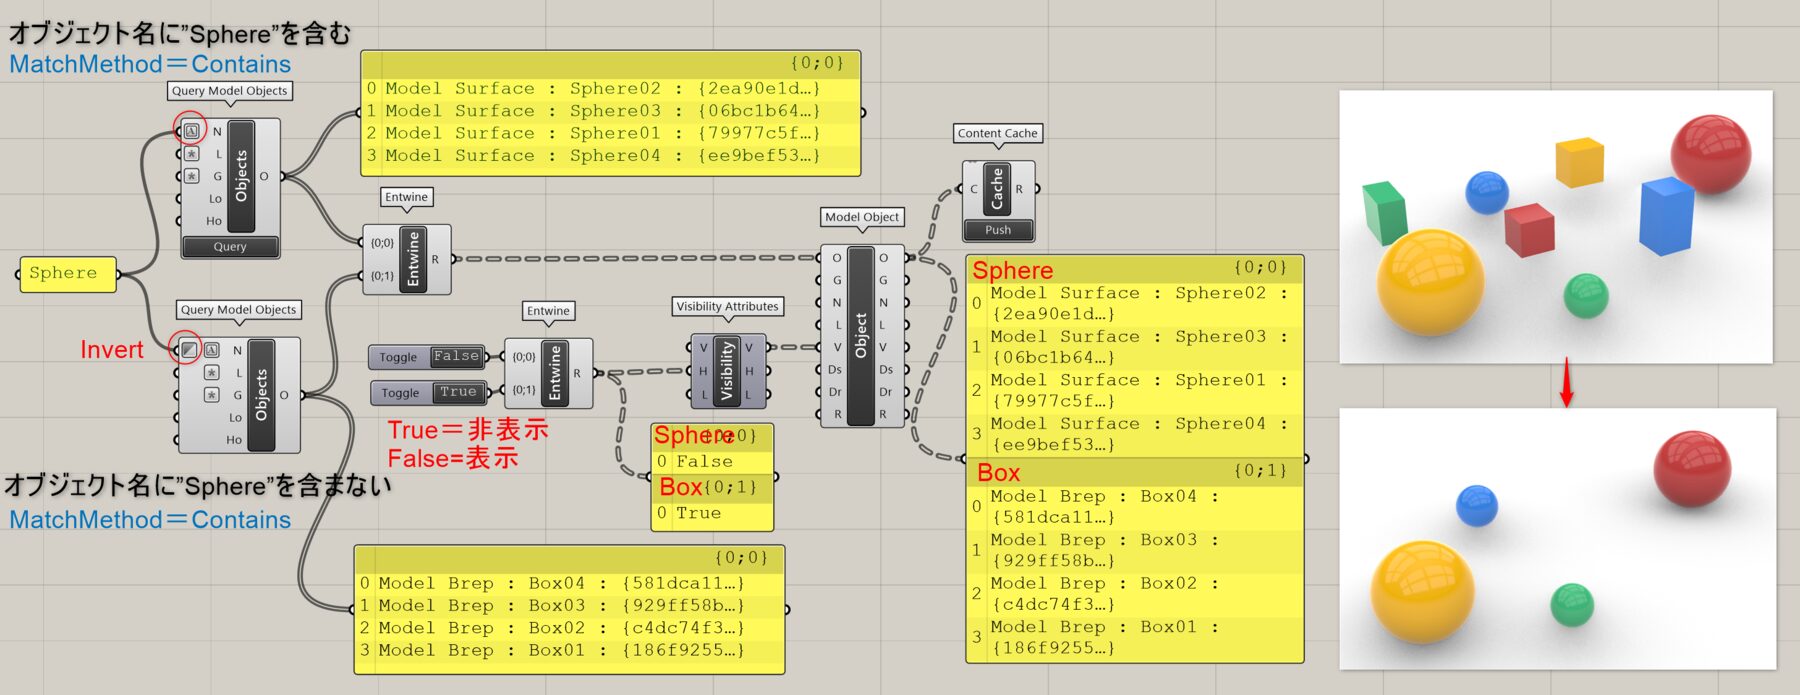
Visibility Attributes
B
Rhino>Objects
可視属性(Visibility Attributes)を入力し、表示・非表示(Hidden)やロックされているか(Locked)などを取得する。もしくは個々に値を入力し、可視属性を作成・修正することも可能。
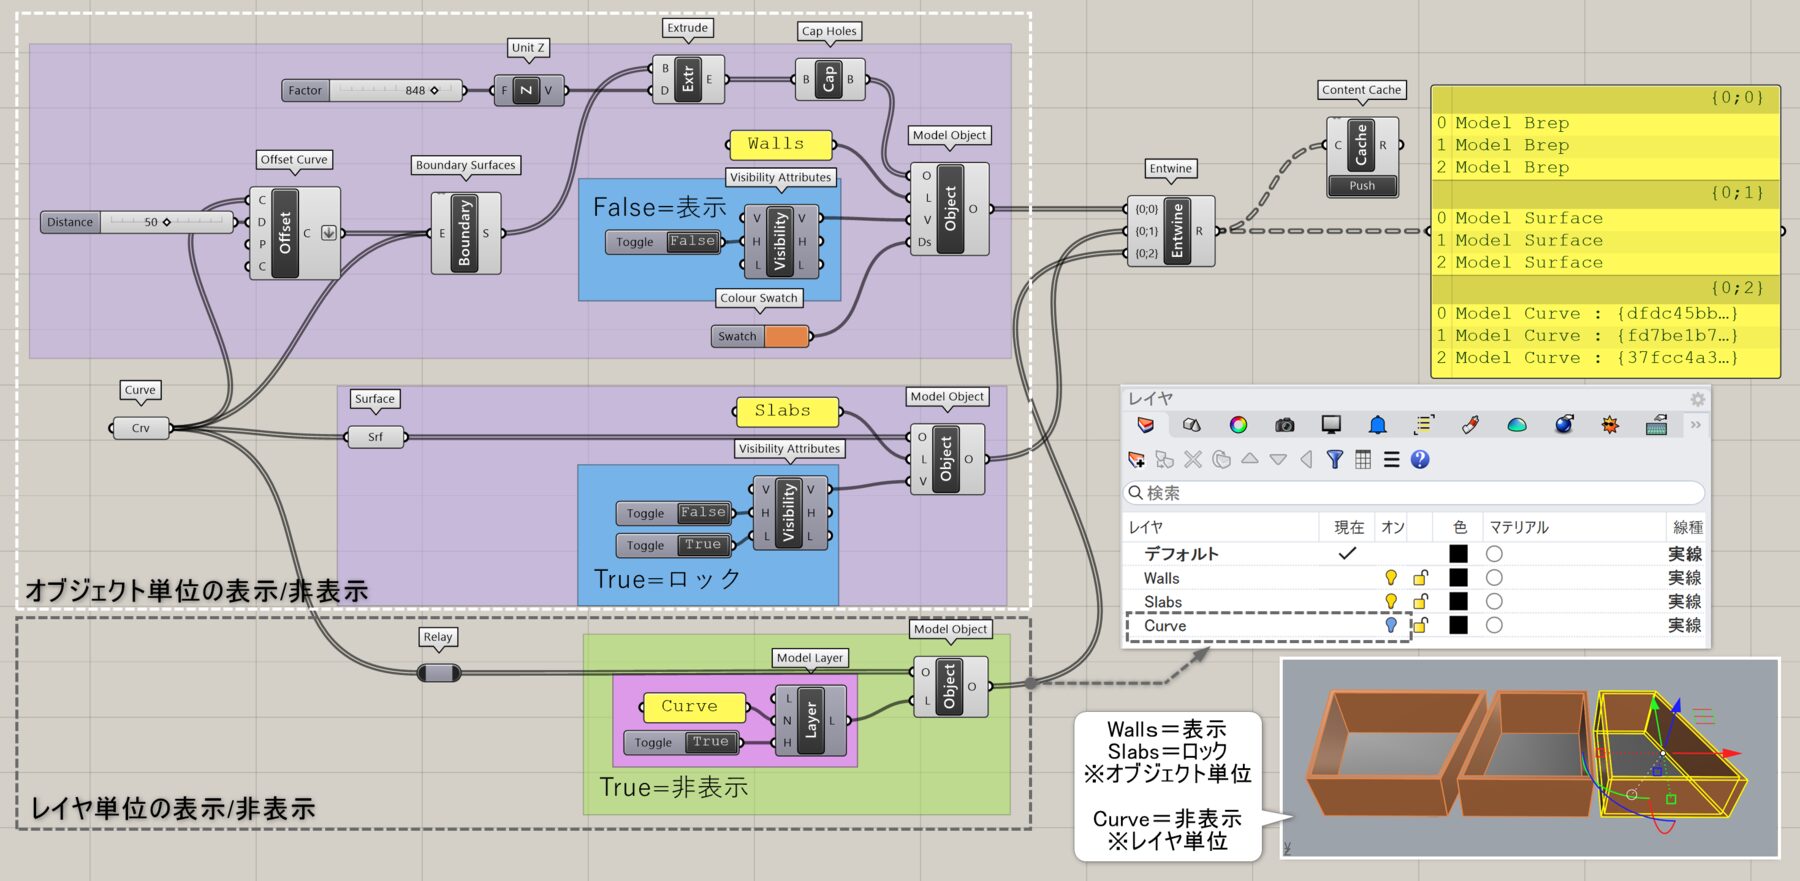
詳細1:[Visibility Attributes]と[Content Cache]を使用して、曲線をオフセット+押し出しで立ち上げた壁(Walls)は「表示」、曲線にサーフェスを貼った床(Slabs)は「ロック」に設定した例。レイヤ単位(ここではWalls/Slabsなど)でベイクしても、各レイヤのオン/オフがコントロールされる(レイヤの電球アイコンがオフになる)訳ではなく、あくまでもオブジェクト単位の表示/非表示となる。レイヤ単位で表示/非表示をベイクするには、[Model Layer]の「Hidden」入力を使用。ここでは、元の曲線をレイヤ単位で「非表示」にしている。
詳細2:[Visibility Attributes]の入力を簡単にするため、「Hidden」入力とオブジェクト入力に[Entwine]を使用した例。オブジェクトは[Query Model Object]のMatchMethod(Contains)フィルタを使用して「Sphere」を含むものとそうでないものに分けるため、「Invert」オプションで切り分けている。
Drafting
Model Linetype
C
Rhino>Drafting
モデルの線種(Model Linetype)を入力し、線種名(Name)や線種の長さ(Segments)、端部のスタイル(Cap Style)、結合部のスタイル(Join Style)、幅(Width)、幅の単位(Width Units)などを取得する。もしくは個々に値を入力し、モデルの線種を作成・修正することも可能。
Query Model Linetypes
C
Rhino>Drafting
線種名(Name)を入力し、3dm内から該当する線種を取得する。端子メニューのMatchMethodから、完全一致(Equals)やワイルドカード(Wildcards)などの一致条件を変更できる。
Colour Gradient
C
Rhino>Drafting
グラデーション(Gradient)を入力し、開始点(Start Point)や終了点(End Point)、繰り返し数(Repeat)やグラデーションタイプ(Type)、色(Colours)などを取得する。もしくは個々に値を入力し、グラデーションを作成・修正することも可能。
Gradient Colour Stop
C
Rhino>Drafting
グラデーション終了点(Gradient Colour Stop)を入力し、色(Colour)や終了する数値(Position)などを取得する。もしくは個々に値を入力し、グラデーション終了点を作成・修正することも可能。
Model Hatch
C
Rhino>Drafting
ハッチ(Hatch)を入力し、ハッチングパターン(Hatch Pattern)や基点(Base Point),回転角度(Rotation)、スケール(Scale)、境界を表示するか(Show Boundary)、背景色(Background)、塗りつぶしスタイル(Fill Style)などを取得する。もしくは個々に値を入力し、ハッチを作成・修正することも可能。
Hatch Line
C

Rhino>Drafting
ハッチ線(Hatch Line)を入力し、開始点(Start)や方向(Direction)、シフト値(Shift)、オフセット値(Offset)、線の長さ(Segments)を取得する。もしくは個々に値を入力し、ハッチ線を作成・修正することも可能。
Import Hatch Pattern
C

Rhino>Drafting
ハッチパターンがあるPC内のファイルパス(File Path)を入力して、ハッチパターンをインポートできる。
Model Hatch Pattern
C
Rhino>Drafting
ハッチパターン(Hatch Pattern)を入力し、ハッチ名(Name)やハッチ線(Hatch Lines)などを取得する。もしくは個々に値を入力し、ハッチパターンを作成・修正することも可能。
Query Model Hatch Patterns
C
Rhino>Drafting
ハッチ名(Name)を入力し、3dm内から該当するハッチを出力する。端子メニューのMatchMethodから、完全一致(Equals)やワイルドカード(Wildcards)などの一致条件を変更できる。
Model Space Scale
C
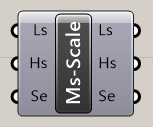
Rhino>Drafting
モデル空間での線種スケール(Linetype Scale)、ハッチスケール(Hatch Scale)、モデル空間でのハッチのスケーリングを有効にするか(Hatch Scale Enabled)を設定する。もしくはそれらの情報を取得する。
Annotations
Aligned Dimension
C
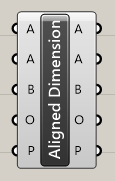
Rhino>Annotations
長さ寸法(Aligned Dimension)を入力し、1点目(Point A)、2点目(Point B)、オフセット値(Offset)、配置平面(Plane)などを取得する。もしくは個々に値を入力し、長さ寸法を作成・修正することも可能。
Angle Dimension(Arc)
C

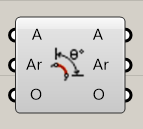
Rhino>Annotations
角度寸法(Angle Dimension)を入力し、円弧(Arc)、オフセット値(Offset)などを取得する。もしくは個々に値を入力し、角度寸法を作成・修正することも可能。
Angle Dimension(Lines)
C
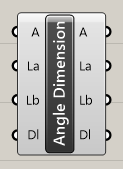
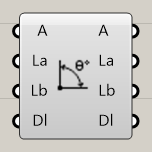
Rhino>Annotations
角度寸法(Angle Dimension)を入力し、1つ目の線分(Line A)、2つ目の線分(Line B)、寸法配置位置(Dimension Location)などを取得する。もしくは個々に値を入力し、角度寸法を作成・修正することも可能。
Angle Dimension(Points)
C
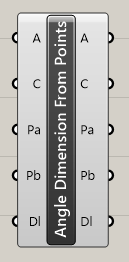
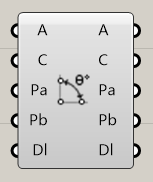
Rhino>Annotations
角度寸法(Angle Dimension)を入力し、中心点(Center)、1つ目の点(Point A)、2つ目の点(Point B)、寸法配置点(Dimension Location)などを取得する。もしくは個々に値を入力し、角度寸法を作成・修正することも可能。
Annotation Dot
C
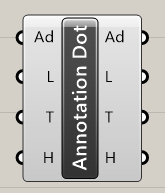

Rhino>Annotations
テキストドット(Annotation Dot)を入力し、配置位置(Location)や表示テキスト(Primary Text)や文字高さ(Text Height)などを取得する。もしくは個々に値を入力し、ドットを作成・修正することも可能。
Centermark
C
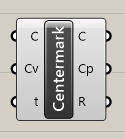

Rhino>Annotations
中心寸法(Centermark)を入力し、中心点(Center Point)や半径値(Radius)などを取得する。もしくは個々に値を入力し、中心寸法を作成・修正することも可能。
Leader
C

Rhino>Annotations
引出線(Leader)を入力し、ポリライン(Curve)や表示文字(Text)や配置平面(Plane)などを取得する。もしくは個々に値を入力し、引出線を作成・修正することも可能。
Linear Dimension
C
Rhino>Annotations
並行寸法(Linear Dimension)を入力し、配置直線(Base Line)や1つ目の配置点(Point A)や2つ目の配置点(Point B)などを取得する。もしくは個々に値を入力し、並行寸法を作成・修正することも可能。
Ordinate Dimension
C

Rhino>Annotations
座標寸法(Ordinate Dimension)を入力し、基準平面(Plane)や方向(Direction)、平面上の座標値を求める点(Feature Location)、寸法配置点(Dimension Location)、寸法のオフセット値などを取得する。もしくは個々に値を入力し、座標寸法を作成・修正することも可能。
Radial Dimension
C
Rhino>Annotations
円弧寸法(Radial Dimension)を入力し、半径か直径か(Dimension Type)や中心点(Center Point)や2つ目の配置点(Curve Point)、寸法配置点(Dimension Location)などを取得する。もしくは個々に値を入力し、並行寸法を作成・修正することも可能。
Text Entity
B
Rhino>Annotations
テキスト(Text Entity)オブジェクトを入力し、配置平面(Plane)や設定した文字(Text)などを取得する。もしくは個々に値を入力し、テキストオブジェクトを作成・修正することも可能。ここで言うテキストオブジェクトはRhinoで[Text]コマンドで作成するもの。
詳細1:[Text Entity]を経由して、Rhinoで扱う事のできる各種テキストオブジェクトを作成できる。図は、上から①[Text Entity]のTe出力を[Model Object]に接続し「テキスト」を作成②[Annotation Dot]に接続し「テキストドット」を作成③[Text On Surface]に接続し「テキストオブジェクト」を作成した例。フォントを変更するには、コンポーネントを拡大して「Ts(Text Settings)」入力を追加し、[Annotation Text Settings]の「Font」入力で指定可能。
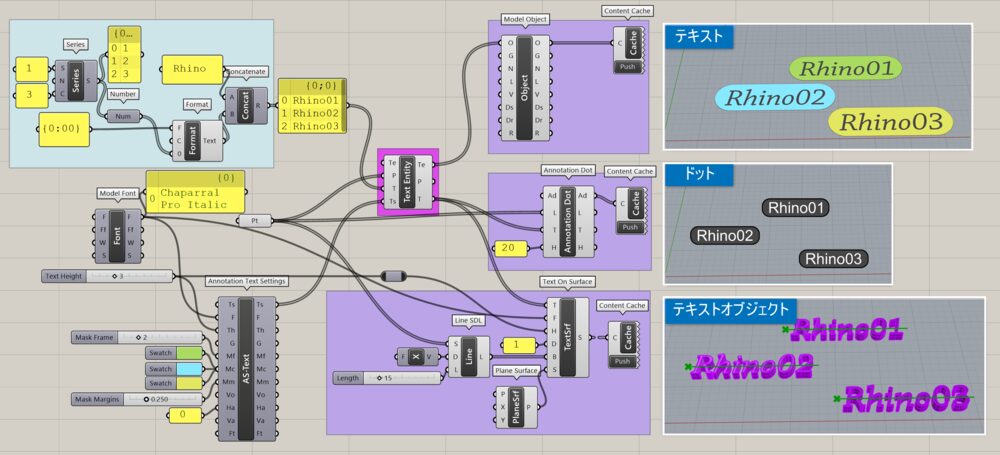
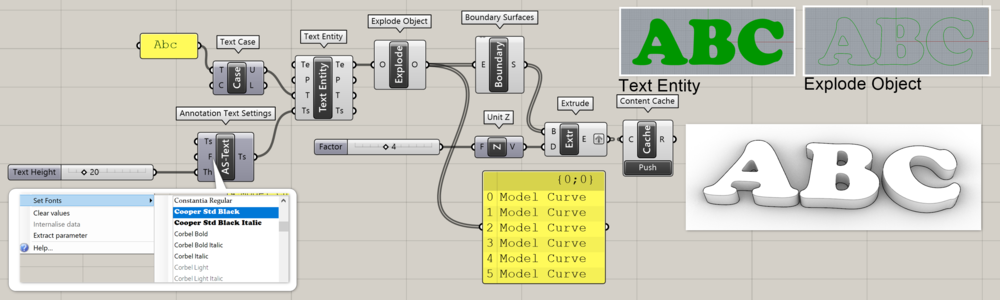
詳細2:[Text Entity]で入力したテキストを[Text Case]を経由して全て大文字に変換後、[Explode Object]でアウトライン曲線を抽出し、押し出した例。
Annotation Style
C
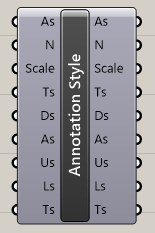
Rhino>Annotations
注釈スタイル(Annotation Style)を入力し、スタイル名(Name)やモデル空間スケール(Scale)、テキスト設定(Text Settings)、寸法設定(Dimension Setteings)、矢印設定(Arrow Settings)、単位設定(Units Settings)、引出線設定(Leader Settings)、許容差設定(Tolerance Settings)などを取得する。もしくは個々に値を入力し、注釈スタイルを作成・修正することも可能。
Annotation Style Overrides
B
Rhino>Annotations
注釈データ一般(Annotation)を入力し、注釈スタイル(Style)やモデル空間スケール(Model Scale)、テキスト設定(Text Settings)、寸法設定(Dimension Settings)、矢印設定(Arrow Settings)、単位設定(Units Settings)、引出線設定(Leader Settings)、許容差設定(Tolerance Settings)などを取得する。もしくは個々に値を入力し、注釈データ一般の設定を作成・修正することも可能。Query Annotation Styleで求めた注釈スタイルを入力し、注釈スタイルをまとめて上書きするような使い方も可能。
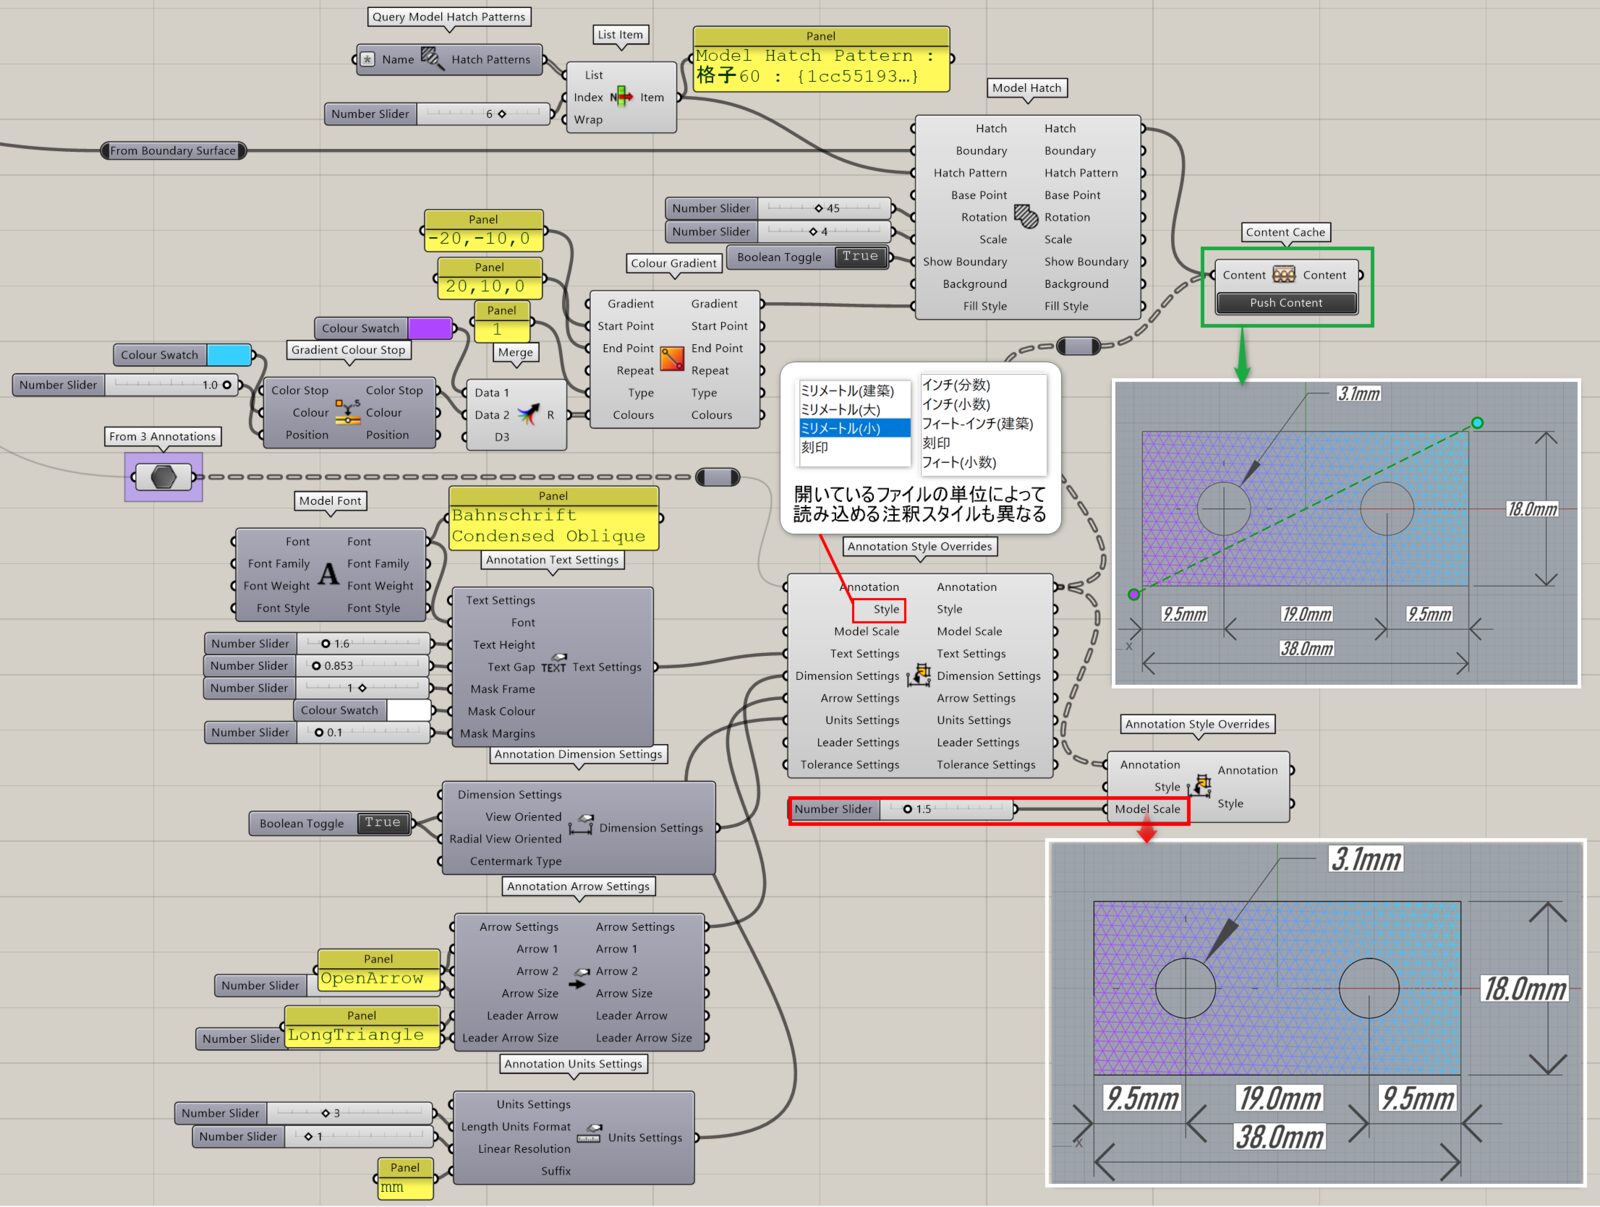
詳細1:注釈データを入力して、更に細かい設定を追加・修正できる。図は詳細1Aで作成した[Linear Dimension][Radial Dimension][Aligned Dimension]に対して、詳細1Bの[Annotation Style overrides]によってテキスト設定(Text Settings)、寸法設定(Dimension Settings)、矢印設定(Arrow Settings)、単位設定(Units Settings)などを変更、更にもう1つの[Annotation Style Overrides]へ注釈データを渡し、モデルスケールを1.5倍にしてすべての要素を拡大した例。加えて、[Model Hatch]にてハッチングを作成し、[Colour Gradient][Gradient Colour Stop]などで色付けを行った後、注釈データと共に[Content Cache]でベイクしている。
クリックで拡大表示できます。

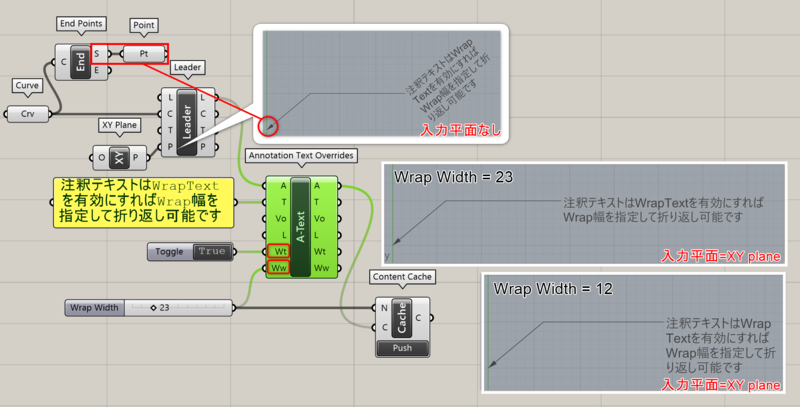
Annotation Text Overrides
B
Rhino>Annotations
注釈データ一般(Annotation)を入力し、注釈の文字(Text)とビューに水平か(View Oriented)などを取得する。もしくは個々に値を入力し、注釈データ一般の設定を作成・修正することも可能。
詳細1:注釈データ一般(Annotation)を入力し、文字に関する情報を取得、または作成/修正可能。図は、[Leader]で作成した引出線に[Annotation Text Overrides]にて文字を追加した例。全てのオプションを表示させると表示される「Wrap Text」を有効+「Wrap width」の幅を変更し、[Contents cache]のキャッシュ名を利用して異なる折り返し幅の引出線を複製ベイクした例。
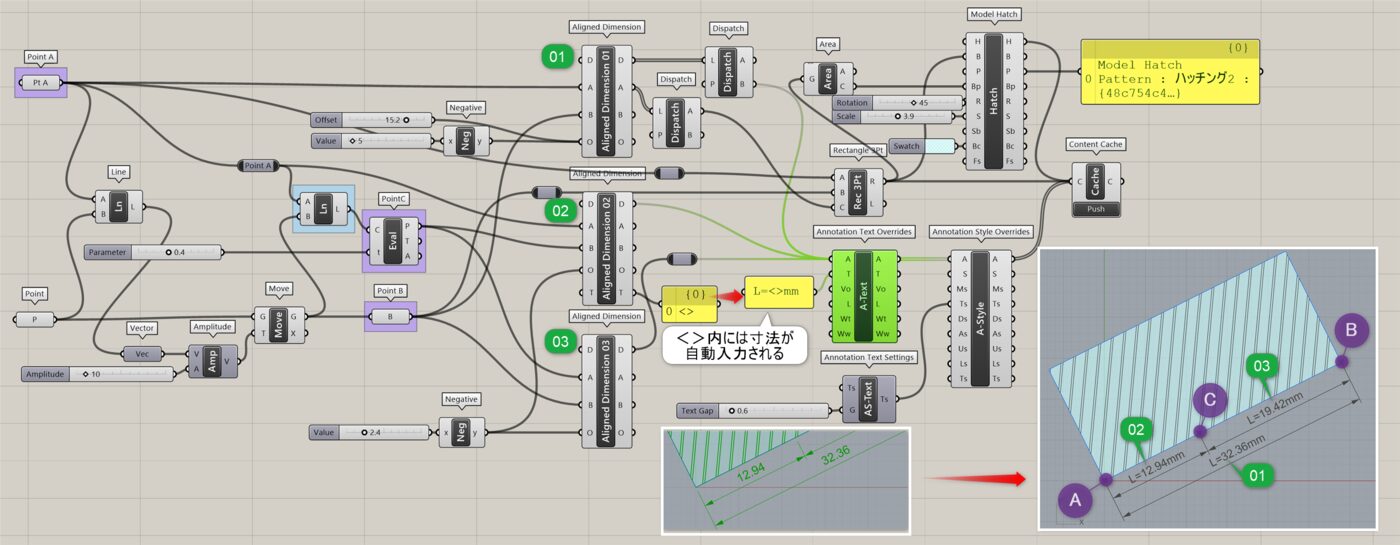
詳細2:[Aligned Dimension]のT出力(Text Override)からは、<>(=寸法)が出力され、入力が無い場合は寸法のみが自動入力されている事が確認できる。図は、[Annotation Text Overrides]のT入力に「L=<>mm」(<>=寸法自動入力)を追加入力し、複数のAnnotationに対して接頭と接尾に記号を上書き修正した例。
クリックで拡大表示できます。
Query Annotation Styles
B

Rhino>Annotations
注釈スタイル名(Name)を入力し、3dm内の注釈スタイルから該当する注釈スタイルを出力する。オプションのMatchMethodで入力名と完全一致や含むなどから検索の設定を変更できる。
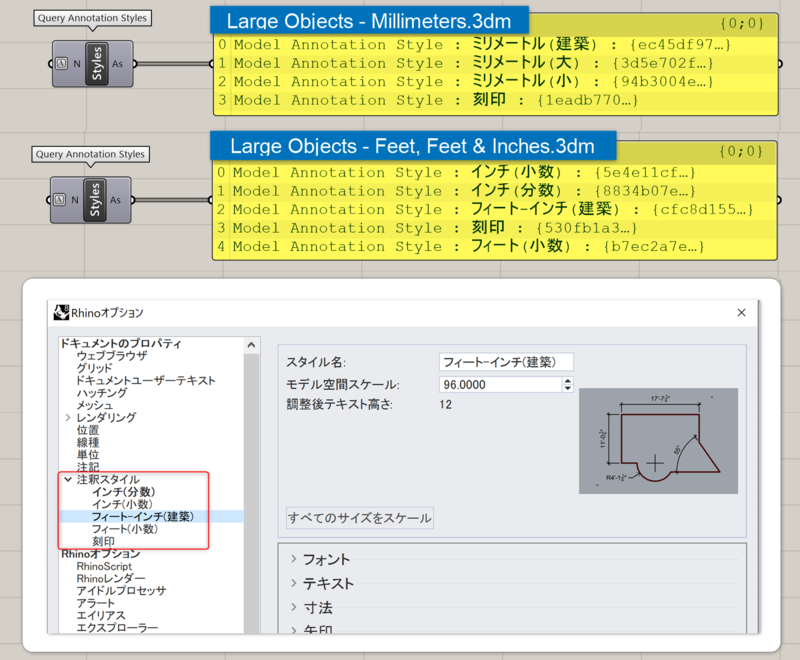
詳細1:現在開いている3dmファイル内の注釈スタイルから、任意のスタイルを抽出する。注釈スタイルの種類は、開いているテンプレートによって異なる。※ここでいう「注釈スタイル」は、Rhinoオプション>注釈スタイルで選択できるもの。不要なスタイルはここで削除や編集も可。
詳細2:注釈スタイルはオプションのMatchMethodでフィルタ検索をかける事ができる。図は、[Equals]オプションと[Value List]にて各注釈スタイルをプルダウンで選択できるようにし、[Aligned Dimension]の表記を[Annotation Style Overrides]と[Annotation Units Settings]を使用して編集した例。

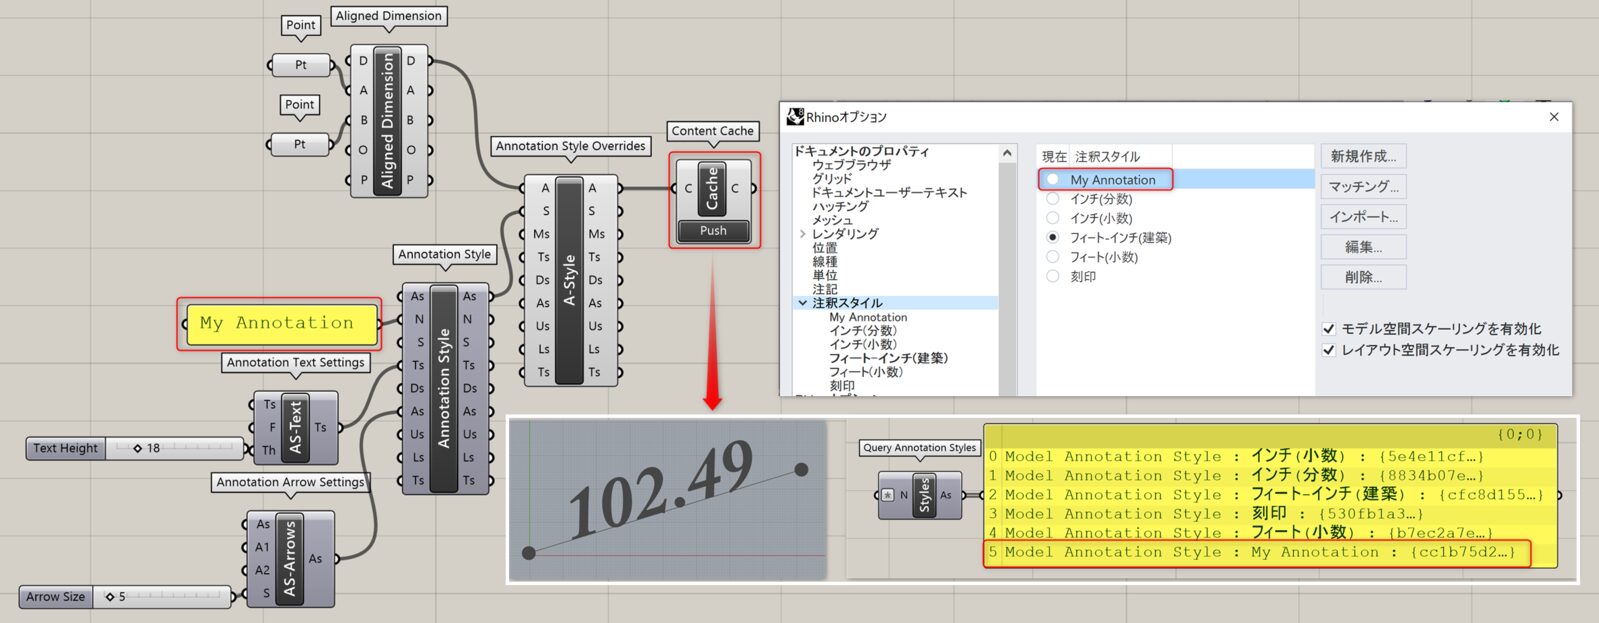
詳細3:3dmファイル内の注釈スタイル以外に、Grasshopper内で新規作成した注釈スタイルをベイクし、オリジナルの注釈スタイルとして同様に[Query Annotation Styles]で抽出する事も可能。クリックで拡大表示できます。
Annotation Arrow Settings
C
Rhino>Annotations
矢印設定(Arrow Settings)を入力し、先端1(Arrow 1)や先端 2(Arrow 2)、矢印のサイズ(Arrow Size)、矢印のフィット設定(Fit Arrow)、矢印が外にある場合どうするか(Dimension Inline)、引出線の先端(Leader Arrow)、引出線矢印のサイズ(Leader Arrow Size)などを取得する。もしくは個々に値を入力し、矢印設定を作成・修正することも可能。Rhinoの寸法スタイル内の[矢印]の設定とほぼ同じ内容。
Annotation Dimension Settings
C
Rhino>Annotations
寸法設定(Dimension Settings)を入力し、ビューに水平か(View Oriented)テキストの配置位置(Text Location)、テキストの向き(Text Rotation)、延長部の長さ(Dimension Line Extension)、補助線の延長部長さ(Extension Line Extension)、補助線のオフセット距離(Extension Line Offset)、補助線を固定するか(Fixed Extension)、固定した際の長さ(Fixed Extension Length)などを取得する。もしくは個々に値を入力し、寸法設定を作成・修正することも可能。Rhinoの寸法スタイル内の[寸法]の設定を上から並べたものとほぼ同じ内容。
Annotation Leader Settings
C
Rhino>Annotations
引出線設定(Leader Settings)を入力し、曲線タイプ(Leader Curve Type)や参照線をつけるか(Has Landing)、参照線の長さ(Landing Length)マスク各種設定(Frame,Colour,Margins)、ビューに沿うか(View Oriented)、文字を配置する位置(Holizontal Alignment,Vertical Alignment,Leader Text Orientation)などを取得する。もしくは個々に値を入力し、引出線設定を作成・修正することも可能。
Annotation Text Settings
C
Rhino>Annotations
注釈文字設定(Text Settings)を入力し、フォント(Font)や文字高さ(Text Height)、マスク各種設定(Frame,Colour,Margins)、ビューに沿うか(View Oriented)、文字を配置する位置(Holizontal Alignment,Vertical Alignment,Fit Text)などを取得する。もしくは個々に値を入力し、注釈文字設定を作成・修正することも可能。
Annotation Tolerance Settings
C
Rhino>Annotations
注釈許容差設定(Annotation Tolerance Settings)を入力し、許容差のスタイル(Tolerance Format)や精度(Tolerance Resolution)、変換精度(Alt. Tolerance Resolution)、上限・下限(Tolerance Upper Value,Lower Value)、テキスト高さの%(Tolerance Height Scale)などを取得する。もしくは個々に値を入力し、注釈許容差設定を作成・修正することも可能。Rhinoの寸法スタイル内の[許容差の設定]とほぼ同じ内容。
Annotation Units Settings
C

Rhino>Annotations
注釈単位設定(Annotation Units Settings)を入力し、単位の数値表記(Length Units Format)や長さ計数(Length Factor)や直線長さの精度(Linear Resolution)、丸め(Roundoff)、接頭・接尾表記(Prefix,Suffix)、0省略(Zero Suppression)、分数のスタック形式(Fraction Format)、スタック高さスケール(Fraction Height Scale)、角度の単位(Angular Units Format)、角度の精度(Angle Resolution)、角度の丸め(Angle Roundoff)、角度の0省略(Angle Zero Suppression)などを取得する。もしくは個々に値を入力し、注釈許容差設定を作成・修正することも可能。Rhinoの寸法スタイル内の[長さの単位]、[角度の単位]を併せたもの。
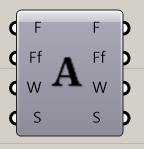
Model Font
C
Rhino>Annotations
フォント(Font)を入力し、フォントファミリ(Font Family)やレギュラやボールドといったウェイト(Font Weight)、垂直かイタリックかなどのスタイル(Font Style)などを取得する。
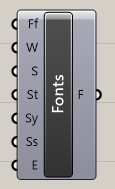
Query Installed Fonts
C
Rhino>Annotations
フォントファミリ名(Font Family)を入力し、インストール済みの該当するフォントを出力する。オプションのMatchMethodで入力名と完全一致や含むなどから検索の設定を変更できる。レギュラやボールドといったウェイト(Font Weight)、垂直かイタリックかなどのスタイル(Font Style)、伸縮の状態(Font Stretch)、シンボルフォントか(Symbol)、一筆書きできるか(Single Stroke)、エングレービングフォントか(Engraving)も併せて検索の設定に追加できる。
Render
Import Model Material
C
Rhino>Render
マテリアルファイルのパス(File Path)を設定し、マテリアルをインポートする。マテリアルファイルは拡張子がrmtl形式のもの。
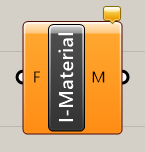
Model Material
C
Rhino>Render
マテリアル(Material)を入力し、マテリアル名(Name)やシェーダー(Shader)などを取得する。もしくは個々に値を入力し、マテリアルを作成・修正することも可能。
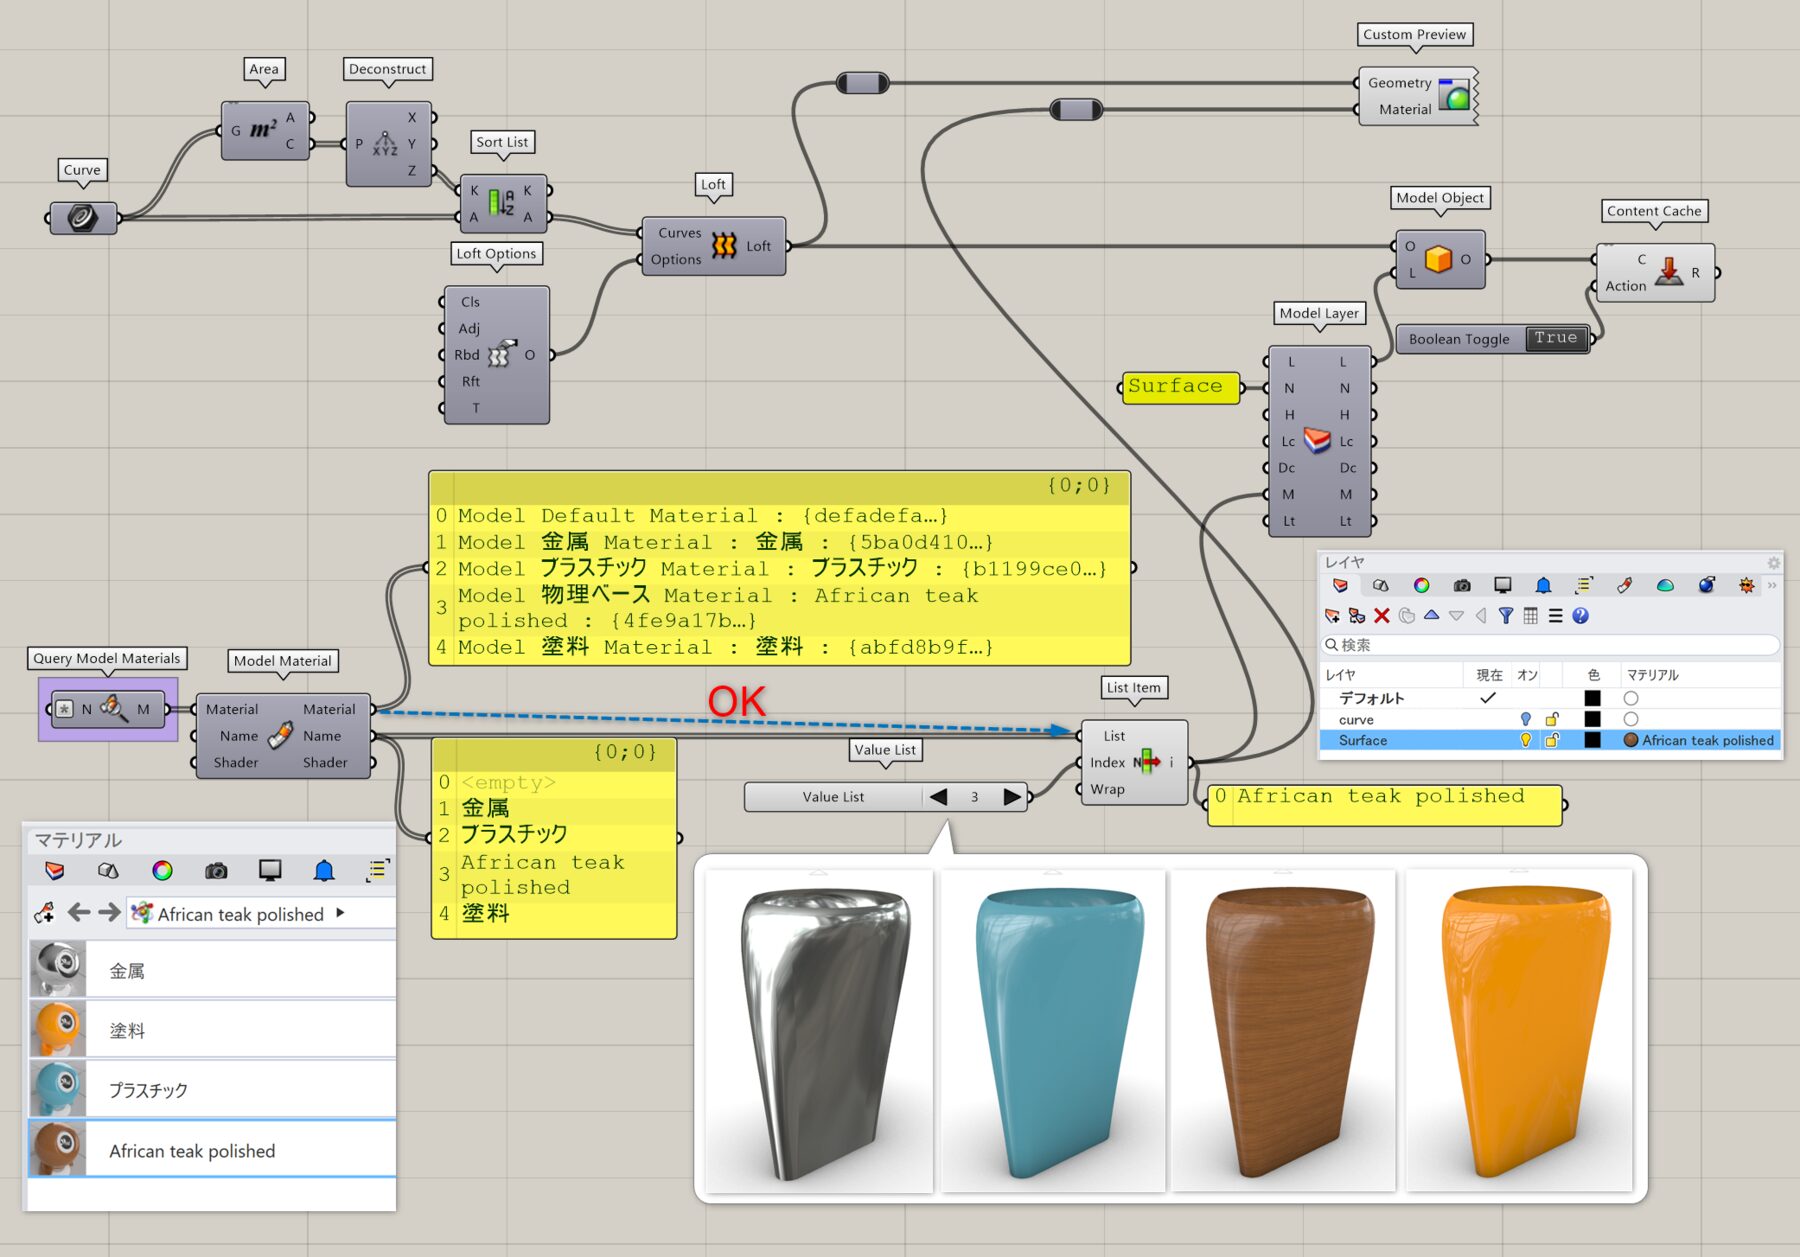
Query Model Materials
B
Rhino>Render
マテリアル名(Name)を入力し、3dm内から該当するマテリアルを出力する。端子メニューのMatchMethodから、完全一致(Equals)やワイルドカード(Wildcards)などの一致条件を変更できる。
詳細1:3dm内のマテリアルを[Query Model Materials]のワイルドカードを経由して全て取得し、[List item]と[Value List]でマテリアルの切替えを行った例。図では、[Content Cache]のPushを使用してマテリアルを適用した状態で指定レイヤにベイクした例と、ベイクせずに[Custom Preview]にてマテリアルを適用した例を両方紹介。
※[Model Layer]や[Custom Preview]に入力するマテリアルは、[Model Material]を経由して出力できるマテリアル(Material)でもマテリアル名(Name)でも両方入力可能。
Light Attributes
C
Rhino>Render
ライト全般(Light)を入力し、有効か無効か(Enabled)、色(Color)、強度(Intensity)、シャドウの強度(Shadow Intensity)、フォールオフ(Falloff)などを取得する。もしくは個々に値を入力し、ライトを修正することも可能。
Query Model Lights
C
Rhino>Render
ライトの名前(Name)とレイヤ名(Layer)を入力し、3dm内から該当するライトを出力する。端子メニューのMatchMethodから、完全一致(Equals)やワイルドカード(Wildcards)などの一致条件を変更できる。
Directional Light
C
Rhino>Render
指向性光源(Directional Light)を入力し、ライトの位置(Location)、ライトの向き(Direction)などを取得する。もしくは個々に値を入力し、指向性光源を作成・修正することも可能。
Linear Light
C
Rhino>Render
線光源(Linear Light)を入力し、ライトとなる線(Line)などを取得する。もしくは個々に値を入力し、線光源を作成・修正することも可能。
Point Light
C

Rhino>Render
点光源(Point Light)を入力し、ライトの位置(Location)などを取得する。もしくは個々に値を入力し、点光源を作成・修正することも可能。
Rectangular Light
C
Rhino>Render
矩形光源(Rectangular Light)を入力し、配置平面(Plane)、長さ(Length)や幅(Width)などを取得する。もしくは個々に値を入力し、矩形光源を作成・修正することも可能。
Spotlight
C
Rhino>Render
スポット光源(Point Light)を入力し、ライトの光源位置(Location)、ターゲット点(Target)、スポット光源の硬さ(Splotlight Hardness)、スポット光源の角度(Spotlight Angle)などを取得する。もしくは個々に値を入力し、スポット光源を作成・修正することも可能。
Import Model Environment
C
Rhino>Render
環境ファイルのパス(File Path)を設定し、環境をインポートする。環境ファイルは拡張子がrenv形式のもの。
Model Basic Environment
C
Rhino>Render
環境(Enviroment)を入力し、名前(Name)、背景色(Back Color)、投影方法(Projection)などを取得する。もしくは個々に値を入力し、環境を作成・修正することも可能。
Query Model Environment
C
Rhino>Render
環境名(Name)を入力し、3dm内から該当する環境を出力する。端子メニューのMatchMethodから、完全一致(Equals)やワイルドカード(Wildcards)などの一致条件を変更できる。
Query Render Options
C
Rhino>Render
3dm内の太陽(Sun)や環境を出力する。端子メニューのMatchMethodから、完全一致(Equals)やワイルドカード(Wildcards)などの一致条件を変更できる。
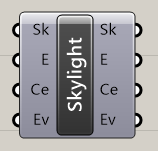
Skylight
C
Rhino>Render
スカイライト(Skylight)を入力し、有効か無効か(Enabled)、カスタム環境かどうか(Custom Enviroment)、環境(Enviroment)などを取得する。もしくは個々に値を入力し、スカイライトを作成・修正することも可能。
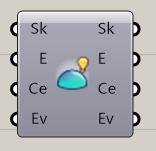
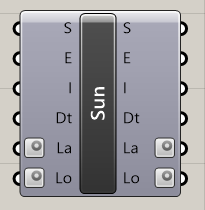
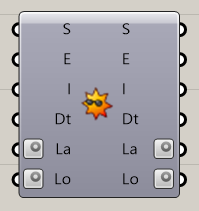
Sun
C
Rhino>Render
太陽(Sun)を入力し、有効か無効か(Enabled)、強度(Intensity)、日付(Date Time)、緯度(Latitude)、経度(Longitude)などを取得する。もしくは個々に値を入力し、太陽を修正することも可能。
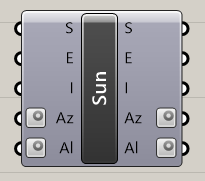
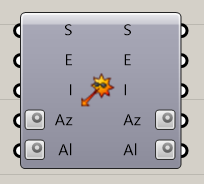
Sun(Manual Control)
C
Rhino>Render
太陽(Sun)を入力し、有効か無効か(Enabled)、強度(Intensity)、方位角(Azimuth)、高度(Altitude)などを取得する。もしくは個々に値を入力し、太陽を手動で修正することも可能。Rhinoで[手動コントロール]にチェックをつけた状態と同様。
Viewports
Model View
C
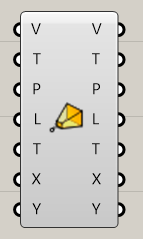
Rhino>Viewports
モデルビュー(View)を入力し、ビュータイトル(Title)、並行かパースか(Perspective)、カメラ位置(Location)、カメラのターゲット(Target)、フレーム幅(X Extents)、フレーム高さ(Y Extents)などを取得する。もしくは個々に値を入力し、モデルビューを作成・修正することも可能。BakeするとRhinoの名前の付いたビューに追加・反映される。
Model Viewport
C
Rhino>Viewports
モデルビューポート(Viewport)を入力し、ビューポート名(Name)、モデルビュー(View)などを取得する。もしくは個々に値を入力し、モデルビューポートを作成・修正することも可能。Bakeすると新規でビューポートが立ち上がったり、修正が反映される。
Query Pages
C
Rhino>Viewports
レイアウトのページ名(Name)を入力し、3dm内から該当するページを出力する。端子メニューのMatchMethodから、完全一致(Equals)やワイルドカード(Wildcards)などの一致条件を変更できる。
Query Viewports
C
Rhino>Viewports
ビューポート名(Name)を入力し、3dm内から該当するビューポートを出力する。端子メニューのMatchMethodから、完全一致(Equals)やワイルドカード(Wildcards)などの一致条件を変更できる。
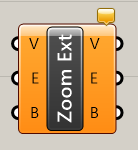
Zoom Extents
C
Rhino>Viewports
対象のビュー(View)とジオメトリ(Extents)を入力し、ジオメトリを全体を表示するよう調整されたビューを作成する。Borderの値で拡大縮小時の周りの余白を調整する。また、既存ビューを入力することで表示のバウンディングボックスやBorderの値を取得可能。BakeするとRhinoの名前の付いたビューに追加・反映される。[Model View]や[Model Viewport]と組み合わせることでRhinoの全体表示コマンドのように使用することもできる。