RhinoのプラグインBongoのIK(インバースキネマティクス)を使ったアニメーション作成方法を紹介します。
Bongoの基本的な操作方法についてはこちらのチュートリアルもご参考ください。
※ご利用の環境によっては一部インターフェースの表示が異なりますのでご注意ください。
Step1 始める前に
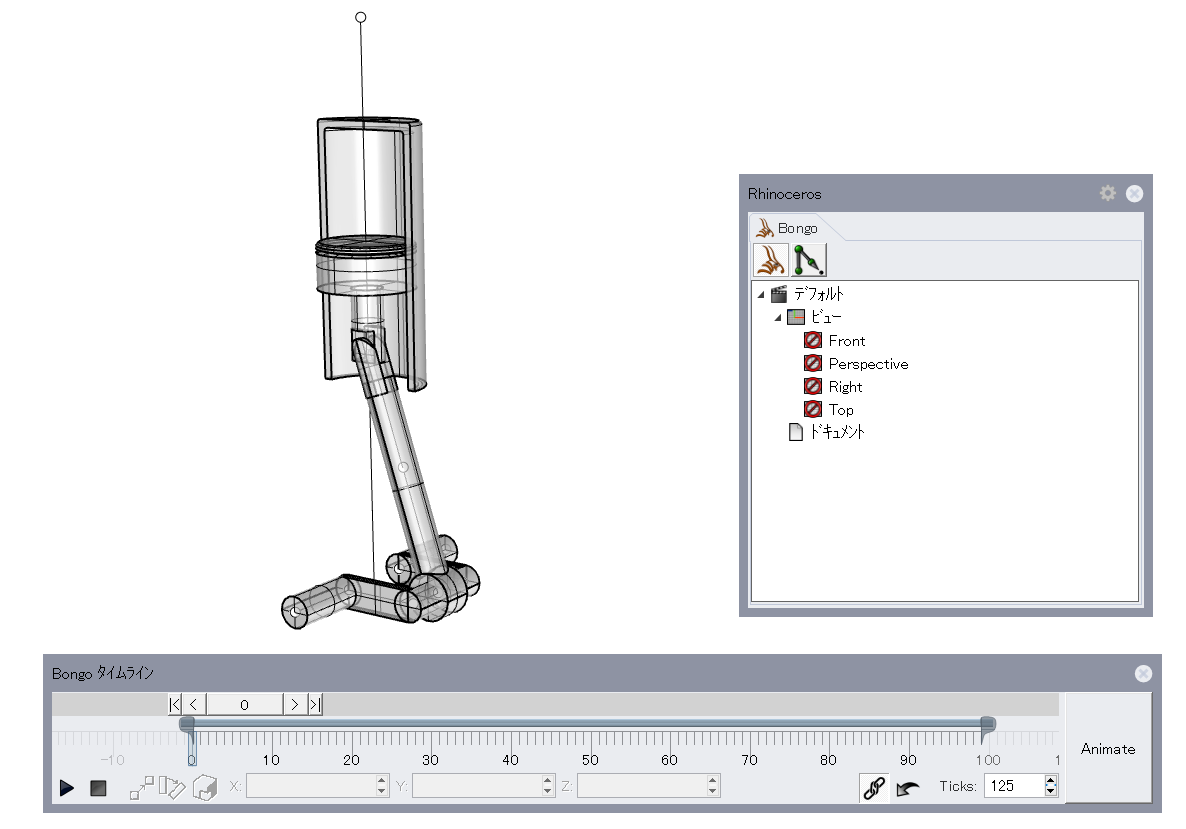
1-練習用のモデルをダウンロードして開きます。
PistonStart.3dm
モデルを開き、以下のパーツが表示されているか確認します。

2-Bongoツールバーから”タイムライン”・”アニメーションを編集”を開きます。

Step2 Bongoコマンド[BongoLinkChain]でオブジェクトをリンクする
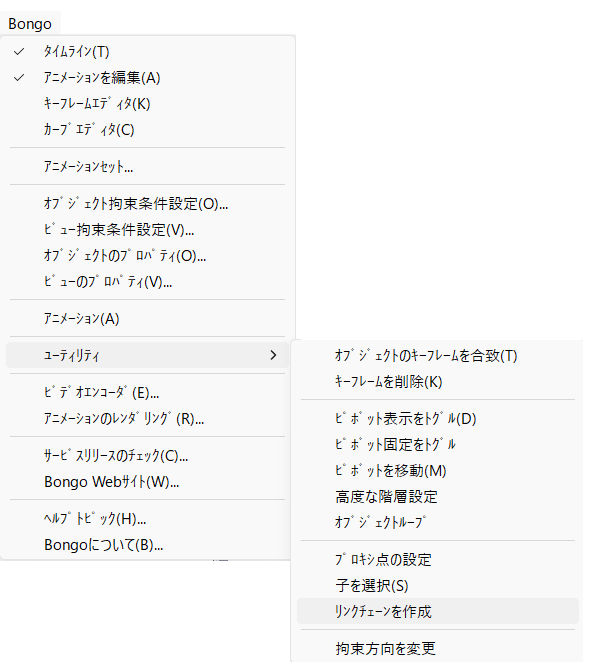
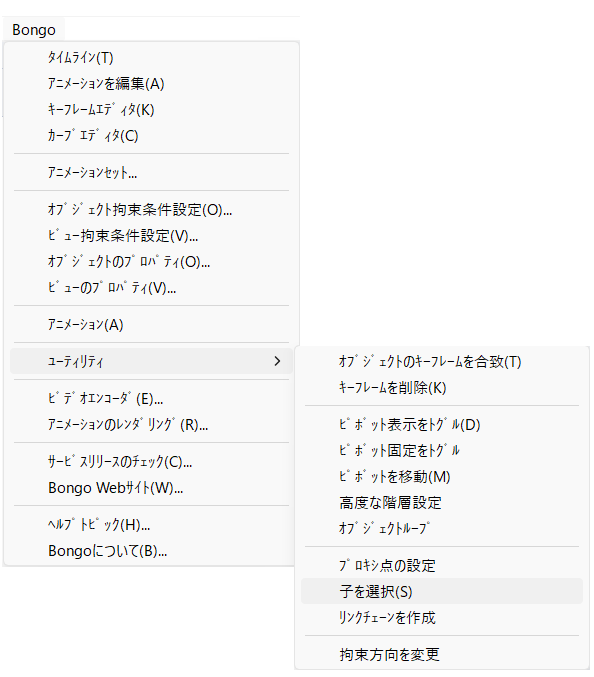
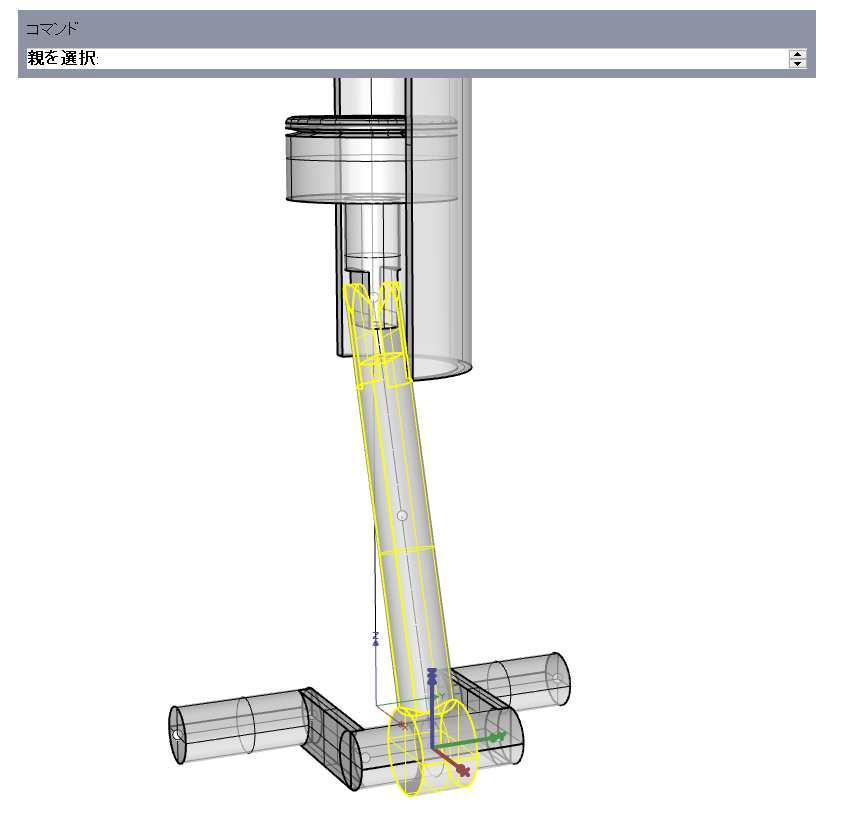
1-Bongoメニュー>ユーティリティ>リンクチェーンを作成をクリックします。
2-“親を選択”のプロンプトでベース部分(オブジェクト0)を選択します。
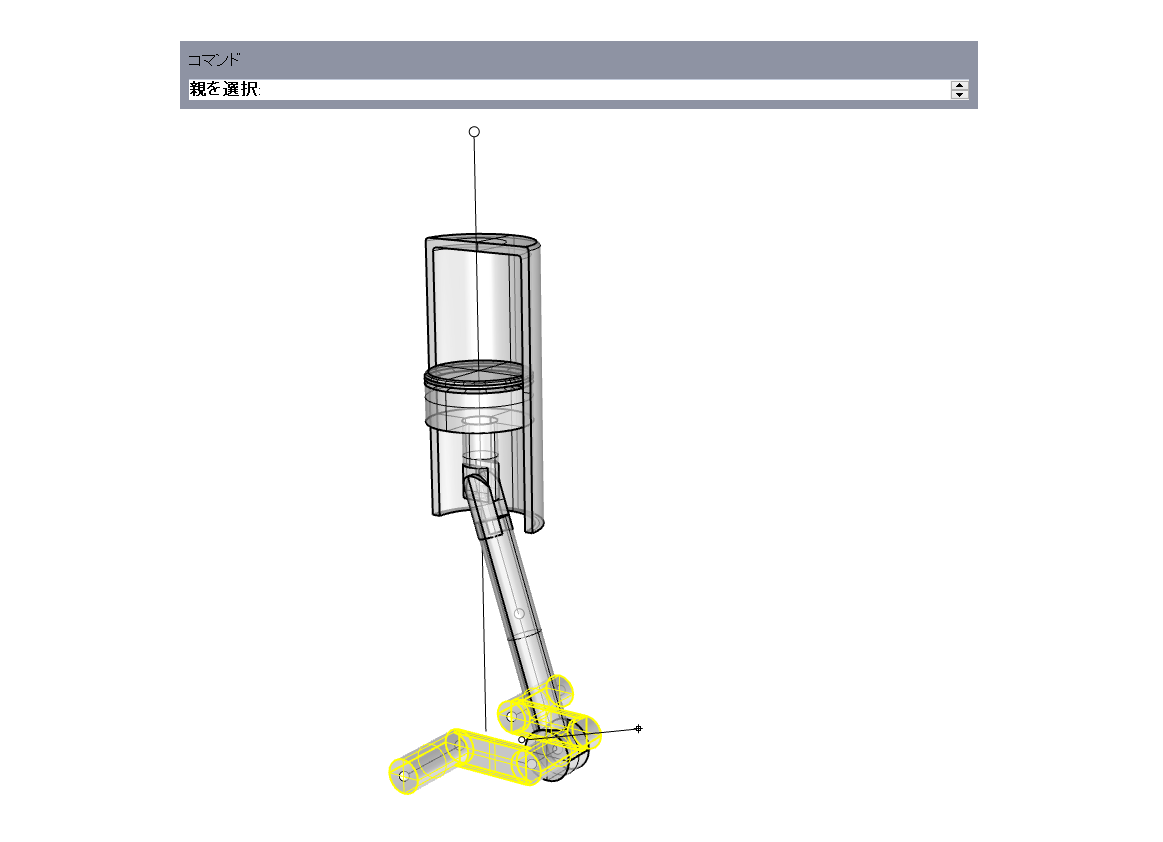
3-“ピボットを移動する点”のプロンプトで、オブジェクトスナップの端点にチェックを入れ、曲線1の下部端点をクリックします。
4-“新しいリンクを選択”のプロンプトではアーム(オブジェクト1)を選択します。
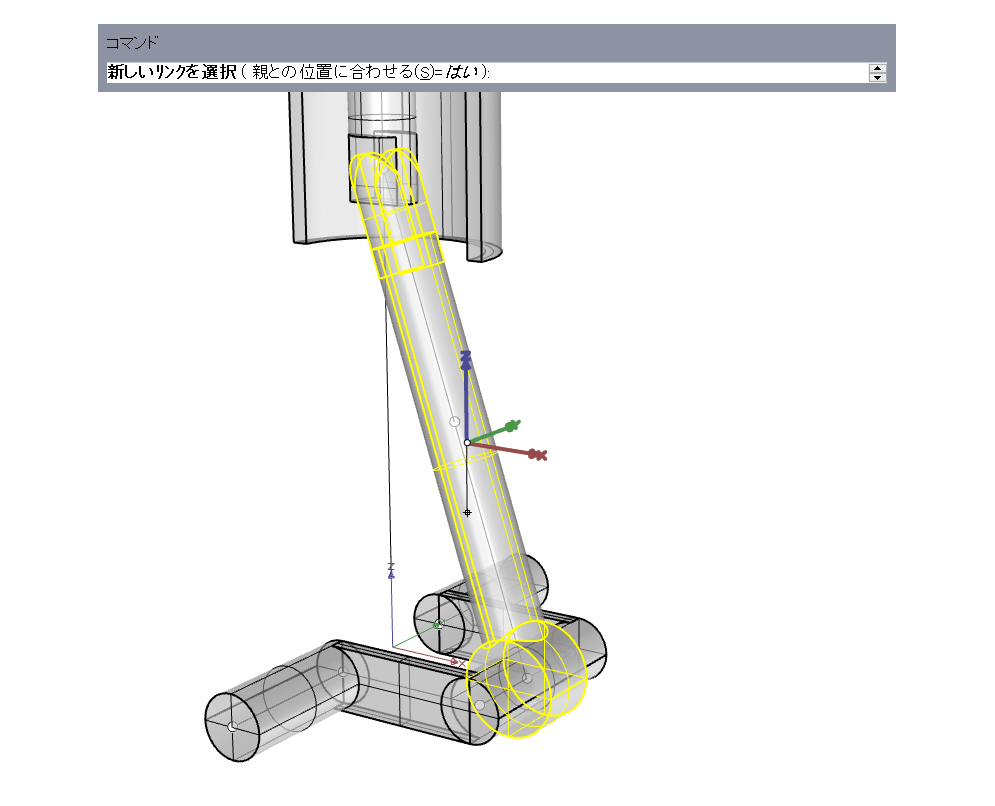
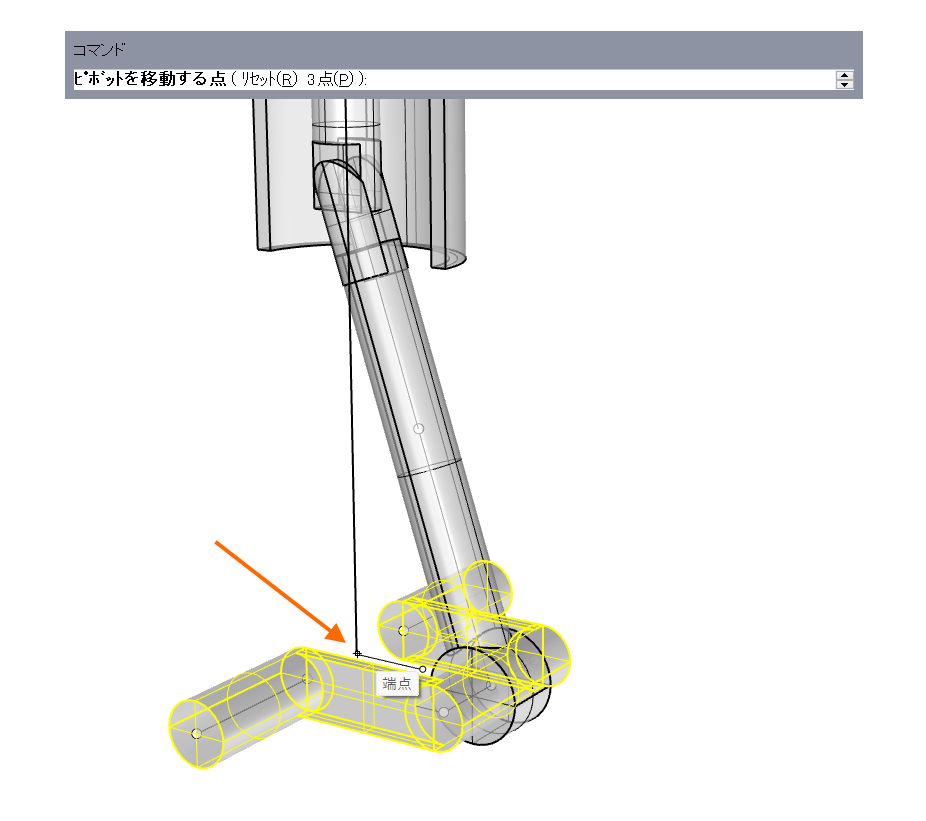
5-“ピボットを移動する点”のプロンプトで、アーム内にある曲線2の下部端点をクリックします。
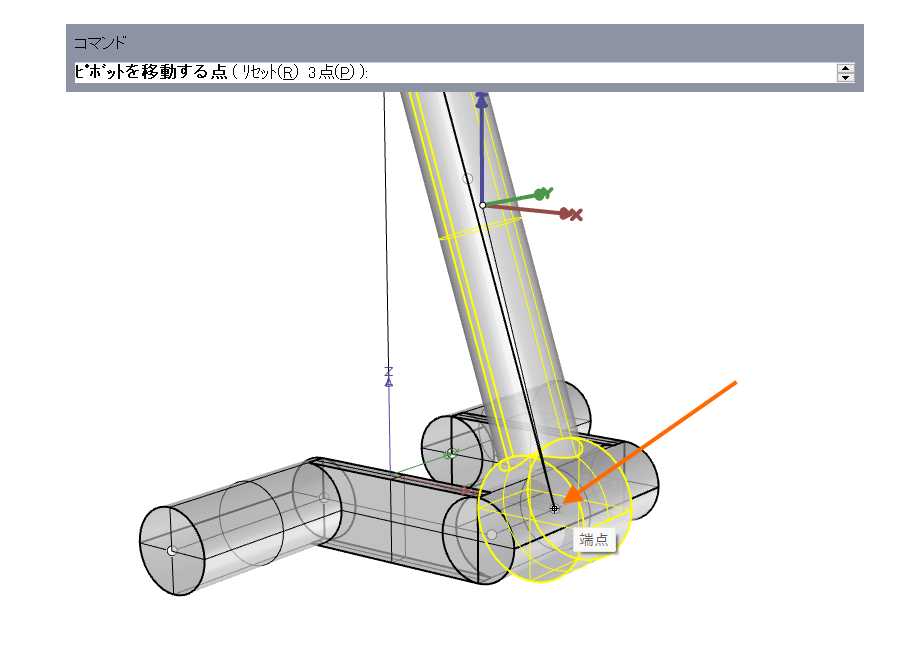
6-“新しいリンクを選択”のプロンプトで、上部パーツ(オブジェクト2)を選択します。
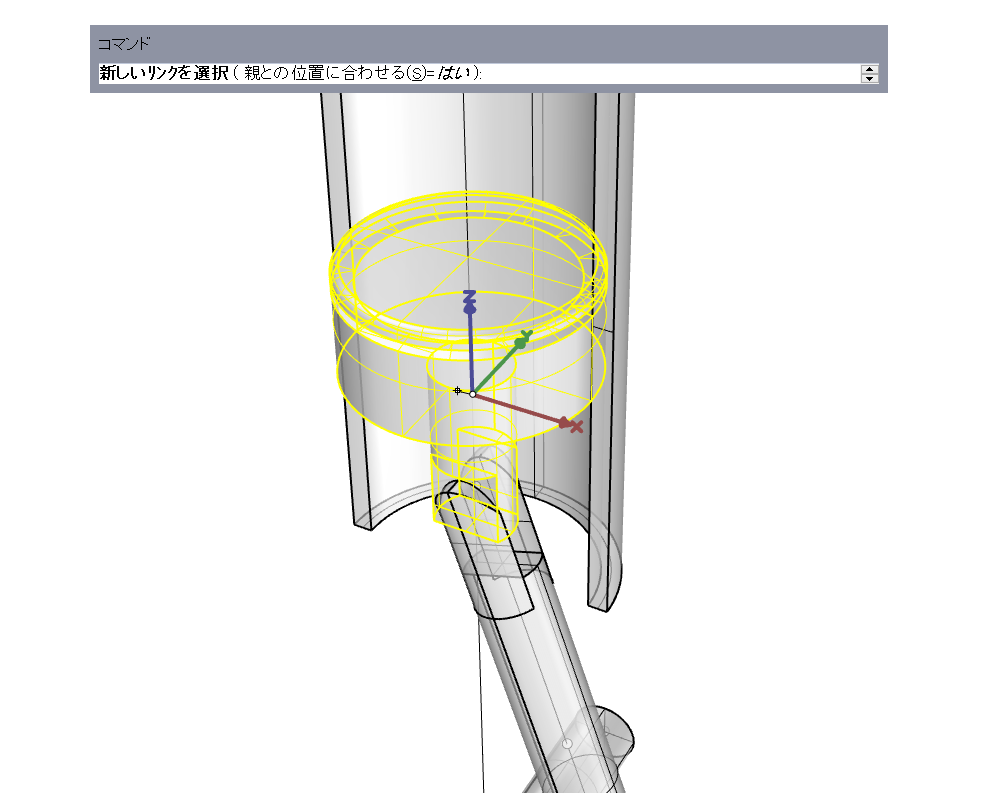
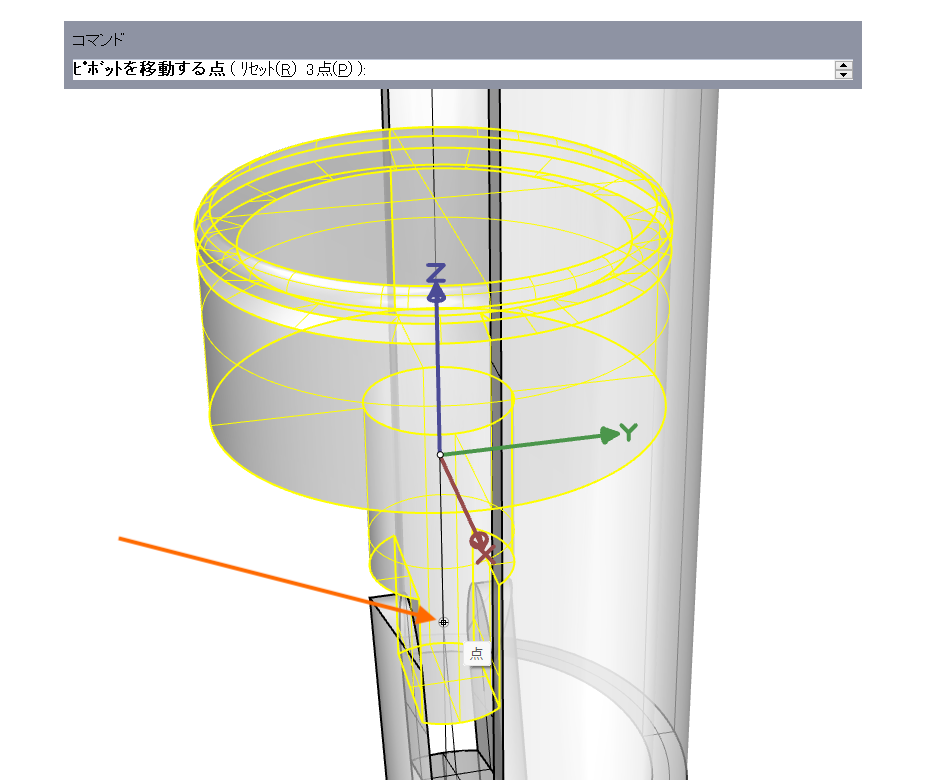
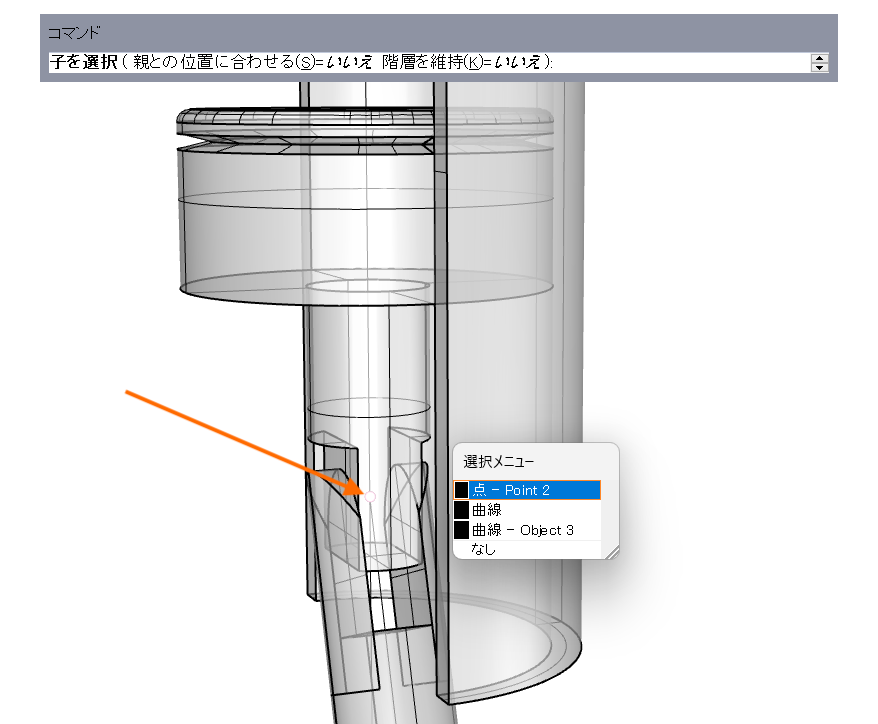
7-“ピボットを移動する点”のプロンプトで、オブジェクトスナップの点にチェックを入れ、Point2をクリックします。クリックしたらEnterキーを押してコマンドを終了します。
アニメーション編集ウィンドウを確認し、オブジェクトが以下のような階層になったことを確認します。
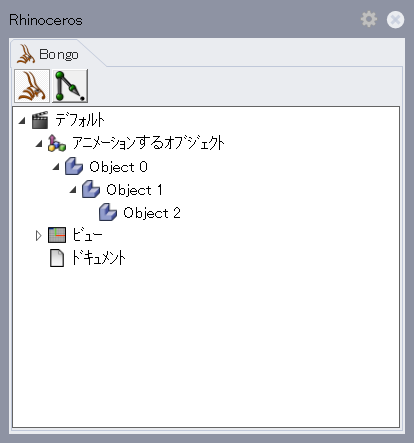
Step3 Bongoコマンド[BongoSelectChildren]で親子関係を作成する
1-Bongoメニュー>ユーティリティ>子を選択をクリックします。
2-“親を選択”のプロンプトでアーム(オブジェクト1)を選択します。
3-“子を選択”のプロンプトでPoint2を選択します。Enterキーを押してコマンドを終了します。
アニメーションを編集ウィンドウを再度確認し、以下のような階層になったことを確認します。

Step4 アニメーションをつける
1-ベース部分(オブジェクト0)を選択し、タイムラインのアニメートボタンをクリックします。
2-スライダを”99″へ移動させ、回転モードのアイコンをクリックします。
3-Yの項目に”360″と入力しEnterキーを押します。
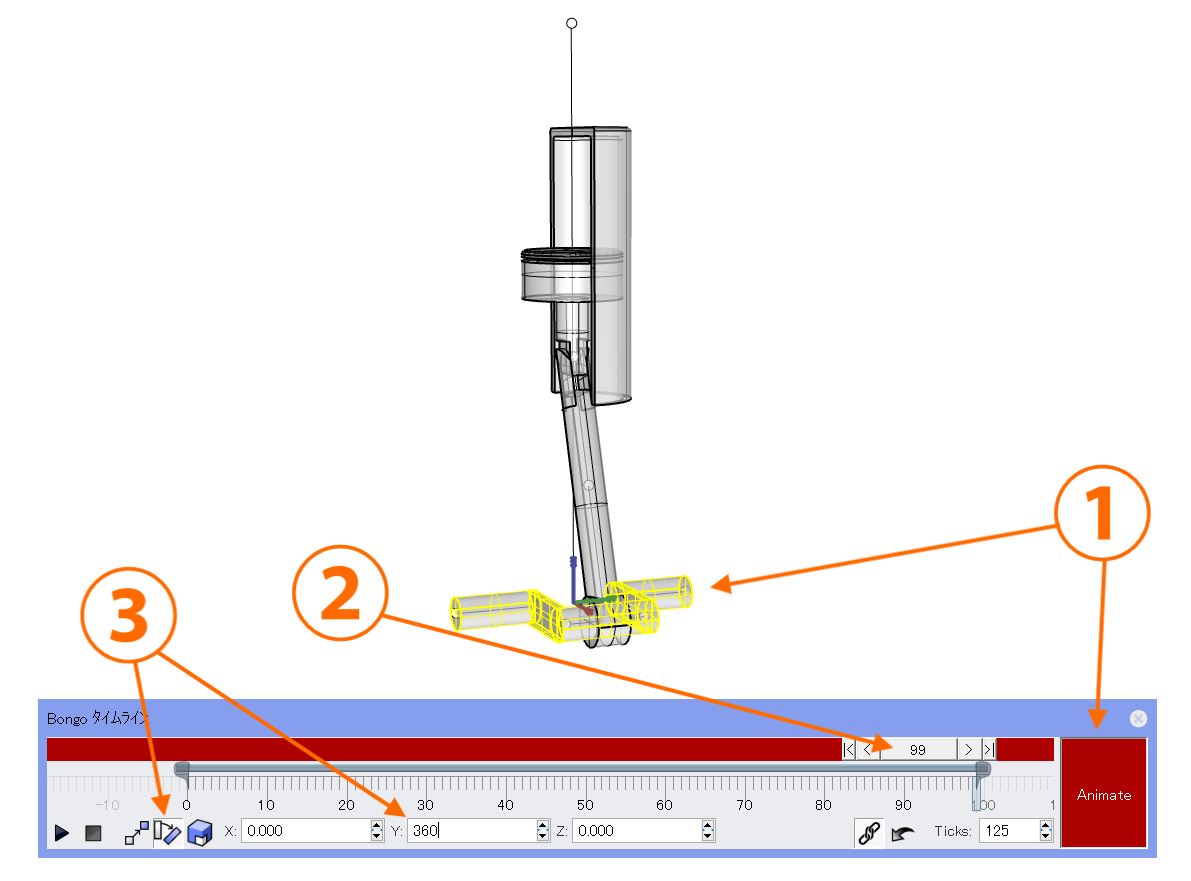
4-アニメートボタンをもう一度クリックし、アニメーションを停止します。再生ボタンをクリックしオブジェクト0、1、2全てが回転することを確認します。
Step5 オブジェクトに拘束・ジョイントをつける
1-アーム部分(オブジェクト1)を選択し、Rhinoプロパティパネル内にあるBongoアイコンをクリックします。
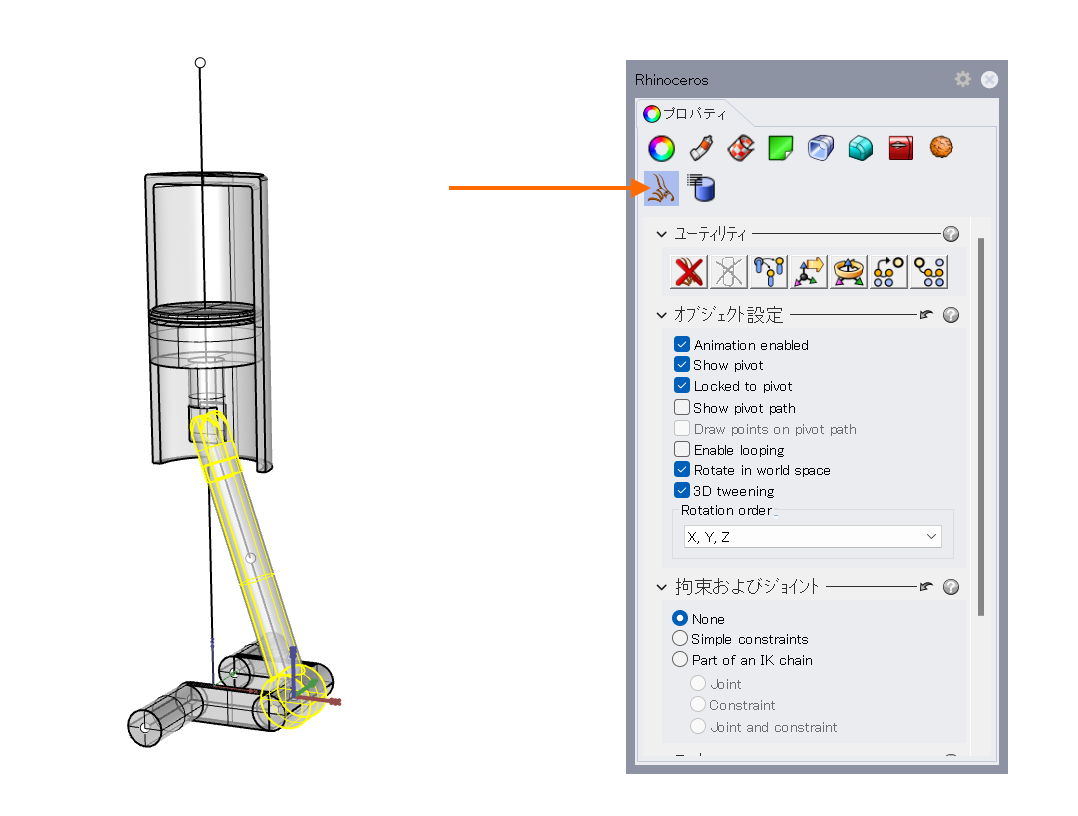
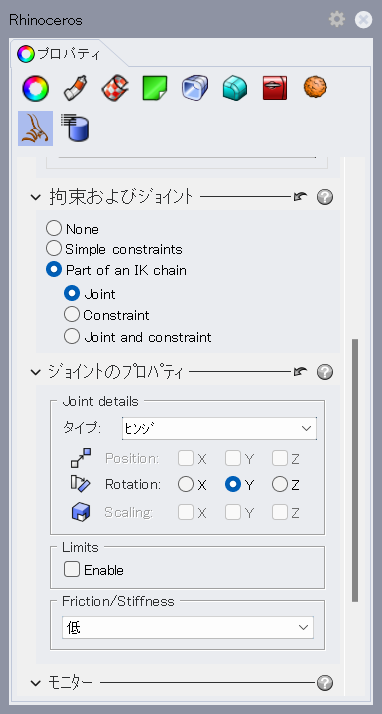
2-“拘束およびジョイント”項の、Part of an IK chainにチェックを入れ、Jointにチェックを入れます。
タイプをヒンジに、RotationをYに設定します。
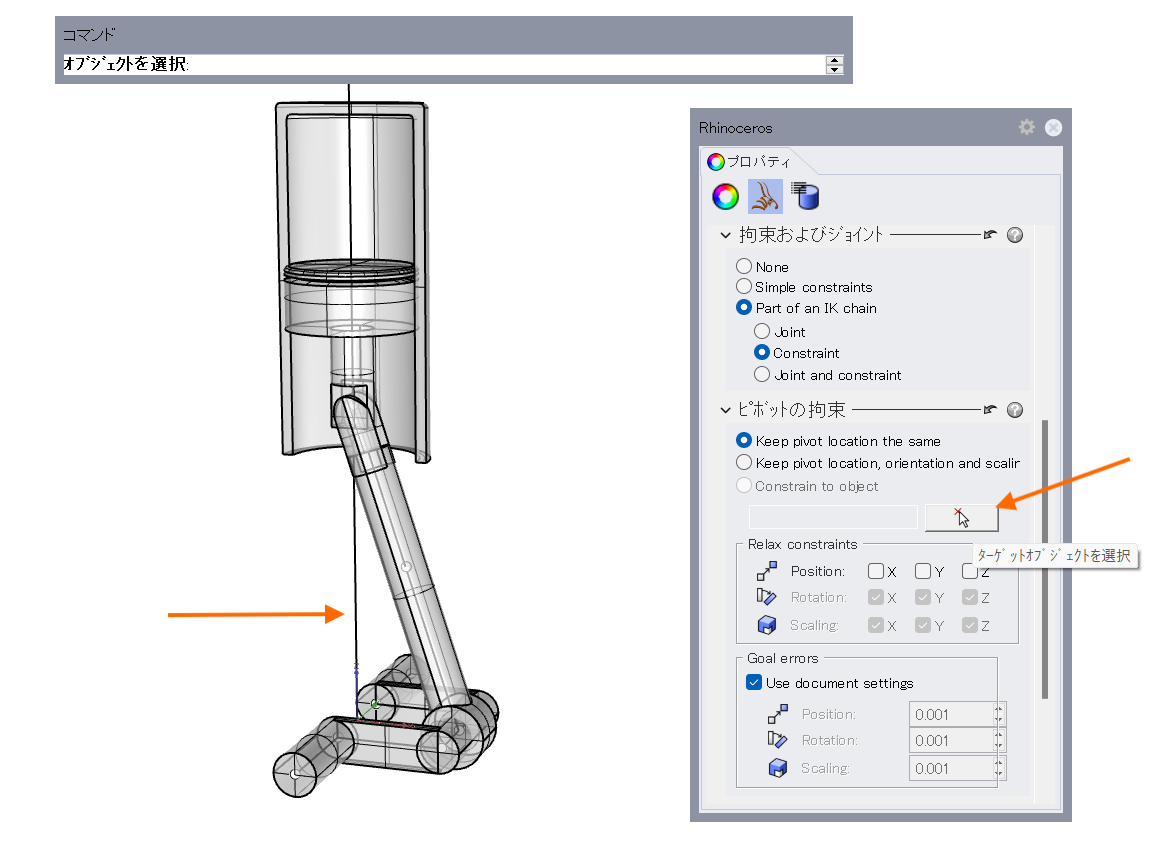
3-次に、Point2を選択し”拘束およびジョイント”項のPart of an IK chainにチェックを入れ、Constraintにチェックを入れます。

4-Point2が選択された状態のまま”ピボットの拘束”項の”ターゲットオブジェクトを選択”ボタンをクリックし、”オブジェクトを選択”のプロンプトで曲線を選択します。
5-上部パーツ(オブジェクト2)を選択し、”拘束およびジョイント”項のSimple Constraintにチェックを入れます。
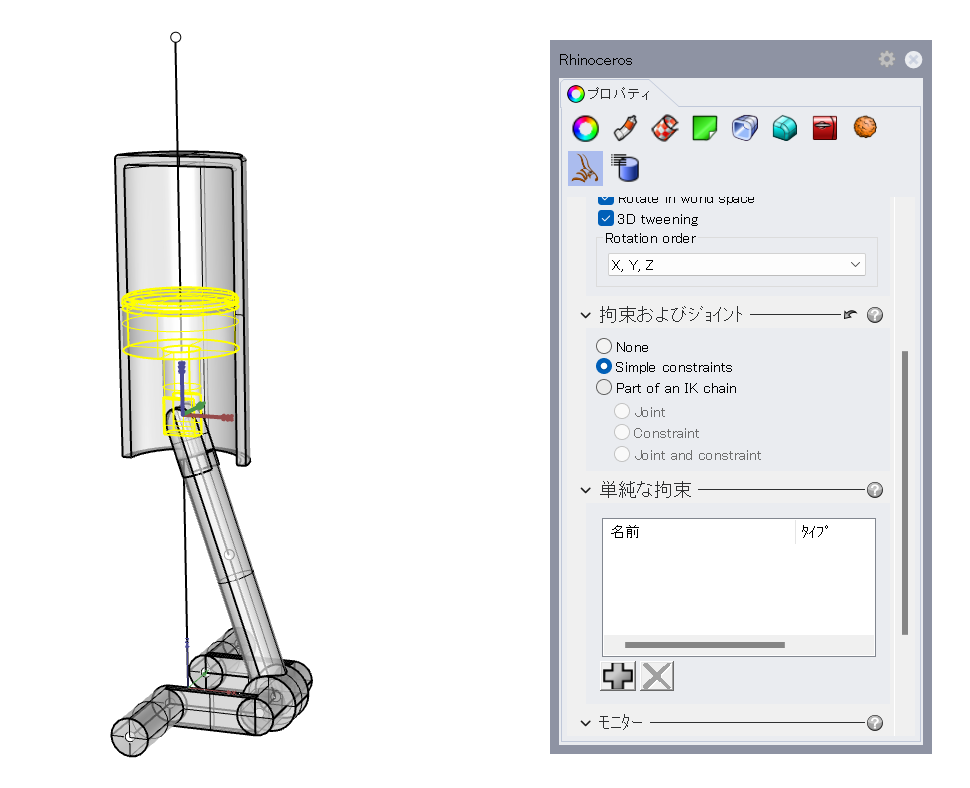
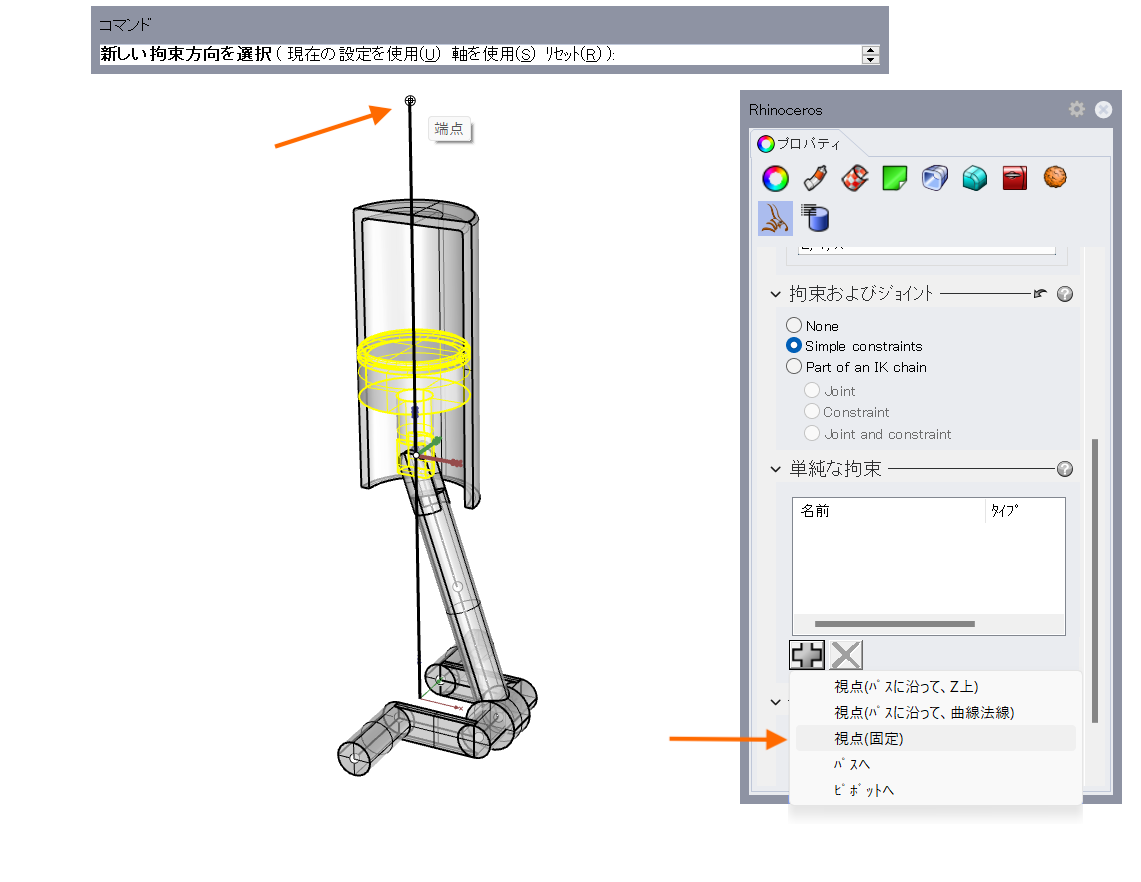
6-“単純な拘束”項のプラスボタンをクリックし、視点(固定)をクリックします。”新しい拘束方向を選択”のプロンプトで曲線1の端点をクリックします。
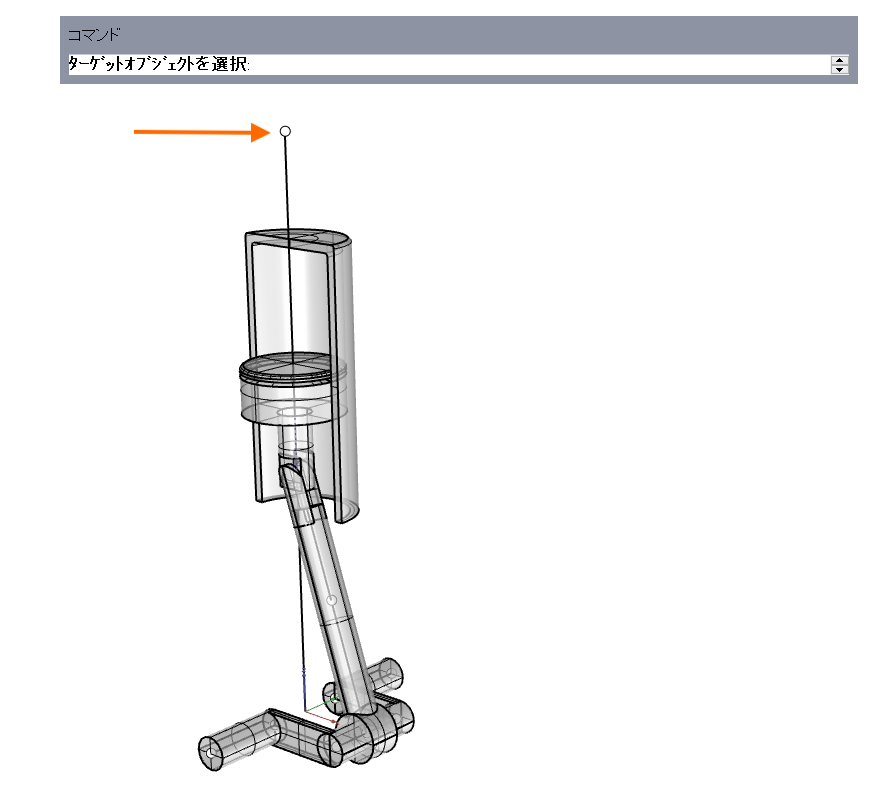
7-“ターゲットオブジェクトを選択”のプロンプトで、Point3をクリックします。
アニメーションを再生し、期待通りに動いているか確認します。
Step6 アニメーションを出力する
1-任意の場所に出力用のフォルダを作成します。
2-Bongoメニュー>アニメーションのレンダリングをクリックします。
3-“Output”項で、レンダーを選択します。マテリアルでアニメートしたい場合はRhino Renderを、ビューの表示をそのままアニメートしたい場合はビューポート表示を選択し、出力するサイズとFPSを設定します。
4-“File”項のBrowseボタンをクリックし、出力先に手順1で作成したフォルダを指定します。任意で名前、出力される静止画の拡張子を設定します。
5-“Video Output”項でCreate video Fileにチェックを入れます。Video Typeで動画の拡張子を選択します。
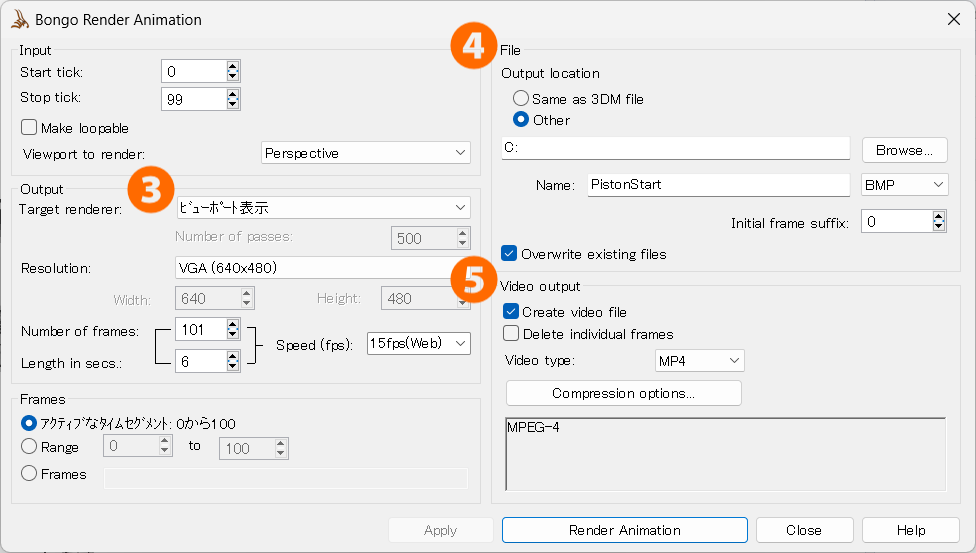
設定が終わったらRender Animationボタンをクリックし、動画の出力処理が完了するのを待ちます。
Bongoのより詳しいチュートリアルは以下のリンクでも紹介されています。
◆開発元URL(英語)
https://www.rhino3d.com/plugins/bongo/support/faq/
https://www.rhino3d.com/plugins/bongo/docs/tutorials/piston-animation-using-ik/
◆日本語訳チュートリアル
https://www.applicraft.com/manual-tutorial-download/
Bongo導入前の方は評価版で機能をお試しください。