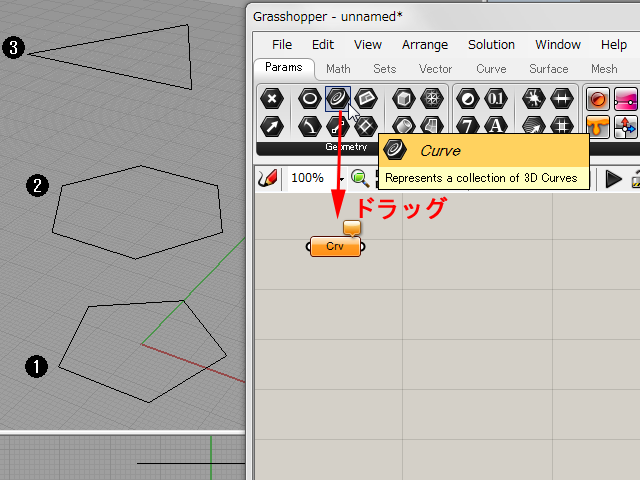
「Params」タブからCurveコンポーネントをドラッグしてワークスペースに配置します。
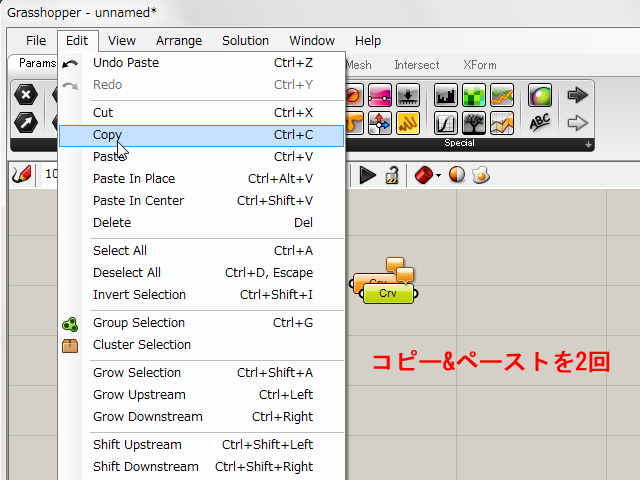
配置したCurveコンポーネントを選択し、メニューより「Copy」、「Paste」を2回実行して、
計3個のCurveコンポーネントを配置します。
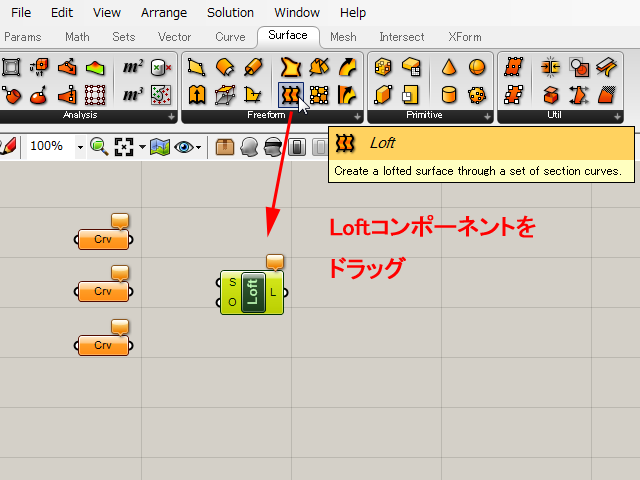
「Surface」タブからLoftコンポーネントを配置します。
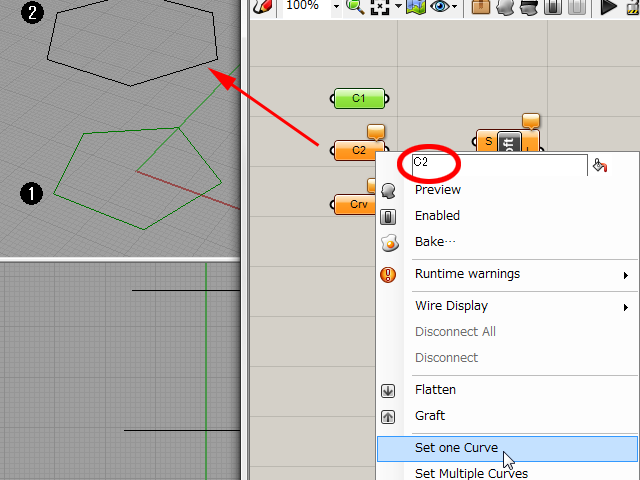
Curveコンポーネントを右クリックし、コンポーネント名称の変更、およびSet one Curveをクリックして、
予めRhino上で作成した3本の曲線をそれぞれのコンポーネントに定義します。
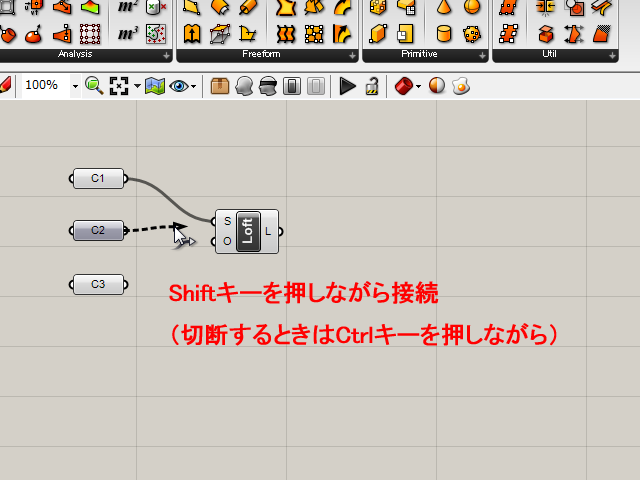
各CurveコンポーネントをLoftコンポーネントのS端子に接続します。
複数のコンポーネントを接続する際はShiftキーを押しながら、また切断するときはCtrlキーを押しながらつなぎます。
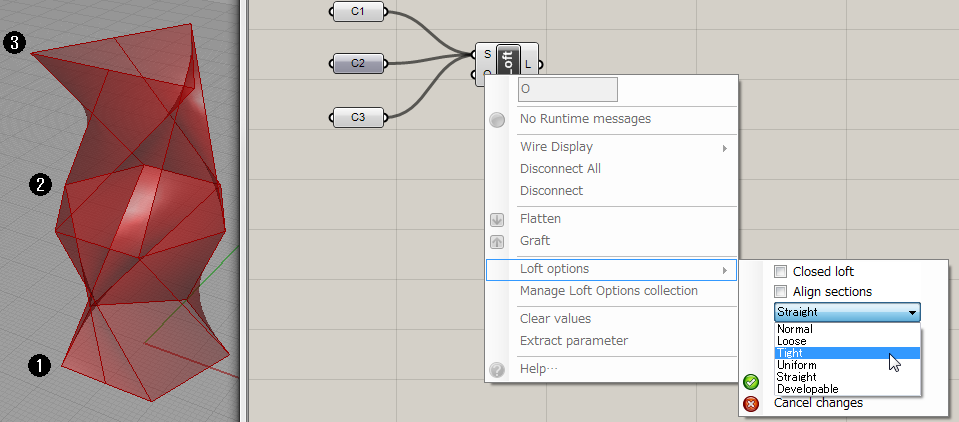
LoftコンポーネントのO端子を右クリックすると、Loftオプションを変更することができます。
Grasshopper – イントロ ~パラメータとコンポーネント~
Grasshopper – ポリラインからカーブへの変換
Grasshopper – コンポーネントの接続
Grasshopper – Panel コンポーネントの使い方
Grasshopper – スライダーの使い方
Grasshopper – データ編集
Grasshopper – One Point!コンポーネントの表示の制御
Grasshopper – サンプル1、サンプル2(多角形・2DBasic)
Grasshopper – サンプル3(3DBasic)
Grasshopper – サンプル4(Fusion)
Grasshopper – サンプル5(Transform)
Grasshopper – サンプル6(UVDivision)
Grasshopper – サンプル7(Morfh)
Grasshopper – サンプル8(MapSurface)
Grasshopper – サンプル9(OrientSrf)
Grasshopper: Voronoiパターンを利用した建築モデリング
Grasshopper – Voronoi パターンシミュレーション